
 (1).svg)
 (1).png)


 (1).svg)
.svg)
Overview
The WordPress Manager is a robust utility designed to centralize the management of all your WordPress installations. This powerful tool provides the convenience of updating various settings for your WordPress sites without the need to log into each WordPress admin panel individually. Please note: This feature was introduced in Softaculous version 5.6.1.
Accessing WordPress Manager
There are two primary ways to access the WordPress Manager:
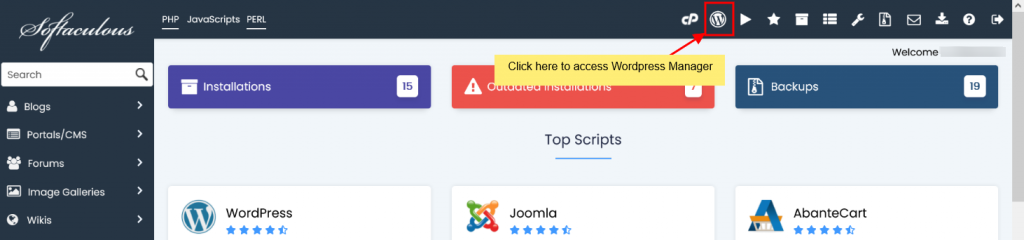
- To access the WordPress Manager, click on the “WordPress” icon located in the upper right corner of your Softaculous end-user panel, as illustrated in the screenshot below.
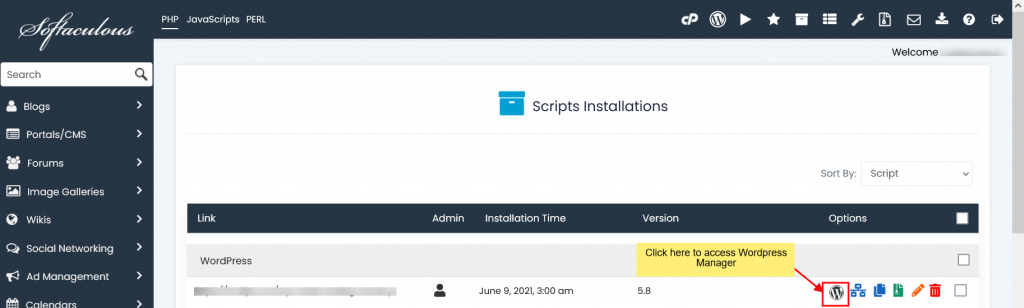
- Alternatively, you can access the WordPress Manager by clicking the “WordPress” icon positioned next to the specific WordPress installation you wish to manage from the All Installations page, as depicted in the following screenshot.
Installing WordPress
Installing WordPress through the WordPress Manager is a straightforward process:
- Begin by clicking on the “Install” button.

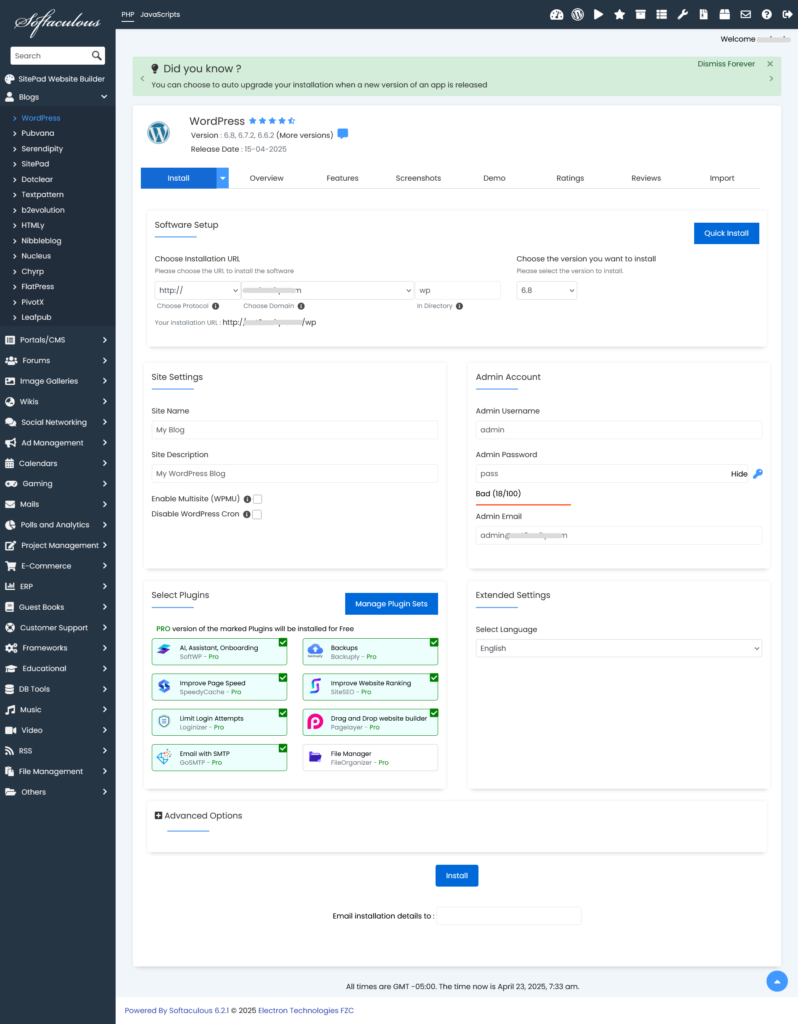
- Proceed to fill in the required details on the form that appears. This includes information such as the protocol, domain name, installation directory, database name, administrator login credentials, and language settings.
- You also have the option to select any desired plugins for automatic installation during this step.
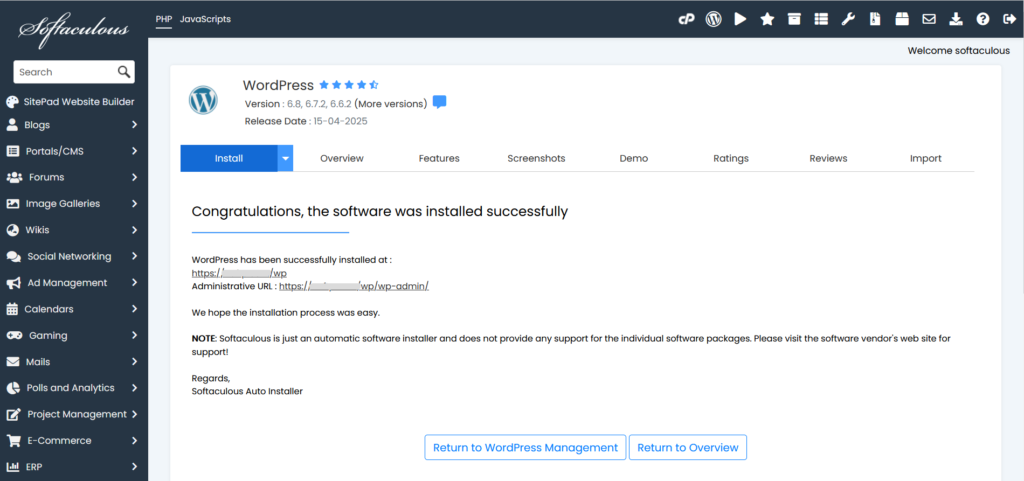
- Once the installation is complete, Softaculous will provide direct links to your newly set up WordPress site.
- Click on the provided links to be redirected either to your site's front page or the administrator homepage, depending on your selection.
Automatic Login to WordPress Admin Panel
To automatically log in to your WordPress admin panel as an administrator user without entering a password, simply click the “Login” button situated next to your site URL. This feature provides quick and convenient access to your dashboard.

Upgrading Your Installation
If an update is available for your WordPress installation, an “Upgrade Now” button will appear next to the version number. Clicking this button will seamlessly direct you to the upgrade page, allowing you to keep your WordPress core up-to-date.

Configuring Automatic Core Upgrade Settings
You can define your preferences for automatic WordPress core upgrades directly within the manager. Choose from the following options, and Softaculous will manage updates accordingly:
- Do not Auto Upgrade: No automatic updates will be performed.
- Upgrade to Minor versions only: Your installation (e.g., 5.5.1) will be updated to minor releases within the same major version (e.g., 5.5.x), but not to a new major version (e.g., 5.6.x).
- Upgrade to latest version available (Major as well as Minor): Your installation (e.g., 5.5.1) will be upgraded to minor releases (e.g., 5.5.x) and then to new major versions (e.g., 5.6.x) as they become available.
Simply select your preferred option, and the setting will be automatically saved, accompanied by a success message.

Managing Automatic Plugin and Theme Upgrades
Take control of your plugin and theme updates by enabling or disabling auto-upgrade functionality. If enabled, the system will check for updates every 24 hours and apply them automatically. Toggle the “Enable/Disable” button to save your preference, and a success message will confirm your selection.

Controlling Search Engine Visibility
The Search Engine Visibility setting, found in WordPress Reading options, can also be customized here. If you are developing a site, cloning a live site to a development environment, or if your website is not yet ready for public indexing, you can disable this setting to prevent search engines from crawling your site. To allow search engines to index your site, simply enable this setting. Tap the “Enable/Disable” button to save your preference, and you will receive a success message.

Enabling/Disabling WordPress CRON
By default, WordPress includes a CRON job that performs various background tasks on your site. For very large websites, this can sometimes consume significant server resources. If you wish to enable or disable this wp-cron setting, you can do so by tapping the “Enable/Disable” button. Your preference will be saved, and a success message will appear.

Utilizing WordPress Debug Mode
WordPress debug mode, which is disabled by default, is an invaluable tool for diagnosing issues on your site. You can enable or disable debug mode directly from the Softaculous WordPress Manager. Tap the “Enable/Disable” button to save your preference and receive a success message. Note: It is strongly recommended not to leave debugging mode enabled on your production site. On a live production site, disable debug mode once you have completed your debugging tasks.

Modifying Your Website URL
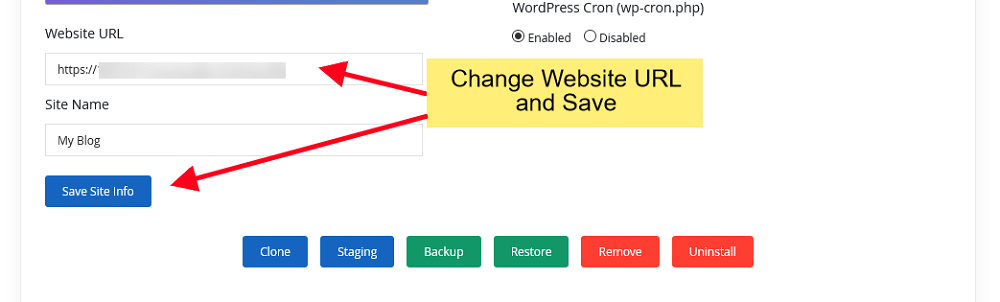
The site URL for your website can be changed conveniently through the Softaculous WordPress Manager. This is particularly useful if you have accidentally set an invalid URL from your WordPress admin panel and are now locked out. Simply update the “Website URL” field with the correct value and click the “Save Site Info” button. The URL will be updated in your WordPress database accordingly.
Updating Your Site Name
You can easily change the name of your website directly from the Softaculous WordPress Manager. Enter the new “Site Name” value into the designated field and click the “Save Site Info” button. The updated site name will be reflected in your WordPress database.

Resetting User Passwords
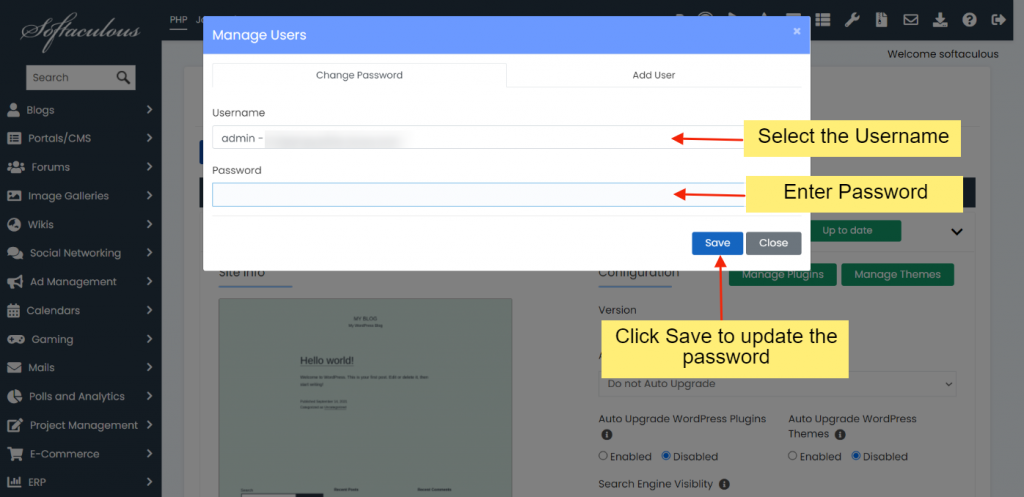
If you've forgotten your password for a WordPress account or need to reset a password for any user, the Softaculous WordPress Manager provides a simple solution:
- Navigate to the Manage Users Utility.
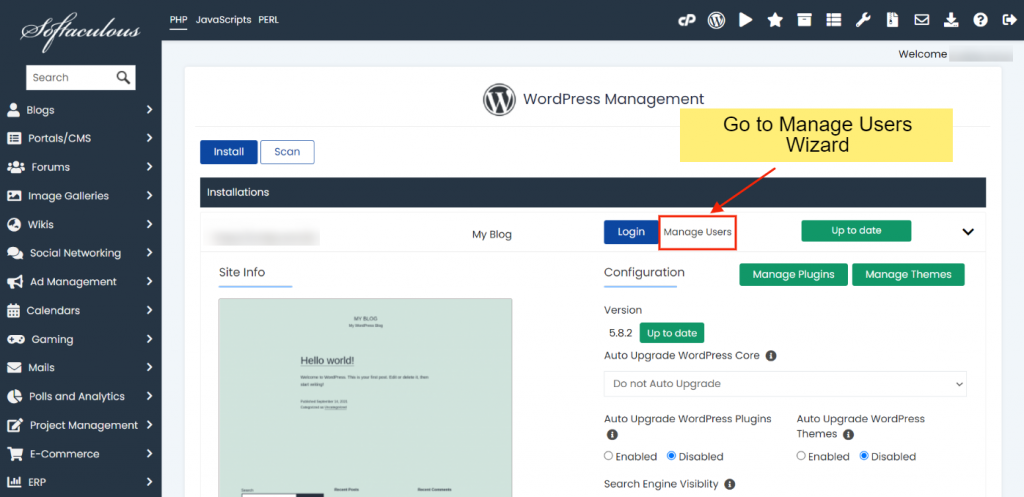
- Select the Username for which you want to change the password and enter the New Password you wish to use.
Managing WordPress Plugins
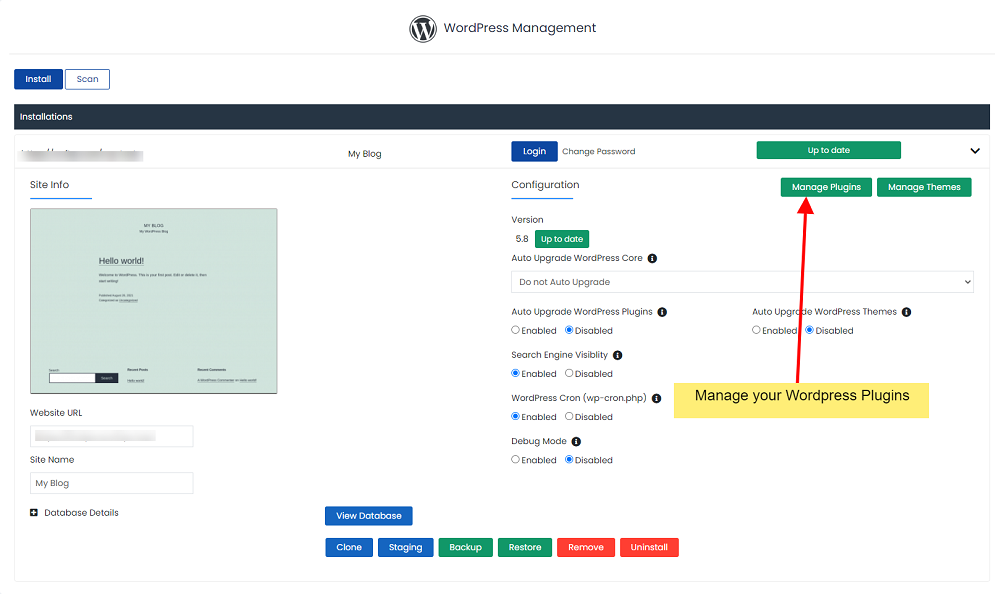
Installed Plugins
The “Installed” section provides a comprehensive list of all plugins currently installed on your WordPress installation. From here, you can conveniently activate, deactivate, or delete plugins as needed.

Adding New Plugins
The “Add Plugins” section allows you to effortlessly search for and install any plugin available from wordpress.org. Plugins selected through this method are automatically activated upon successful installation.

Uploading Plugins
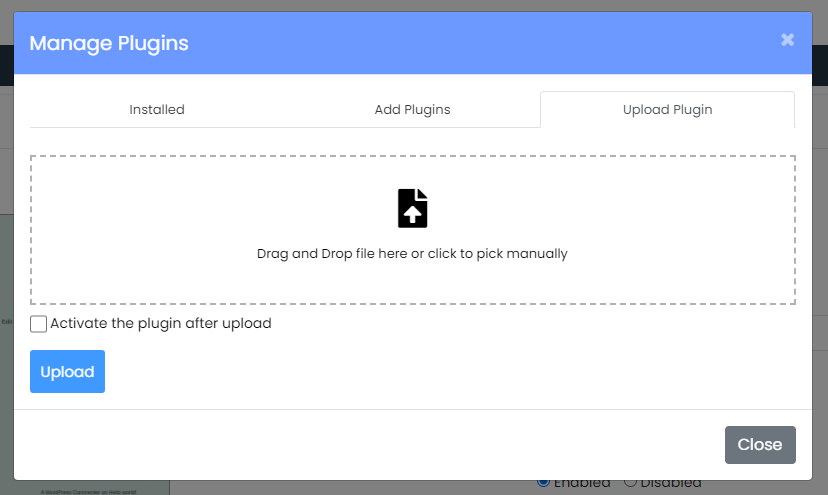
If you have a plugin in a ZIP file format, the “Upload Plugin” section enables you to install it by simply uploading the file.
Managing WordPress Themes
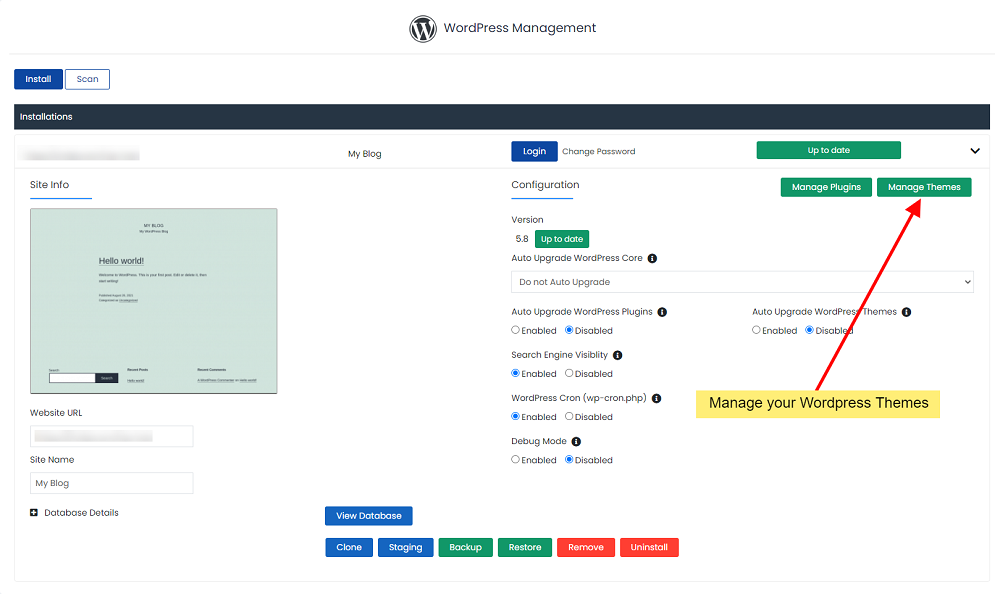
Installed Themes
Within the “Installed” section, you will find a list of all themes currently installed on your WordPress site. Here, you have the flexibility to activate, deactivate, or delete themes as required.

Adding New Themes
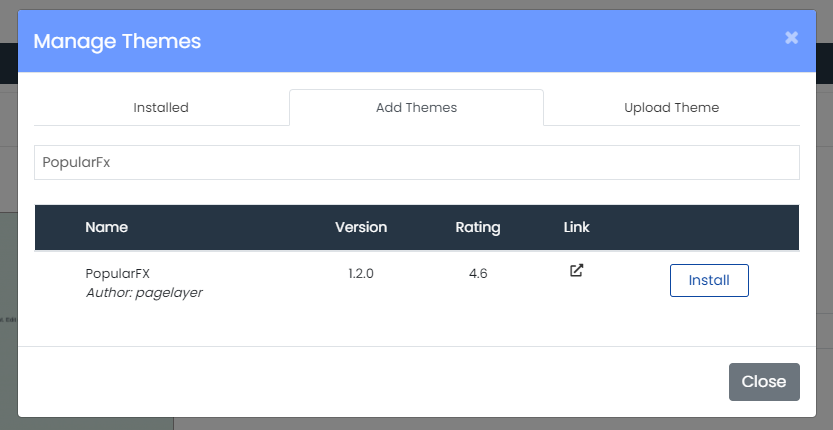
The “Add Themes” section provides the functionality to search for and install any theme available on wordpress.org. When a theme is selected and installed through this method, it will automatically activate and replace any previously active theme.
Uploading Themes
For themes distributed as ZIP files, the “Upload Theme” section allows you to install them directly by uploading the theme's ZIP archive.

Adding New Users
Do you need to add new users to your WordPress blog, such as Editors, Authors, or Contributors? The WordPress Manager by Softaculous includes a built-in tool for adding WordPress users with various roles.
- Access the Manage Users Utility.
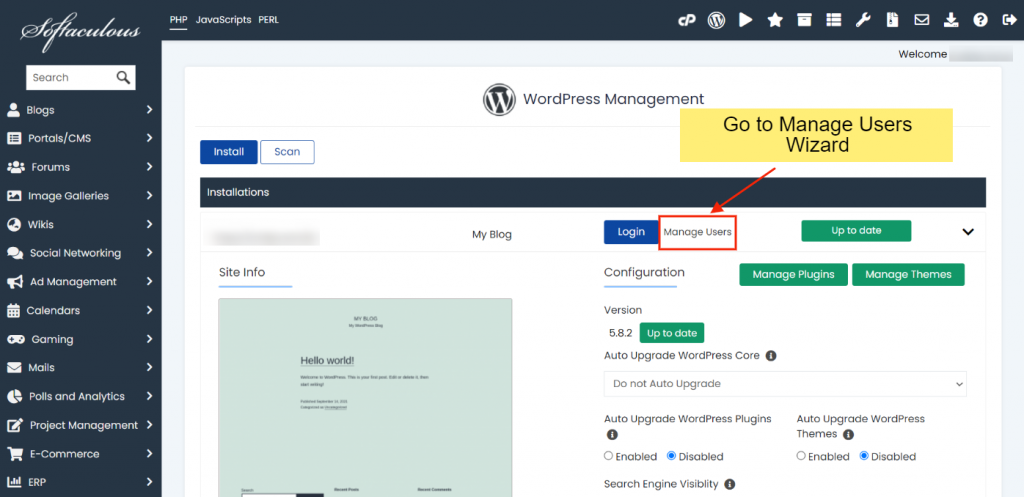
- Click on the “Add user” tab.

- Select the desired User role and fill in all the necessary details for the new user.

- Click on “Add user” to complete the process. The new user will be successfully added to your WordPress installation.
Installing Featured Plugins
The Softaculous team has developed a suite of WordPress plugins designed to enhance your website with essential features. These include solutions for Security, Backups, SEO, Caching, a Page Builder, SMTP functionality, a File Manager, and a versatile theme with over 600 templates.
The Pro versions of these plugins and themes are included with your Softaculous license. If you or your provider has already acquired a Softaculous license, you can enjoy the professional features of these plugins at no additional cost.
To install these valuable plugins, follow these steps:
- Open Softaculous from your control panel.
- Click on “WordPress Manager.”
- Select all the WordPress installations where you wish to install the plugins, then click the “Featured Plugins” button.
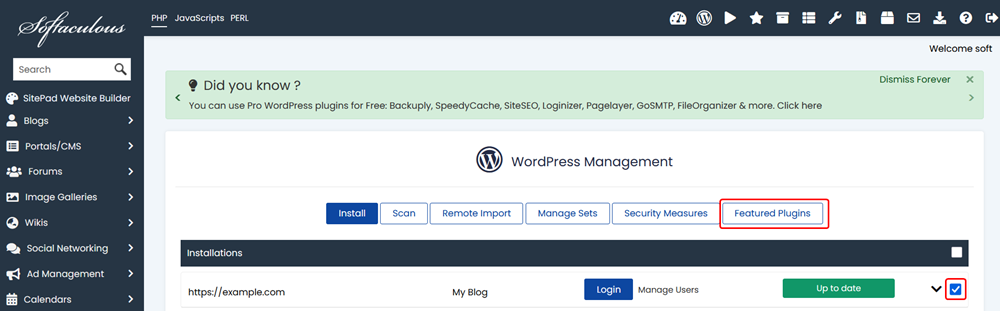
Select WordPress Installations and click on Featured Plugins button.
- Click on the “Install” button next to each plugin you want to deploy. It will be automatically installed on all the WordPress installations you selected in the previous step.
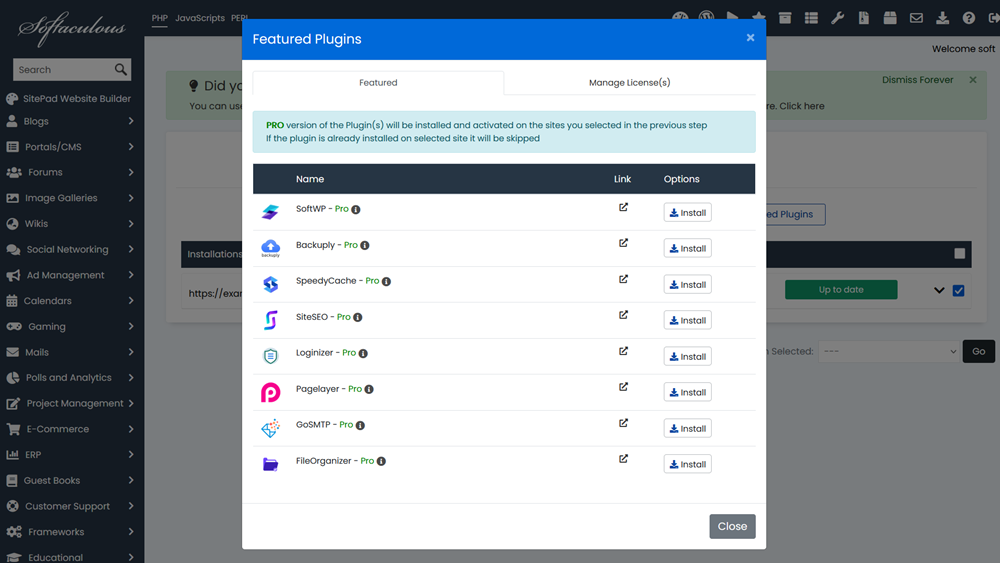
Click on Install button to install the plugins you wish to use.
Note: A unique license starting with SOFTWP- will be automatically generated for each WordPress site and will be utilized for all the aforementioned Pro plugins. The validity of this license is synchronized with your Softaculous license expiry date.
More features will be progressively added to the WordPress Manager in upcoming versions, further enhancing its capabilities.
