(1).svg)
 (1).png)


 (1).svg)
.svg)
Restoring Backups with JetBackup for WordPress
This guide outlines the process for restoring backups that have been previously generated using the JetBackup for WordPress plugin. Follow these steps to successfully reinstate your website data.
Step 1: Choose a Backup for Restoration
- Navigate to the JetBackup > Backups section within your WordPress dashboard.
- Carefully review the available backup entries, paying attention to the date and specific details to ensure you select the correct backup version you wish to restore.
Step 2: Initiate the Restoration Process
- Locate and click the "Restore" button corresponding to your chosen backup.

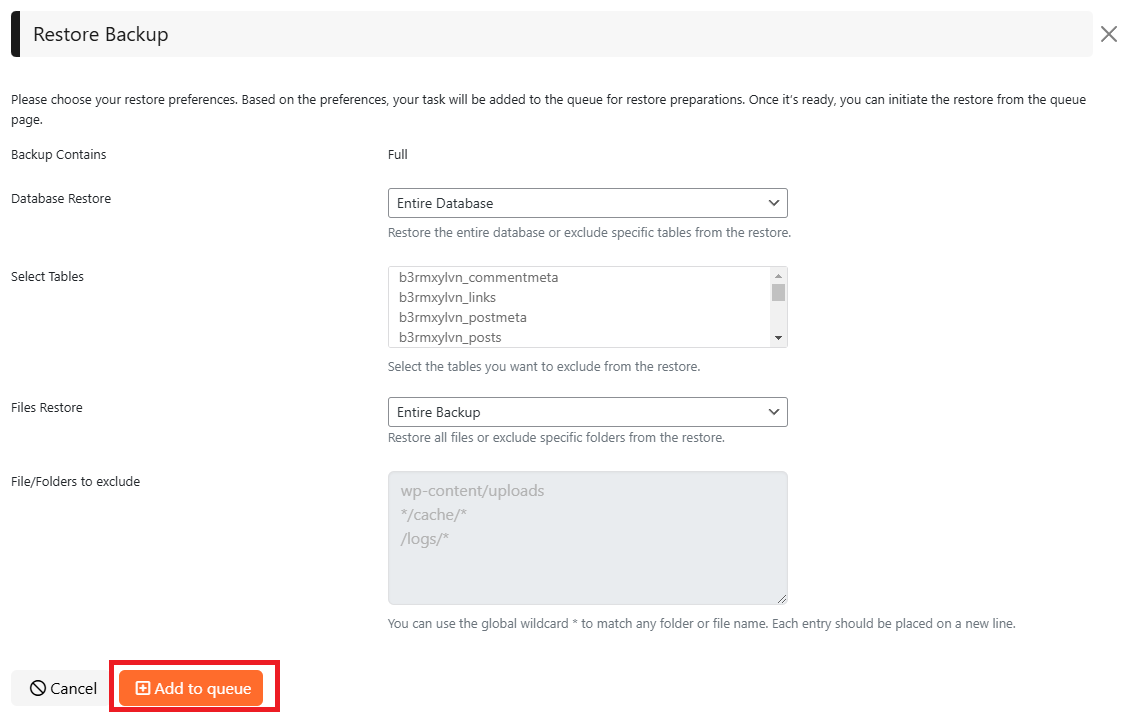
Important Restoration Options
Before proceeding with the full restoration, JetBackup offers several critical options to customize the process. Understanding these can help you achieve a more precise restoration.
Select Database Tables
- This option allows you to specify which database tables should be included in or excluded from the restore operation. This is particularly useful for selective data recovery.

Files Restore Configuration
- Utilize this option to define specific parameters for file restoration, ensuring only the necessary files are restored or excluded as per your requirements.

Specify Files/Folders to Exclude
- Enter the paths of any specific files or folders you wish to exclude from the restoration. You can use the global wildcard (
*) to match any folder or file name. Please enter each exclusion path on a new line for clarity. This ensures unwanted data is not overwritten.

Step 3: Monitor the Restoration Process
- Once initiated, the pre-restore task will be added to the queue. You can track its progress and status by navigating to the JetBackup > Queue section. This allows you to stay informed about the ongoing operation.
Step 4: Finalize the Restore Operation
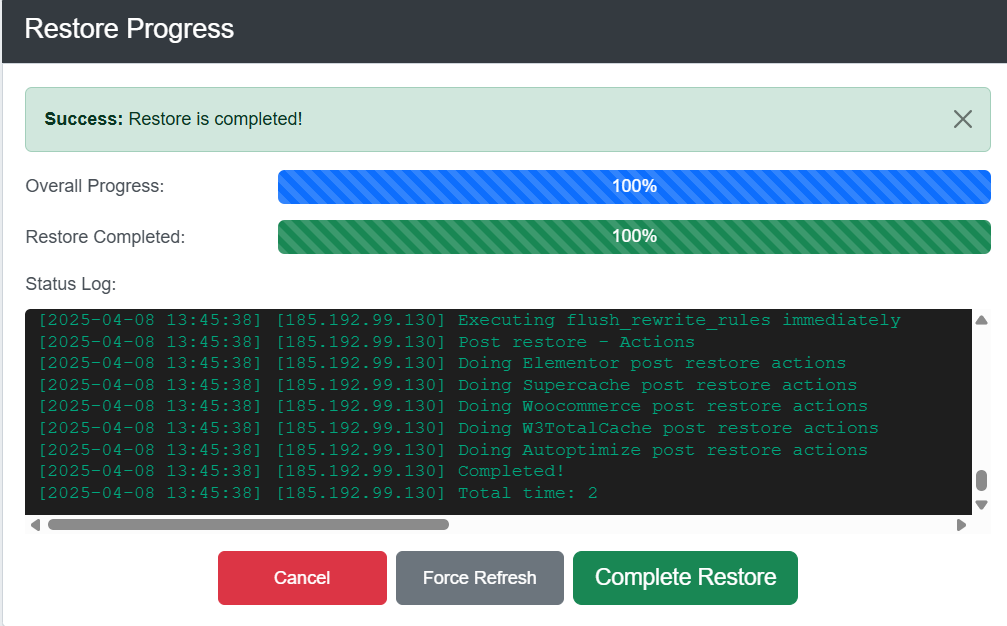
- After the pre-restore process has successfully completed, your restore is prepared for its finalization.
- Click the "Complete Restore »" button to proceed.