
 (1).svg)
 (1).png)


 (1).svg)
.svg)
Plesk is a powerful web hosting control panel that provides a user-friendly graphical interface and a variety of features designed to simplify web management tasks. This article serves as a comprehensive guide, explaining how to effectively use Plesk to manage your online presence. You will learn the fundamental steps for installing and utilizing it to oversee your websites, domains, and email accounts with ease.
Furthermore, this tutorial will delve into best practices for leveraging the control panel to enhance your website management efficiency and optimize your server’s performance. By following these guidelines, you can streamline your workflow and maintain a robust online environment.
How to Use Plesk
This section will guide you through the process of installing Plesk on your Virtual Private Server (VPS) and explain how to use it to manage your websites, domains, and email accounts.
1. Getting Started with Plesk
Since Plesk operates on a license-based model, you will need to acquire a license for the control panel and a suitable web hosting plan before proceeding with its installation on your servers. If you have a hosting plan that includes Plesk, you can typically select it directly during the initial setup process. Otherwise, you may need to manually install it by changing your VPS operating system.
Important Note: Always create a backup of your VPS files before changing its operating system, as this process will erase all existing data on the server.
If your plan did not come with Plesk pre-installed, you can follow these general steps to change your VPS operating system:
- Access your hosting provider's control panel and navigate to the VPS management section.
- Select the specific VPS you wish to configure and open its management interface.
- Locate the option to manage the Operating System (OS) and Panel.
- Search for "Plesk" or select it from the "OS with Panel" tab. Confirm your selection to initiate the OS change.
Once installed, you can access your Plesk control panel by entering https://example:8443 into your browser’s address bar. Remember to replace example with your server’s domain name or its IP address. This crucial information is usually provided within your hosting account’s VPS management area.
Upon entering your VPS username and password, you will be directed to the main dashboard. The Plesk interface typically offers two distinct viewing modes, which can be selected from the Interface Management menu. The Service Provider view is designed for managing customers, service plans, and reseller accounts, making it ideal for web hosting providers. For personal use and the purpose of this tutorial, we will focus on the Power User interface.
Regardless of the chosen interface, the Plesk dashboard is generally structured with the following key areas:
- Sidebar – This navigation panel presents all the items you can manage, including websites, domains, email accounts, and various Plesk settings.
- Main menu – This area displays the settings and shortcuts for the currently selected item, such as database and file manager access for your website.
- Top bar – Here you will find a search bar for quick navigation, the logged-in username, notifications, and a helpful support button.
2. Managing Domains and Emails in Plesk
After successfully setting up a Plesk server, the next essential step is to add a new domain. If you do not yet possess a domain, you can easily purchase one from an ICANN-accredited registrar. Before making a purchase, it's advisable to check the domain name availability using a reliable domain checker tool.
Once you have acquired your desired domain, open Plesk and follow these instructions to integrate it:
- On the sidebar, click Websites & Domains.
- Select Add domain → Blank website.
- Provide the necessary information, such as your domain name and webspace settings. Click Add Domain to confirm your entry.
- Plesk will then display your new domain’s configuration menu. Navigate to Hosting & DNS → DNS.
- Point your domain to your VPS hosting by using the information provided in the Records tab. Your domain should become accessible within 24 hours after the DNS propagation process has been completed across the internet.
Managing multiple domains is straightforward within Plesk, as all configurations can be handled from a single screen. Simply click on a domain name to manage its SSH access, security features, and associated email accounts.
To establish a new email account, click the Mail tab → Mail Accounts → Create Email Address. Enter your preferred local part for the email address, set a new, strong password, and click Ok to finalize the creation process.
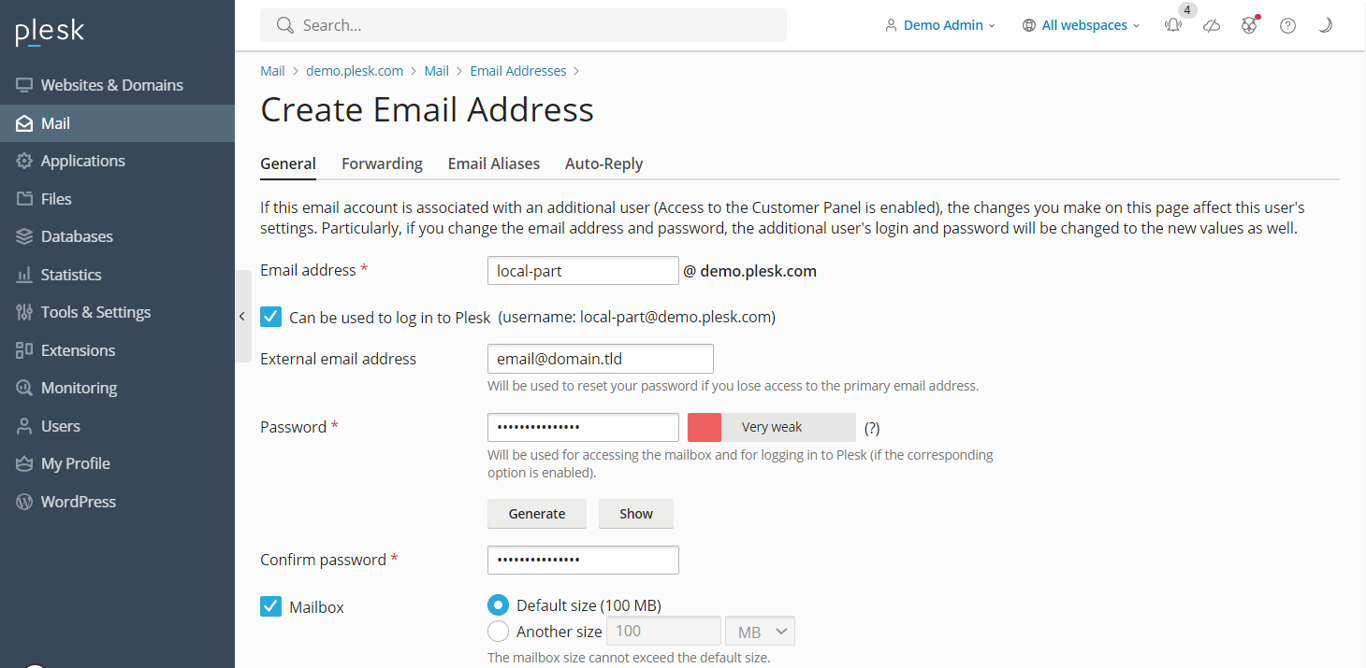
You can also modify the mail settings from this same menu, including enabling or disabling the service and applying Secure Sockets Layer (SSL) certificates for enhanced security. To create additional email addresses for other domain names, simply navigate to the Mail option on the sidebar.
3. Managing Websites in Plesk
The specific steps for using Plesk to set up a website will vary depending on your chosen development method. Options include manual coding, utilizing a built-in website editor, or deploying a content management system (CMS).
Plesk offers robust support for various content management systems, such as WordPress, Joomla, and Drupal. For this guide, we will focus on WordPress, as Plesk provides a dedicated toolkit that automates the generation of databases and admin accounts, significantly accelerating the setup process.
If you prefer a different CMS, you can typically install the platform via the Applications section on the sidebar. Otherwise, follow these steps to create a new WordPress website on your Plesk server:
- From the sidebar, select Websites & Domains. Then, choose the specific domain name on which you wish to establish your website.
- Click PHP settings and ensure the PHP support box is checked. Click Apply and then OK. If the box is already checked, you can skip this step.
- Return to the domain settings menu and select Install Application → WordPress.
- Input the required information for your WordPress installation and click Install.
- Once the installation process is complete, you will be redirected to the WordPress configuration page. Click Log in to access your newly created website’s administrative area.
To access the comprehensive WordPress toolkit, click the WordPress icon associated with your domain name. From this centralized menu, you can conveniently manage databases, plugins, themes, and SSL certificates, offering a streamlined approach to WordPress site administration.

Additionally, Plesk includes a built-in File Manager that enables you to easily modify your website’s files directly, eliminating the need for an external FTP client. It also features a website staging tool, which is invaluable for testing changes and updates in a safe environment before deploying them to your live website, ensuring a smooth user experience.
Pro Tip: Beyond creating new websites, Plesk also facilitates the transfer of existing websites. Refer to Plesk’s official website migration guide to learn more about this comprehensive process.
4. Managing Server Settings in Plesk
Plesk offers extensive capabilities for server management, allowing you to modify various settings directly from the control panel. For instance, you can adjust user permissions through Restricted Mode Settings. This feature is crucial for preventing unauthorized modifications to your Plesk server and maintaining its integrity.
These settings enable you to precisely control or limit features available to the administrator, such as the action log, remote API, server reboot functionality, and IP restriction management. Furthermore, you can configure granular permissions for hosting, PHP, web server, mailing, and DNS management, providing a robust security framework.
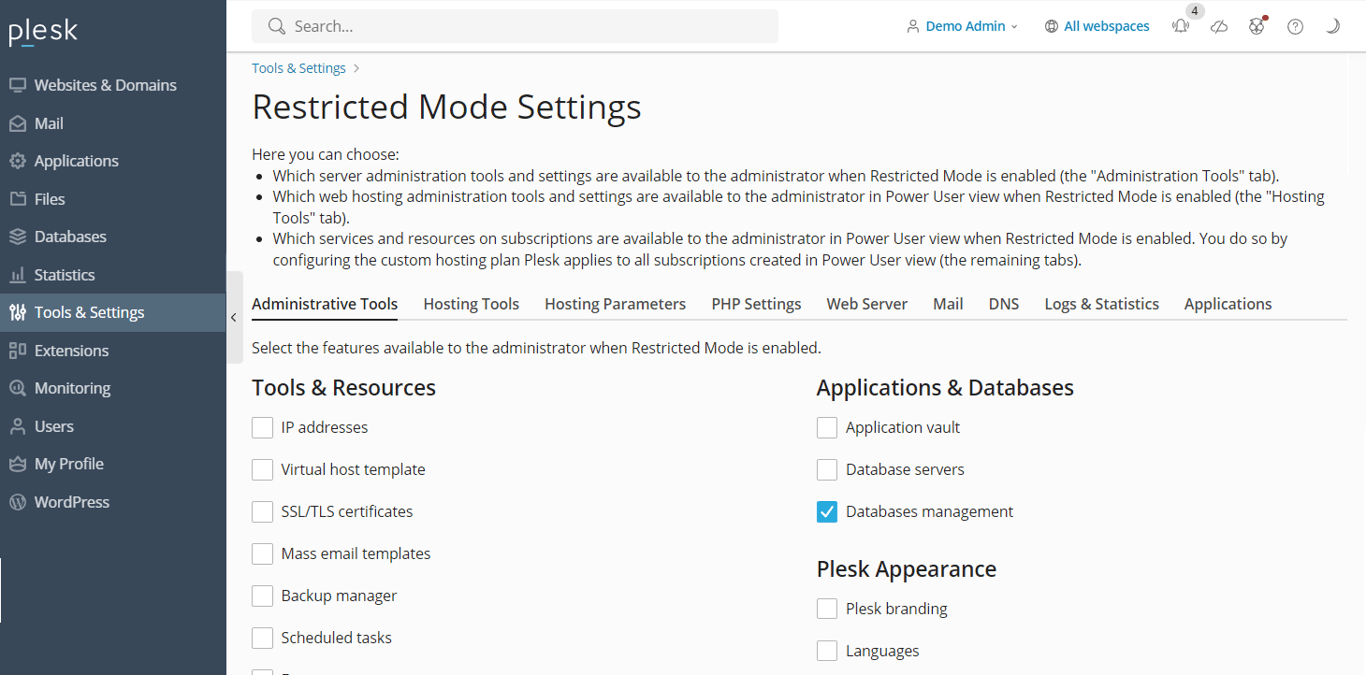
To activate this feature, navigate to Tools & Settings on the sidebar and select Restricted Mode Settings under the Plesk category. Here, you can check the specific features you wish to allow for the administrator and then enable the Restricted Mode.
Plesk also simplifies the creation of backups for your server’s settings and user data using the intuitive Backup Manager. To access this vital feature, go to Tools & Settings → Tools & Resources → Backup Manager.
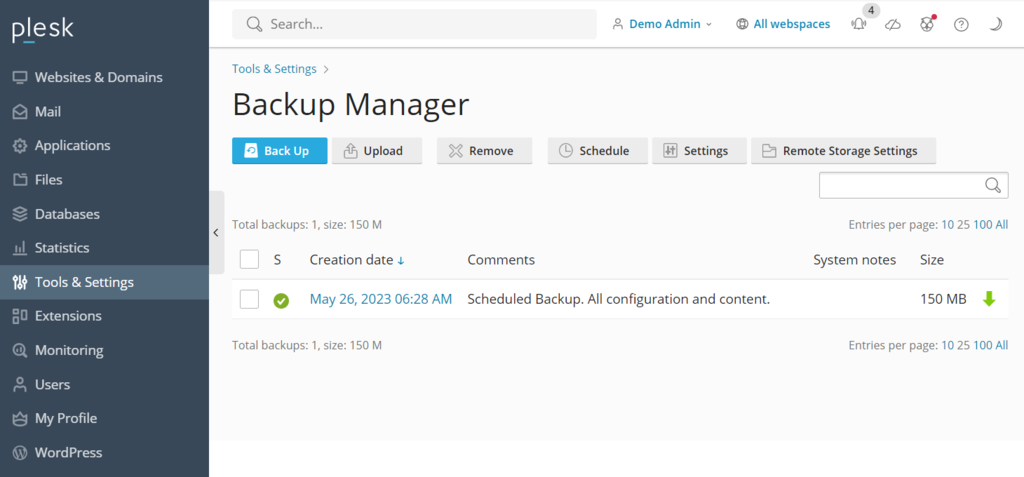
Within this interface, you will find a list of your previously created backups, which you can easily click to restore data as needed. To initiate a new backup, click Back Up, specify the data you wish to include, choose the storage directory, and define the backup type. Confirm your selections by clicking OK.
For server optimization, Plesk offers two powerful website analytics tools: Grafana and Plesk 360. While Plesk 360 requires you to sign in and connect your account, Grafana can be installed directly from your Plesk server dashboard, providing immediate access to performance metrics.
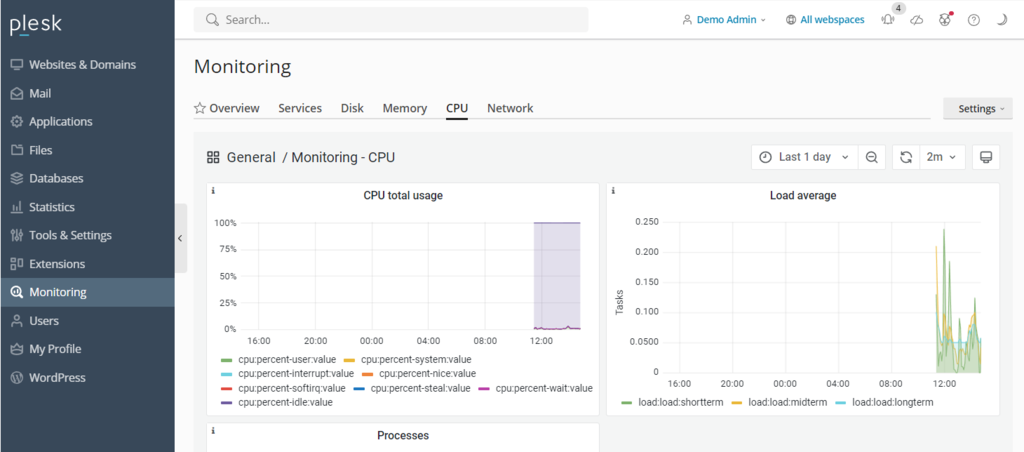
To install Grafana, navigate to Monitoring on the sidebar and select Use Built-In Monitoring at the bottom of the screen. From this dashboard, you can closely monitor critical server aspects such as disk usage, running services, memory consumption, and network load. These insights are invaluable for understanding and improving your server’s overall performance.
5. Integrating Advanced Plesk Features
The Plesk extensions catalog is a rich resource, offering over a hundred add-ons that significantly expand the control panel’s core functionality. These extensions span various categories, including web development tools, security enhancements, server utilities, and site editing solutions, allowing users to tailor Plesk to their specific needs.
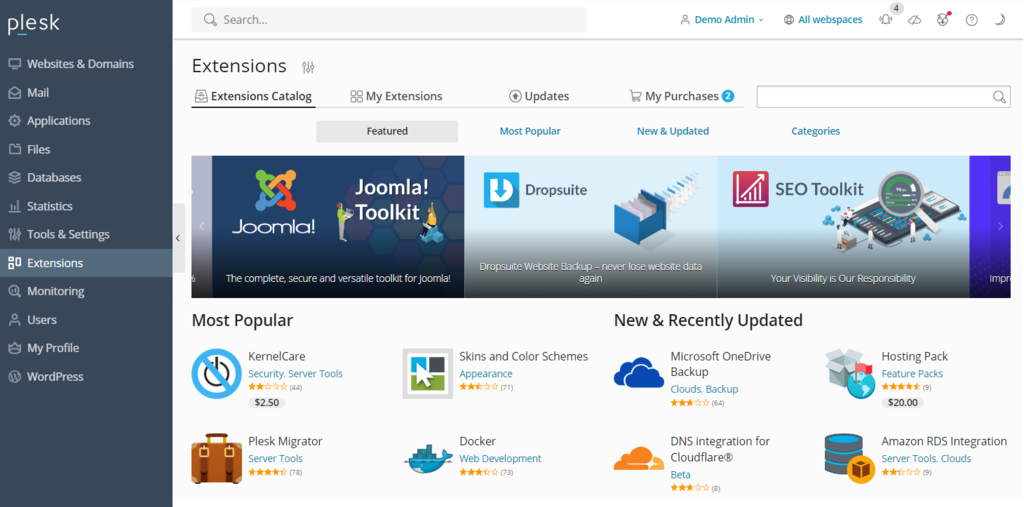
To install an add-on, simply navigate to Extensions on the sidebar, search for the tool you require, and click Get it Free for complimentary options. For paid extensions, you can conveniently purchase and install them directly from the Plesk dashboard.
Plesk also incorporates a robust command-line interface (CLI), which is instrumental for integrating and managing third-party applications. It is widely used by experienced users to manage server settings, accounts, websites, and various services with greater precision and automation.
On Linux servers, the Plesk CLI is typically located in the /usr/local/psa/bin directory. To utilize it, you will need to connect to your Plesk server using SSH and then execute the appropriate command utility with the following syntax:
plesk bin <utility name> [parameters] [options]
Alternatively, you can run the utility from any directory by using the full path:
/usr/local/psa/bin/<utility name> [parameters] [options]
For example, to display all action log entries from a specific date up to the current day in a JSON format, you would use a command similar to this:
plesk bin action-log --show -since YYYY-MM-DD -json
Best Practices for Using Plesk
This section outlines key best practices for using Plesk, designed to help you efficiently manage your websites and optimize your server environment.
Keep Your Plesk Installation Up to Date
Plesk regularly releases crucial patches, security updates, and new features. Ensuring your installation is consistently up to date offers several significant benefits, contributing to a more secure and efficient web management experience:
- You avoid the need for major annual upgrades, as updates are incremental.
- Immediate access to the latest features, tools, and performance improvements is provided.
- Security vulnerabilities are promptly addressed and patched in the newest versions.
- You benefit from continuous speed and overall performance enhancements.
- The latest versions often include improved user data protection mechanisms.
Depending on your web hosting provider, you might be using Plesk Onyx or the more recent Obsidian. Compared to the older Onyx version, Obsidian boasts an improved user interface, expanded features, and more frequent updates. Users of Plesk Onyx can typically reuse their existing licenses to upgrade to Obsidian at no additional cost, ensuring access to the most current and secure platform.
Utilize Plesk’s Automation Features
Plesk’s automation capabilities empower users to schedule cron jobs, which are automated tasks for managing their servers. These tasks can include running PHP scripts, executing custom commands, and fetching URLs. Automating such processes significantly saves time and effort, allowing you to concentrate on other critical aspects of your website and server management.
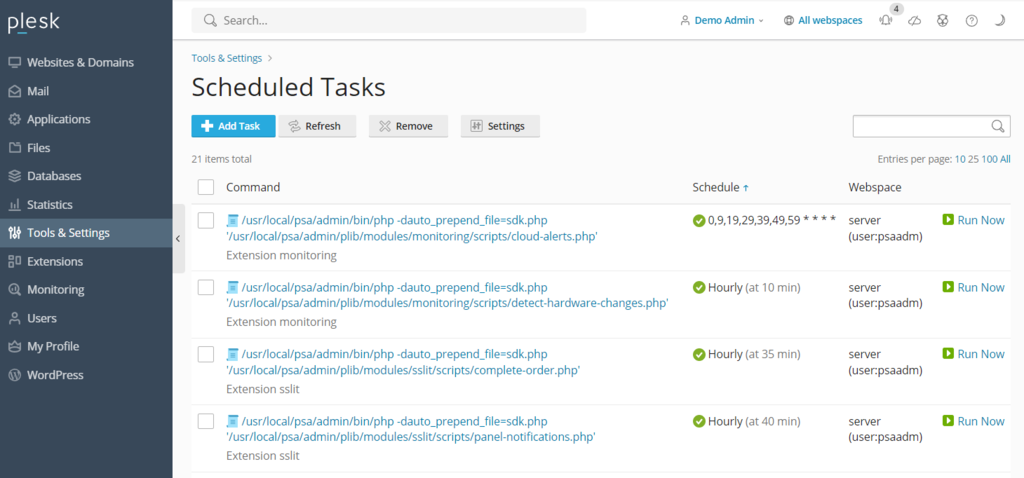
Beyond cron jobs, Plesk also facilitates the automation of essential tasks like updating and backing up data. Automating these crucial processes ensures that your server always has the latest security patches applied and maintains readily available data reserves, offering robust protection against potential cyber threats or data loss.
In addition to managing the control panel itself, Plesk allows you to automatically update other software installed on your VPS, including popular platforms like WordPress, along with its plugins and themes. This comprehensive automation capability ensures your entire web environment remains current and secure.
Take Advantage of Plesk Security Features
When not managed carefully, a virtual private server can be susceptible to various security vulnerabilities. Fortunately, Plesk provides a suite of features designed to help users significantly strengthen their server security with minimal effort. Some of the notable security enhancements include:
- SSL It! – This feature enables users to easily purchase and install SSL certificates directly from the Plesk control panel, ensuring secure data transmission for their websites.
- Firewall – A robust firewall blocks unauthorized connections to your VPS, thereby safeguarding it from potential security compromises and malicious access attempts.
- Server Name Indication (SNI) – SNI helps secure your email conversations, protecting them from unauthorized parties and ensuring privacy in your communications.
- Self-repair kit – This invaluable tool detects and automatically resolves common issues related to your VPS, mailing clients, DNS configurations, and databases, minimizing downtime and maintenance effort.
Customize Your Plesk Dashboard to Suit Your Needs
Plesk is renowned for its intuitive and beginner-friendly user interface right out of the box. However, it also offers extensive customization options, allowing you to tailor the dashboard to better suit your individual needs and optimize your workflow. To personalize your Plesk environment, navigate to Tools & Settings → Plesk Appearance.
For a truly personalized user experience, Plesk provides several key customization options:
- You can easily change the default language of the administrator interface.
- The ability to add custom buttons allows for quick redirection to other web pages or external resources.
- You can replace the default Plesk logo and title with your own branding elements, fostering a more personalized look and feel.
Furthermore, you have the flexibility to modify Plesk’s CSS stylesheet, enabling you to change decorative elements such as the color scheme, background, and fonts. To explore this advanced customization, refer to the official guide on using custom themes for detailed instructions.
Use Plesk’s Community Resources
If you encounter challenges or are simply looking to expand your knowledge of Plesk, its vibrant community resources are an excellent starting point. The Plesk community forum is a valuable platform where users can ask questions, share insights, and find solutions to various issues. This forum covers a wide array of discussion topics, including Plesk for different operating systems, intricacies of WP toolkits, and functionality of extensions.
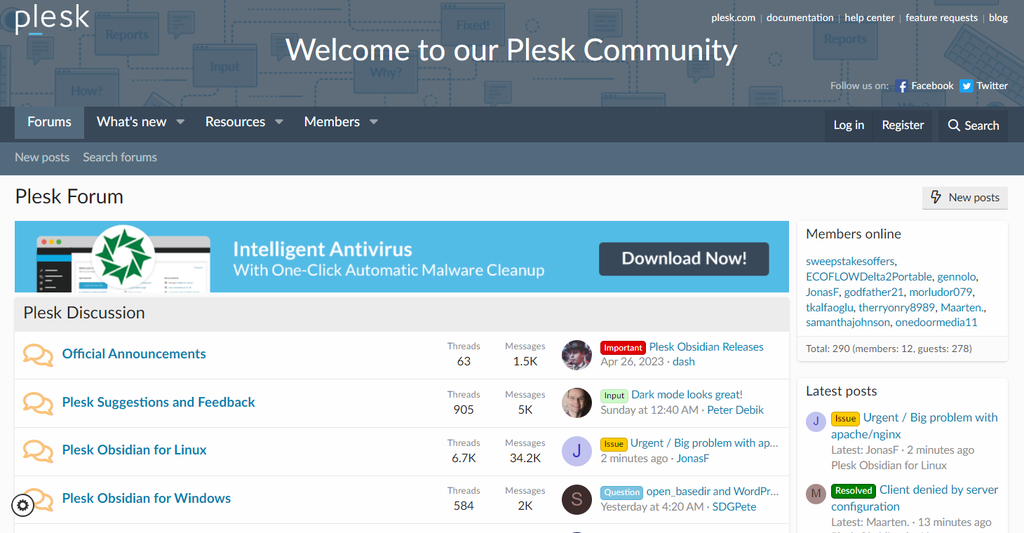
These community resources provide invaluable assets and step-by-step instructions on various management tasks within Plesk, from basic configurations to more advanced operations. In addition to the forum, Plesk also offers comprehensive official documentation, which thoroughly explains how to effectively use and troubleshoot the control panel.
Conclusion
Plesk stands out as a robust web hosting control panel, providing a comprehensive set of features designed to significantly simplify website management tasks. For users, installing this powerful control panel is a straightforward process, often available directly from their VPS operating system management menu, making it accessible even for those new to server administration.
To access the Plesk dashboard, simply enter https://example:8443 into your web browser, ensuring you replace example with your specific VPS domain or IP address. After entering your designated username and password, you will gain entry to the intuitive control panel.
Once inside, you can navigate through the sidebar to locate various items available for configuration, such as your websites, domains, and email accounts. The dashboard’s main menu then allows you to conveniently modify their respective settings and save any changes you make, providing a centralized management hub.
Beyond its built-in functionalities, Plesk further empowers users by allowing the installation of numerous extensions directly from the dashboard. For more advanced users, the command-line interface (CLI) offers a powerful method to install and manage third-party applications, providing greater flexibility and control over their server environment.
To maximize your website management efficiency with Plesk, it is highly recommended to leverage its automation features, which can streamline repetitive tasks. Furthermore, customizing its appearance to align with your personal workflow can significantly enhance your user experience. Finally, for any troubleshooting or to deepen your understanding, actively utilizing the Plesk community forum and official documentation serves as an invaluable resource.
