 (1).svg)
 (1).png)


 (1).svg)
.svg)
Maintaining regular backups of your website files, email accounts, and databases is crucial for ensuring business continuity and data security. JetBackup, seamlessly integrated with cPanel, provides a robust and user-friendly solution for managing these essential backups. This guide will walk you through the process of restoring various types of data and even downloading backups for offline storage, all within the intuitive JetBackup interface.
Important Note: Currently, email notifications from JetBackup are not functional. If you enter your email address in the My Account section, please be aware that you will not receive email notifications from the system.
Restoring Website Files Using JetBackup
To restore your website’s files from a previous backup using JetBackup, follow these detailed steps:
Log in to cPanel, your web hosting control panel.
If you require assistance with logging into your cPanel account, please refer to your hosting provider's documentation or support resources.
On the Tools page, navigate to the Files section and click on the JetBackup 5 icon:

If the JetBackup 5 icon is not visible in your cPanel interface, your account may be utilizing an alternative backup solution. Please consult your service provider for specific instructions on accessing your designated backup management tool.
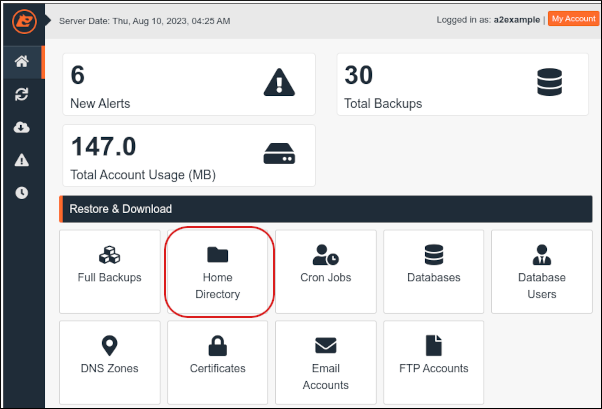
After a brief loading period, the JetBackup dashboard will appear. Click on the Home Directory option to proceed with file restoration:
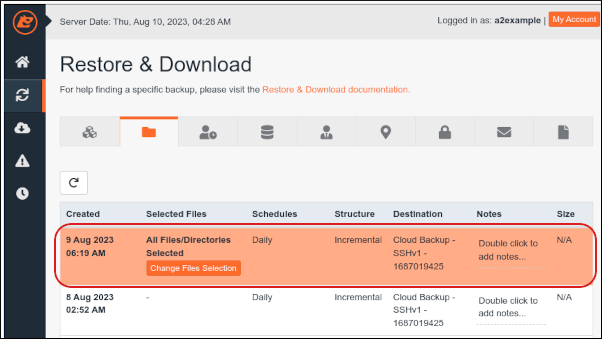
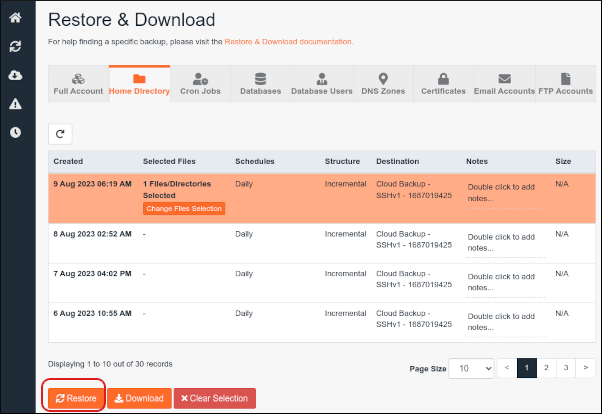
From the displayed list, select the specific backup date from which you wish to restore your files:
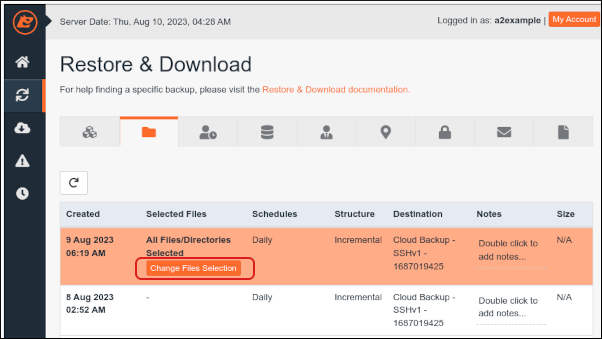
Click Change Files Selection to specify which files or folders you want to restore:
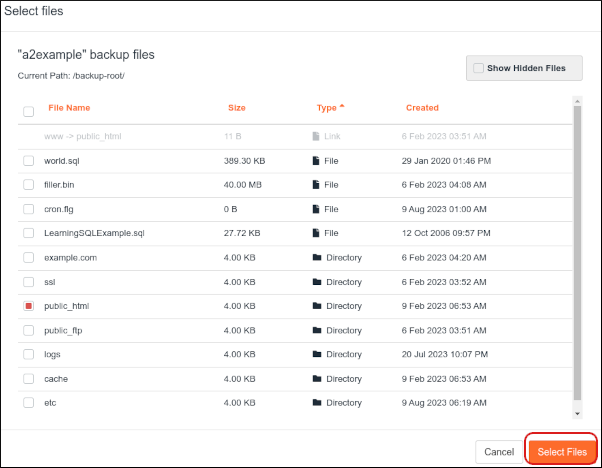
Browse and click to select the folder(s) or individual files you intend to restore. You have the flexibility to choose specific items as needed:
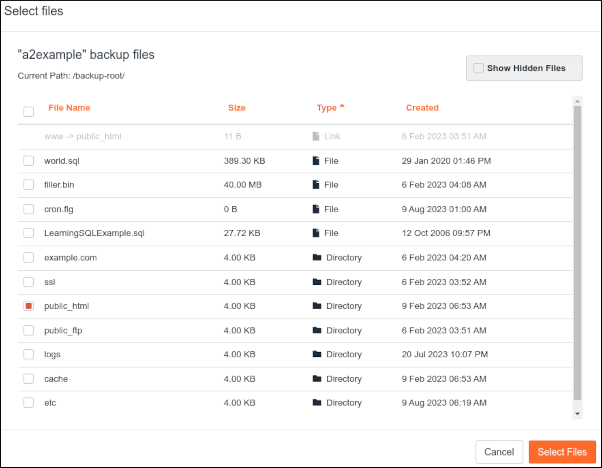
For instance, if your website’s core files are located within the public_html folder, selecting public_html will restore your entire website content.
Once your selections are complete, click Select Files to confirm:
Now, click the Restore button to initiate the restoration process:
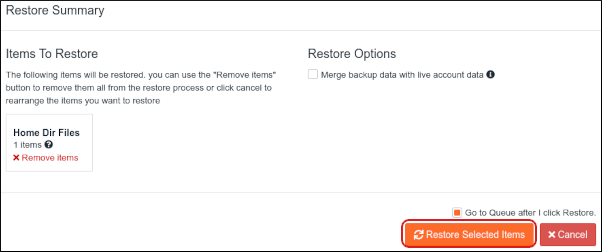
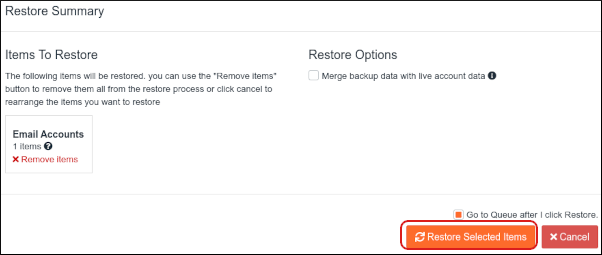
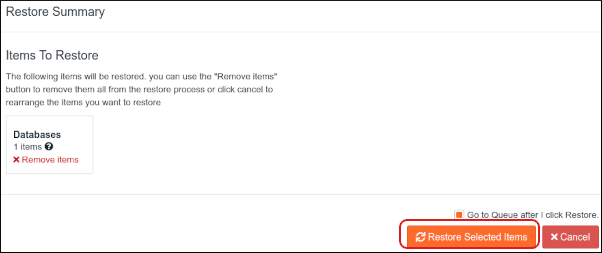
In the Restore Summary dialog box, review your selected items and then click Restore Selected Items. JetBackup will add these items to its queue and commence the restoration:
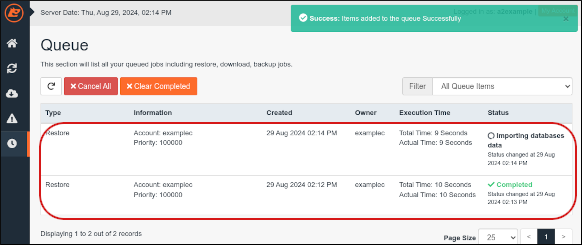
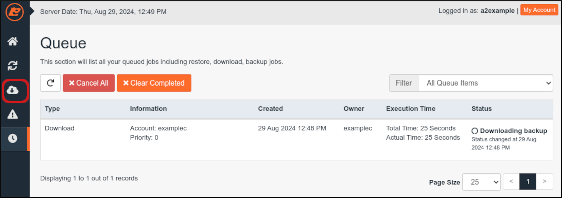
To monitor the progress of your restoration job, click on the Queue icon located in the left sidebar:

The Queue page will display, showing a comprehensive list of all queued jobs along with their current status, allowing you to track completion:
Restoring Email Accounts Using JetBackup
To restore your email accounts from a backup, please follow these instructions:
Access your cPanel account.
If you need assistance logging into your cPanel account, please consult your hosting provider's help documentation.
From the Tools page, locate the Files section and click the JetBackup 5 icon:
Should the JetBackup 5 icon be absent, your account might be provisioned with a different backup system. For guidance on restoring email accounts through an alternative method, please contact your hosting support.
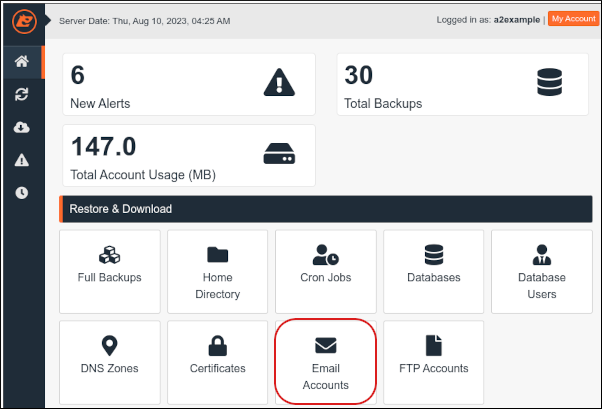
Once the JetBackup dashboard loads, click on Email Accounts:
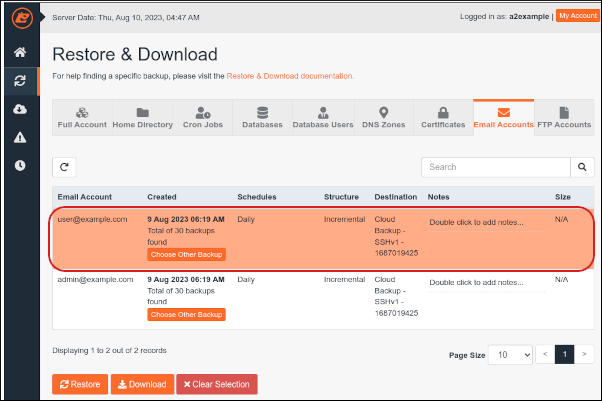
Select the specific email account or accounts you wish to restore from the available list:
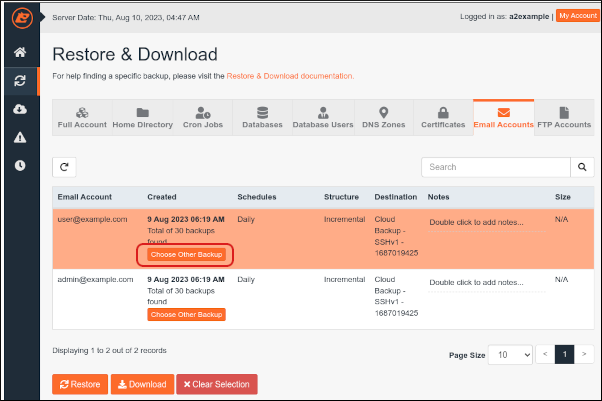
By default, the most recent backup is selected. If you need to restore an older version, click Choose Other Backup and then select the desired backup date:
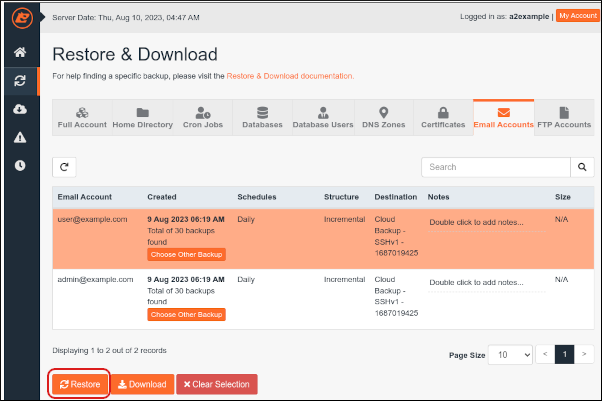
Click Restore to begin the restoration process for your selected email accounts:
Confirm your selection in the Restore Summary dialog box by clicking Restore Selected Items. The items will be queued for restoration:
To view the status of the restoration, click the Queue icon in the left sidebar:
The Queue page will display, providing real-time updates on all jobs, including the restoration of your email accounts:
Restoring MySQL Databases Using JetBackup
To restore your MySQL databases using JetBackup, follow these guidelines:
Log in to your cPanel account.
If you are unsure how to log in to your cPanel account, please consult your hosting provider's documentation.
On the Tools page, within the Files section, click the JetBackup 5 icon:
If the JetBackup 5 icon is unavailable, an alternative backup service may be in use for your account. Please consult with your hosting provider for instructions on restoring databases via their designated backup solution.
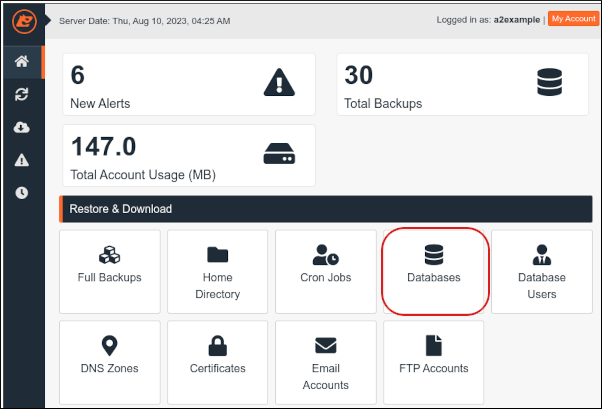
Once the JetBackup dashboard appears, click on Databases:
Select the specific MySQL database or databases that you wish to restore:
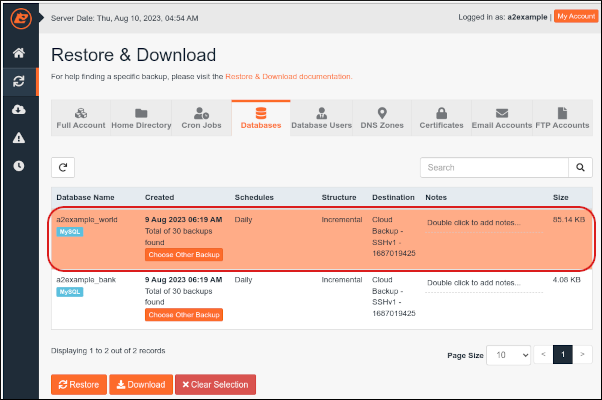
If you need to restore an earlier version of the database, click Choose Other Backup and then select the appropriate backup date:

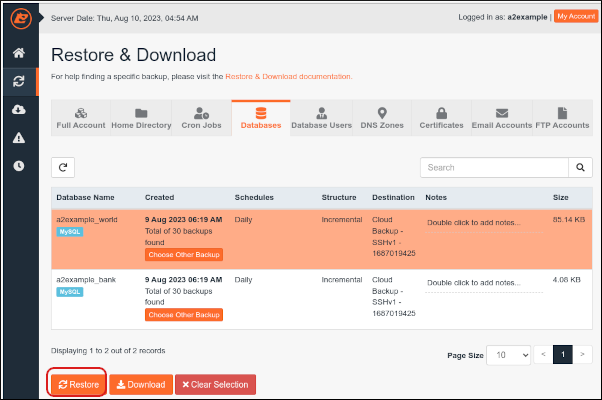
Click Restore to initiate the database restoration process:
In the Restore Summary dialog box, confirm your selections by clicking Restore Selected Items. The database will then be added to the restoration queue:
To track the progress of your database restoration, click on the Queue icon in the left sidebar:
The Queue page will be displayed, providing an overview of all active and pending jobs, including your database restoration status:
Downloading Backups to Your Local Computer
JetBackup also offers the convenient option to download your backups to your local computer. This is useful for additional safekeeping or for reviewing the contents of a backup offline. To download a backup, follow these steps:
Log in to your cPanel account.
If you require assistance with logging in to cPanel, please refer to your hosting provider's support resources.
On the Tools page, within the Files section, click the JetBackup 5 icon:
If the JetBackup 5 icon is not displayed, your account might be utilizing a different backup system. Information on downloading files using an alternative method can be obtained from your hosting provider.
Once the JetBackup dashboard loads, click the Restore & Download icon in the left sidebar. This will present a list of available backups:
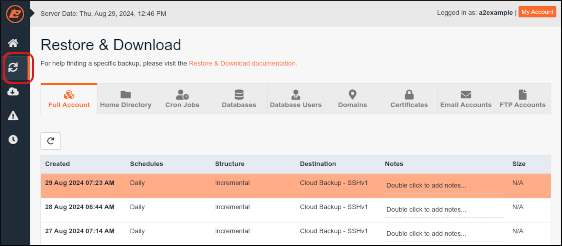
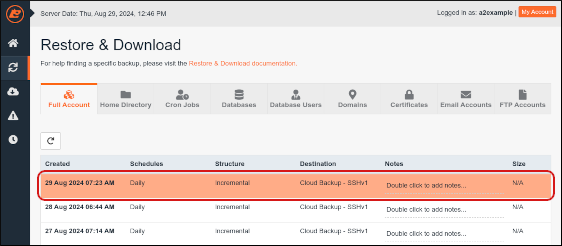
Select the specific backup that you wish to download to your local system:
Click the Download button:

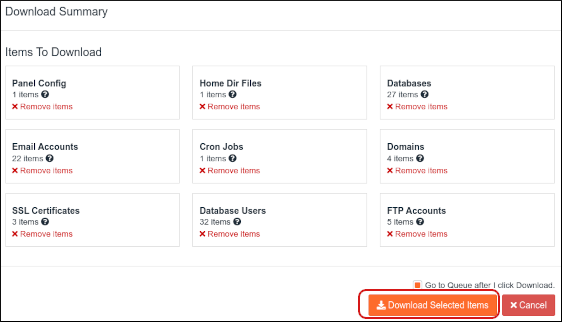
In the Download Summary dialog box, you can review the items included in the download. If there are any items you do not wish to download, click Remove Items next to them. Then, click Download Selected Items to confirm:
The queue will appear, showing the progress of your backup download. When the status changes to Completed, your backup is ready for local download. Click the Downloads icon in the left sidebar:
On the Downloads page, locate the completed download and click the Download button next to it:
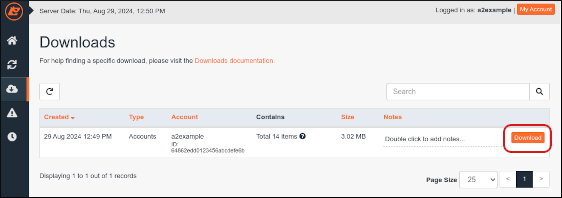
Your browser will prompt you to select a location on your local computer to save the backup file. Choose your desired destination and click Save.
By following these detailed steps, you can effectively leverage JetBackup within cPanel to manage and restore your critical website data, email accounts, and MySQL databases, ensuring peace of mind and operational continuity. Regular backup management is a cornerstone of a resilient online presence.
