 (1).svg)
 (1).png)


 (1).svg)
.svg)
Odoo 19 stands as a powerful and highly customizable platform, ideal for managing and tailoring a wide array of business applications. It is engineered to empower developers to effortlessly design solutions that cater to specific requirements, whether it involves robust data management, intricate process automation, or the development of unique workflows. A cornerstone of Odoo 19’s extensibility is its web controller framework, which provides developers with the ability to craft bespoke front-end views and efficiently handle HTTP requests. These web controllers are instrumental in bridging Odoo’s backend functionalities with external applications or custom web pages, facilitating real-time data integration and seamless management. By leveraging the flexibility of web controllers, organizations can significantly expand Odoo’s native capabilities beyond a typical ERP setup, delivering engaging and interactive experiences for their partners, suppliers, and customers.
In the Odoo architecture, controllers function as a vital link, connecting the website interface with the underlying backend modules. They are responsible for managing and configuring the front-end modules, thereby streamlining the process of designing a dynamic and responsive website experience. Controllers enable the creation of custom URLs that intuitively map web pages to specific backend functions, ensuring a coherent flow between user interaction and system logic.
Setting Up Your Controller Environment
Before you can begin leveraging the full potential of web controllers in Odoo, it is essential to establish a dedicated controllers folder within your custom module. This folder will serve as the central repository for all your controller-related Python files, including the crucial __init__.py file, which ensures that Odoo recognizes your controller definitions.
# -*- coding: utf-8 -*-
from . import controllers
Once this new controllers folder is created and properly structured within your module, it will become an integral part of your module's architecture. This dedicated area offers a streamlined approach for configuring unique web routes and expanding the native website features of Odoo.
Creating a Controller File
Developing a controller in Odoo empowers you to fetch data from the backend and present it on the front-end, granting you the flexibility to define unique web routes. To achieve this, you need to import the necessary modules and define your controller class within a Python file located in the controllers folder. In the following example, we will construct a controller designed to display comprehensive sales order information.
# -*- coding: utf-8 -*-
from odoo import http
from odoo.http import request

class SaleOrderController(http.Controller):
    @http.route(['/saleorders'], type="http", auth="user", website=True)
    def display_sale_orders(self, **kwargs):
        sale_orders = request.env['sale.order'].sudo().search(
            [], order="date_order desc"
        )
        return request.render(
            "custom_module_name.sale_order_website_custom_layout",
            {
                'orders': sale_orders
            }
        )
The @http.route decorator is fundamental when defining a URL route in Odoo, as it precisely indicates the entry point for a specific controller function. It establishes the mapping between a web address and the corresponding Python method that will process requests for that address. Let's delve into a detailed explanation of its syntax and parameters.
Understanding the @http.route Decorator Parameters
Each element within the @http.route decorator serves a distinct and important function:
'/saleorders': This segment explicitly defines the URL path. When a user navigates to this URL (e.g.,<your_domain>/saleorders), Odoo executes the associated function beneath this decorator to generate and display the relevant webpage. This acts as the entry point for your custom web content.type='http': This crucial option specifies that the route is designed for standard HTTP requests. It signifies that the route is intended for access directly via a web browser. Alternatively,'json'is used for API endpoints that primarily return data in JSON format, catering to programmatic interactions rather than direct browser viewing.auth='user': This parameter dictates the level of authentication required for a user to access the specified route. The primary choices for authentication levels include:'public': Allows anyone, including visitors who are not logged into Odoo, to access the page. This is ideal for public-facing content like product catalogs or landing pages.'user': Restricts access to authenticated users only. This means a user must be logged into their Odoo account to view the page. This setting is commonly used for dashboards, customer portals, or other personalized content.'bearer': Implies basic authentication, where credentials are transmitted, often utilizing an API token to verify users. This method is typically employed for integrations with external systems where token-based access is preferred for security.'none': Indicates that no authentication whatsoever is required, making the route completely open and accessible to all, without any login prompts.
website=True: This option explicitly indicates whether the controller function is integrated with the Odoo website module. A value ofTruesignifies that the page is part of the public or private website, benefiting from website-specific features like layouts and menus. A value ofFalseis used for non-website functionalities, such as backend processes or internal API endpoints.methods: If you do not explicitly specify which HTTP methods are allowed, the route will default to accepting all standard methods. However, it is good practice to define them for clarity and security. The primary techniques consist of:['GET']: Primarily used to retrieve information without altering any data on the server.['POST']: Employed to submit data to the server, typically used for creating new records or making modifications.
sitemap: This parameter facilitates the automatic creation of sitemap links. Sitemaps serve as a directory for accessible sites and are crucial for search engine optimization, highlighting the navigation structure and available pages of your website to search engines.cors: Short for Cross-Origin Resource Sharing, this parameter makes it easier for servers and web browsers to securely exchange data and make requests across different domains. It is vital for enabling secure interactions between your Odoo instance and external web applications.multilang: This functionality enables frontend translations, making it possible to include and display content in multiple languages on your website. It is essential for building internationalized web applications.csrf: Cross-Site Request Forgery (CSRF) security, when enabled, protects user sessions by generating a distinct token for each request. This mechanism helps prevent malicious attacks where unauthorized commands are transmitted from a user that the web application trusts.
Within the controller function, the sale_orders variable will now contain all the retrieved sales order information. It's important to note the distinction in accessing the Odoo environment: request.env is utilized within controllers to interact with the Odoo environment, whereas self.env is typically employed within models for direct database interactions and business logic. This distinction is crucial for maintaining proper architectural separation.
Furthermore, before executing any operations such as searching for or creating records, we explicitly use the sudo() method. This practice is vital for handling potential access permission issues, ensuring that the system can retrieve or modify records without encountering security restrictions. The sudo() method temporarily elevates the user's permissions to superuser status for the duration of the call, circumventing typical access rights constraints.
Now, let's look at how we can produce a webpage to effectively showcase the sales order details:
 return request.render(
            "custom_module_name.sale_order_website_custom_layout",
            {
                'orders': sale_orders
            }
        )
In scenarios where a user needs to be redirected to a different URL rather than displaying a new page, the request.redirect method is employed. For instance, if the goal is to direct the user to the /shop page, the following code would be used instead:
return request.redirect('/shop')
Creating the View for Display
With the controller set up, the next crucial step is to create the corresponding XML template, sale_order_website_custom_layout, within your module's views folder. This view is essential because our controller has been configured to reference and render it.
<?xml version="1.0" encoding="utf-8"?>
<odoo>
<template id="sale_order_website_custom_layout" name="Sale Orders Custom Layout">
<t t-call="website.layout">
<div class="container mt-4">
<h3>Sale Orders</h3>
<table class="table table-bordered table-striped mt-3">
<thead>
<tr>
<th>Order</th>
<th>Date</th>
<th>Customer</th>
<th>Status</th>
<th class="text-end">Untaxed</th>
<th class="text-end">Tax</th>
<th class="text-end">Total</th>
</tr>
</thead>
<tbody>
<t t-foreach="orders" t-as="order">
<tr>
<td>
<t t-esc="order.name"/>
</td>
<td>
<t t-esc="order.date_order"/>
</td>>
<td>
<t t-esc="order.partner_id.name"/>
</td>
<td>
<t t-esc="order.state"/>
</td>
<td class="text-end">
<t t-esc="order.amount_untaxed"/>
</td>
<td class="text-end">
<t t-esc="order.amount_tax"/>
</td>
<td class="text-end">
<t t-esc="order.amount_total"/>
</td>
</tr>
</t>
</tbody>
</table>
<t t-if="not orders">
<div class="alert alert-info mt-3">
No sale orders found.
</div>
</t>
</div>
</t>
</template>
</odoo>
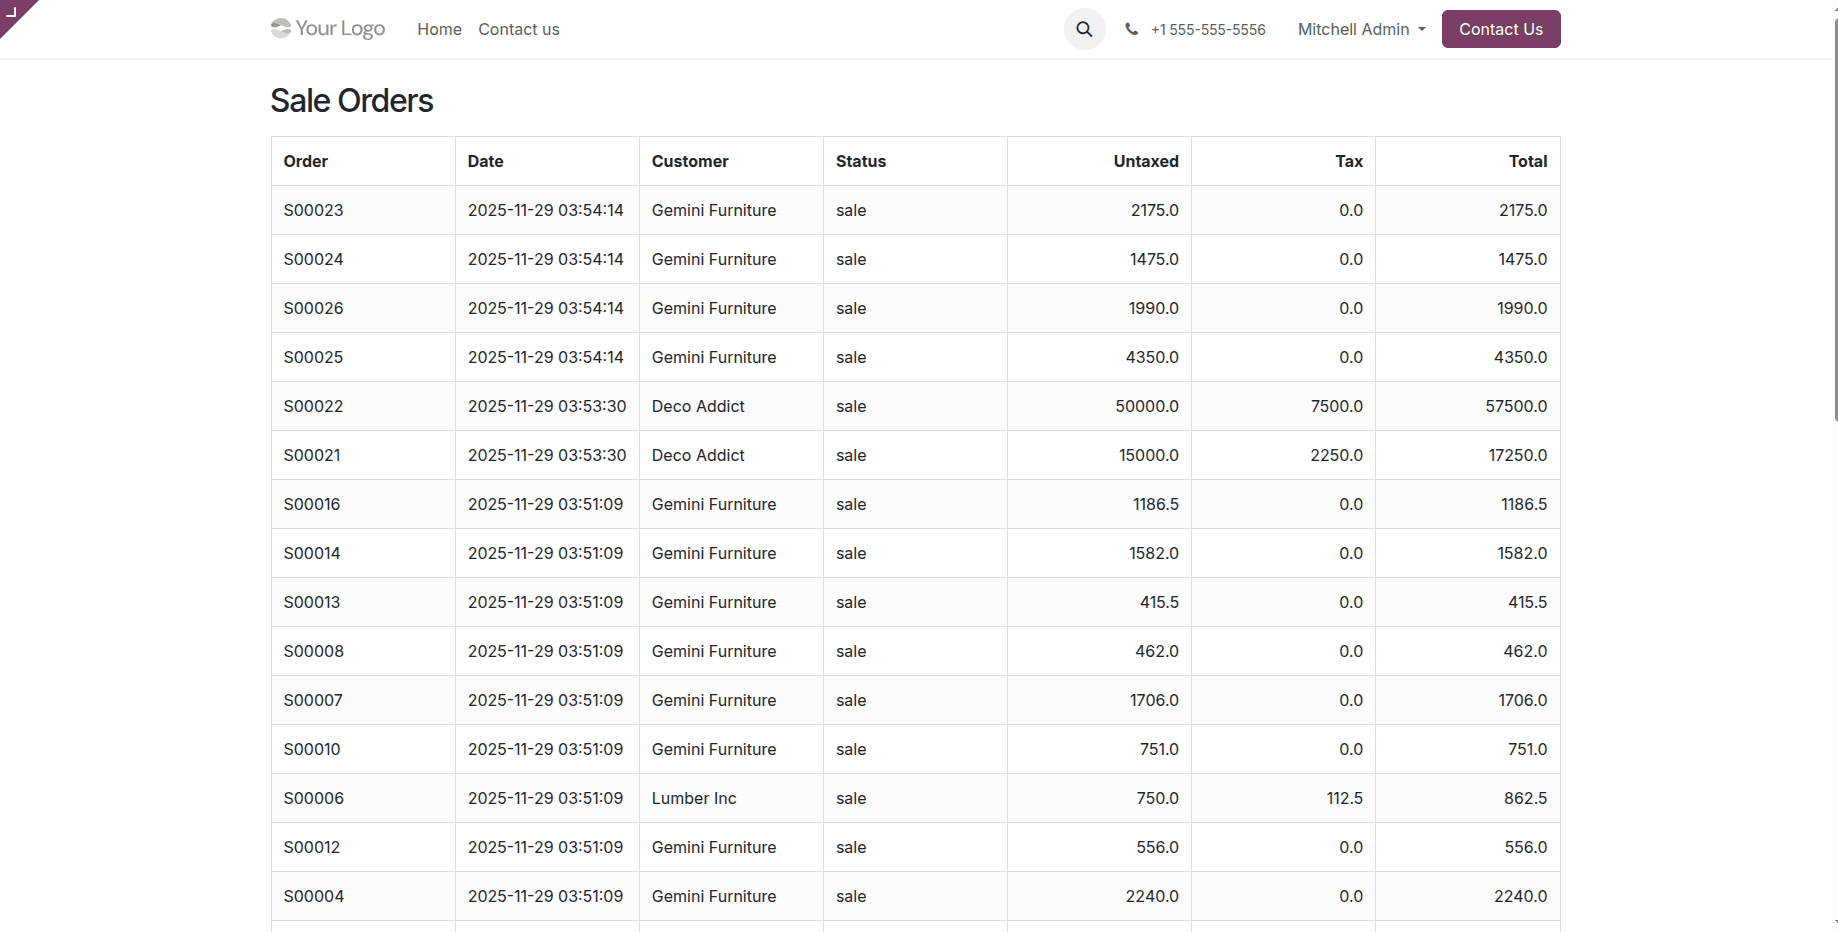
In this XML template, the <t t-call="website.layout"> directive is used to inherit the standard Odoo website layout, ensuring a consistent look and feel across your web pages. The content within the <div class="container mt-4"> defines the specific layout for displaying the sales orders. We use a Bootstrap-styled table to present the data clearly. The <t t-foreach="orders" t-as="order"> loop iterates through the orders collection passed from the controller, and <t t-esc="order.name"/> is used to safely display the value of each field. Finally, <t t-if="not orders"> provides a conditional message when no sale orders are available, enhancing user experience.
After successfully implementing both the controller and its associated view, navigating to the /saleorders page will now display all retrieved sales orders, as illustrated below.
In conclusion, web controllers in Odoo 19 are indispensable tools for customizing web interactions. They provide the necessary framework for defining specific routes, implementing complex business logic, and efficiently managing HTTP responses. By mastering these components, developers can create highly personalized and dynamic online experiences that extend Odoo's core functionalities, making them incredibly flexible for bespoke web application development within the Odoo ecosystem.
