 (1).svg)
 (1).png)


 (1).svg)
.svg)
If you've recently installed Odoo or embarked on a free trial, a fundamental question often arises: "How do I begin utilizing this powerful platform?" The journey with Odoo invariably starts with a database. This database serves as your company's central digital workspace, meticulously storing all your critical business data, installed applications, user profiles, and essential configurations. This beginner-friendly tutorial will guide you through the process of setting up your very first Odoo database, elucidate its purpose, and provide a detailed exploration of the Odoo interface.
Understanding the Odoo Database
In the Odoo ecosystem, a database represents a fully self-contained environment designed to house all your company's information. This includes, but is not limited to, your product catalogs, customer records, financial invoices, employee details, and much more. When you initiate an Odoo session, your first action will always involve selecting or creating a database. Conceptually, it functions as the comprehensive digital "filing cabinet" for your entire organizational operations.
One of Odoo's flexible features is the ability to manage multiple databases within the same Odoo instance. This capability offers significant advantages:
- You can dedicate one database for testing new customizations, experimenting with features, or conducting training without affecting live operations.
- Another database can serve as your "production" environment, containing all your live business data and essential operations.
It's important to remember that whenever you log into Odoo, you are consistently operating within the confines of a specific, chosen database, ensuring data isolation and organizational clarity.
Creating Your Odoo Database
Once your Odoo system is successfully installed and running locally, the next step is to access its database manager. Open your web browser and navigate to the following address:
http://localhost:8069/database/manager
Upon accessing this URL, you will be presented with the "Create Database" form, a crucial interface for configuring your new Odoo workspace.
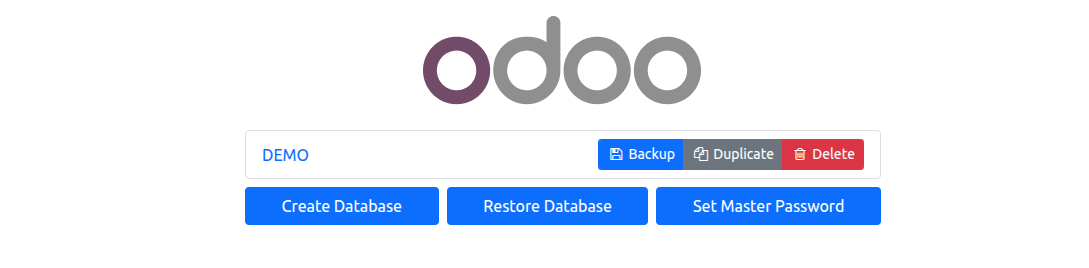
Carefully fill out the required fields in the form to set up your database:
- Master Password: Enter the Master Password that was established during your Odoo installation process, or refer to your
odoo.conffile if you need to retrieve it. This password is vital for administrative tasks. - Database Name: Select a clear and straightforward name for your database (e.g.,
my_company_prodormy_test_db). This name will help you identify it later. - Email: This email address will serve as your primary administrator login credential for the new database.
- Password: Choose a robust and secure password for your administrator account to protect your database.
- Language & Country: Select your preferred language and country settings, which will influence localization aspects within Odoo.
- Load Demo Data: This selection is particularly significant, especially for newcomers to Odoo.
- ☑ Check this box: Activating this option instructs Odoo to populate your new database with a rich set of sample data. This includes example products, customer profiles, sales orders, and more. This approach is highly recommended for your initial database setup, as it provides an invaluable environment for exploring and understanding how various Odoo modules function with pre-existing, practical examples. It significantly lowers the learning curve.
- ☐ Uncheck this box: If you opt for this, your database will be created as a completely empty canvas. This is the preferred choice when you are preparing a clean "production" database for live business operations, after you have gained sufficient familiarity with Odoo's functionalities.


Accessing and Exploring Your New Database
Once you have accurately completed the form, click the "Create Database" button (or "Continue" as labeled in some versions). A brief period of processing will follow, during which Odoo will systematically generate your new operational workspace. Specifically, Odoo will perform several critical actions:
- It will initiate and create a new, empty PostgreSQL database, leveraging the exact name you specified during the setup process.
- The foundational Odoo schema will then be meticulously installed within this new database, establishing its core structure.
- Should you have opted for the "Load Demo Data" selection, the database will subsequently be populated with the chosen sample records, providing a pre-configured environment for exploration.
This entire process may take a few moments, and you will typically observe a loading screen indicating progress. Upon successful completion, you will be automatically redirected to the login page for your newly established Odoo database.
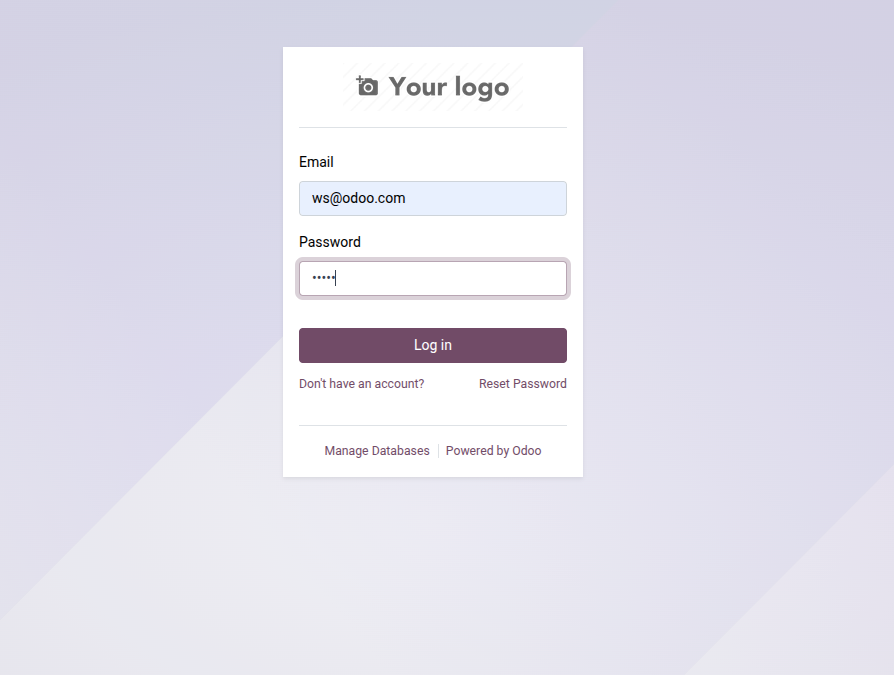
On the login page, input the email address and secure password you defined earlier during the database creation. After entering your credentials, click "Log In." You will then be welcomed by the Apps menu, which serves as your gateway to installing and utilizing various business applications within your Odoo environment.
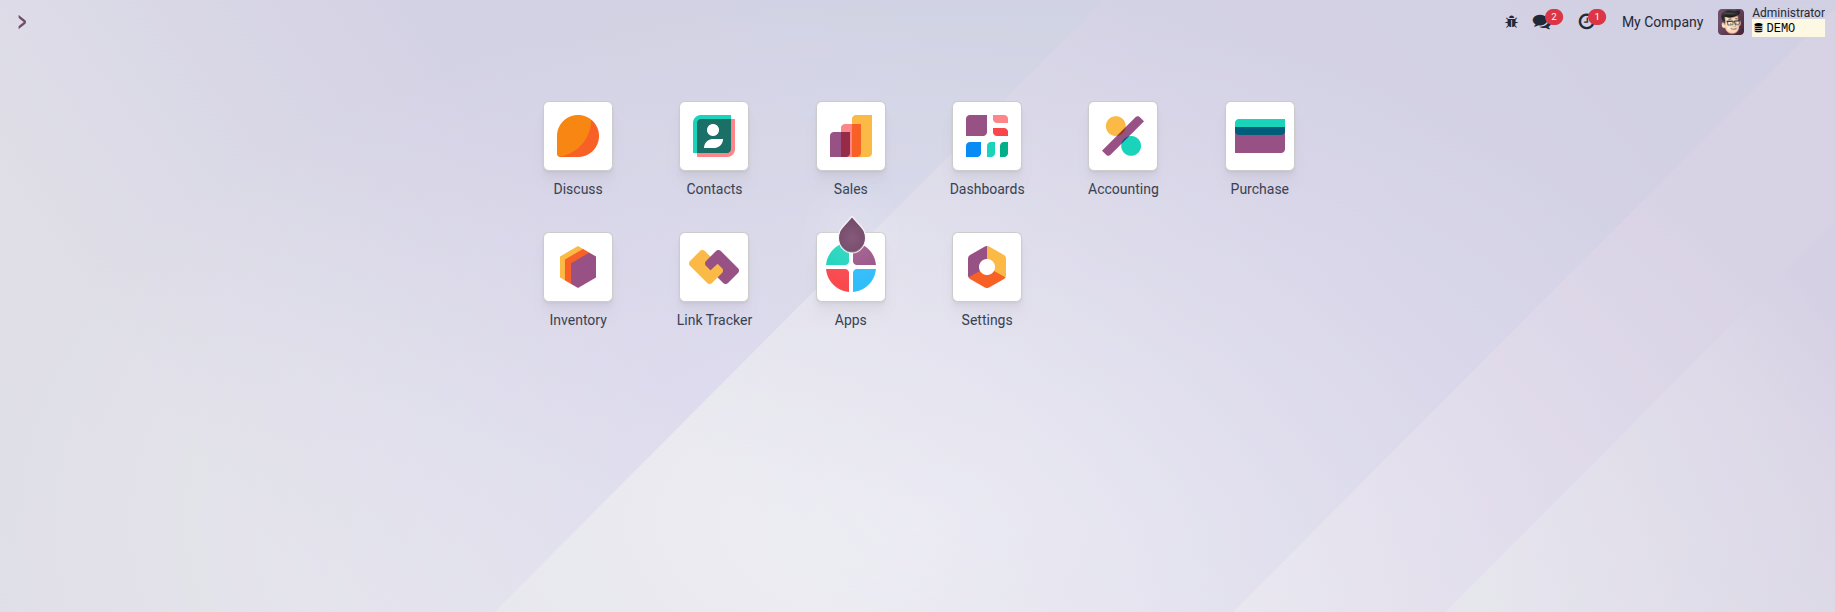
Exploring the Odoo Apps Dashboard
After a successful setup and login, you will land on the intuitive Odoo Apps Dashboard. This central hub presents a curated selection of popular and essential business modules designed to streamline various aspects of your operations. Here, you'll discover applications covering a wide spectrum of business functions, such as:
- ???? Inventory Management
- ???? Financial Accounting
- ???? Sales Management
- ????️ Invoicing and Billing
- ???? Website and eCommerce functionalities
To integrate any of these applications into your Odoo database, simply click on the desired app icon. Odoo is designed for efficiency; it will automatically configure the chosen application without requiring any additional, complex setup steps from your end.
???? Expert Tip: For those new to Odoo's modular architecture, it's often beneficial to begin by installing and exploring modules like "Sales" or "Inventory." This approach provides a practical understanding of how Odoo's interconnected system functions and how different business processes are managed within the platform.
Troubleshooting Common Issues
Even with a clear guide, users might occasionally encounter challenges during a local Odoo setup. Here are some common pitfalls and their straightforward solutions:
- Error: "Database creation error."
-
Cause: This error frequently occurs if you attempt to create a database using a name that is already in use by an existing database on your Odoo instance.
Solution: To resolve this, return to the Database Manager page (typically found at
/web/database/selector). From there, you can either select the existing database to manage or rename it, or simply choose a unique, unused name for your new database creation attempt. - I forgot my Master Password!
-
Solution: The Master Password is crucial for database management. You will need to locate your Odoo configuration file, commonly named
odoo.conf. Within this file, search for a line that begins withadmin_passwd =, followed by your master password. If you are unable to find this line or the password, you may need to halt your Odoo service, manually set a new master password within the configuration file, and then restart the Odoo service for the changes to take effect. - The page
http://localhost:8069won't load. -
Cause: This issue almost always indicates that the Odoo server itself is not currently running or has encountered an unexpected shutdown.
Solution: To fix this, open your terminal or command prompt. Navigate to the directory where your Odoo installation resides. From there, you will need to manually start the Odoo server. This is typically done using a command such as
./odoo-bin(for Linux/macOS) or through your operating system's service manager if Odoo was configured as a service.
Conclusion
Establishing a database on a local Odoo installation grants you unparalleled control and paves the way for extensive customization and development endeavors. While this process may involve a few more technical steps compared to a cloud-hosted version, it remains remarkably straightforward once you are familiar with the necessary procedures. By diligently following the guidelines outlined in this comprehensive guide, you have successfully laid the essential groundwork for deploying your robust, self-hosted business management system. This fundamental step unlocks the full potential of Odoo, empowering your organization with a tailored and efficient operational platform.
