 (1).svg)
 (1).png)


 (1).svg)
.svg)
Odoo 18 offers a robust email management system that allows businesses to streamline communication directly within the platform. By configuring Outgoing Mail Servers, users can send emails seamlessly for various business needs. With Incoming Mail Servers, Odoo can effectively process received emails and automatically create records, such as leads or helpdesk tickets. This guide explains in detail how to configure both types of mail servers in Odoo 18, ensuring smooth, efficient, and secure email integration for enhanced operational capabilities.
Step 1: Enable Developer Mode
The ability to configure mail servers is an advanced technical feature that necessitates access to the Technical menu. This menu becomes visible and accessible only when Developer Mode is activated within your Odoo instance.
How to Enable Developer Mode
- Navigate to General Settings: From the Odoo main dashboard, click on the "Settings" icon to access the general configuration panel.
- Activate Developer Mode:
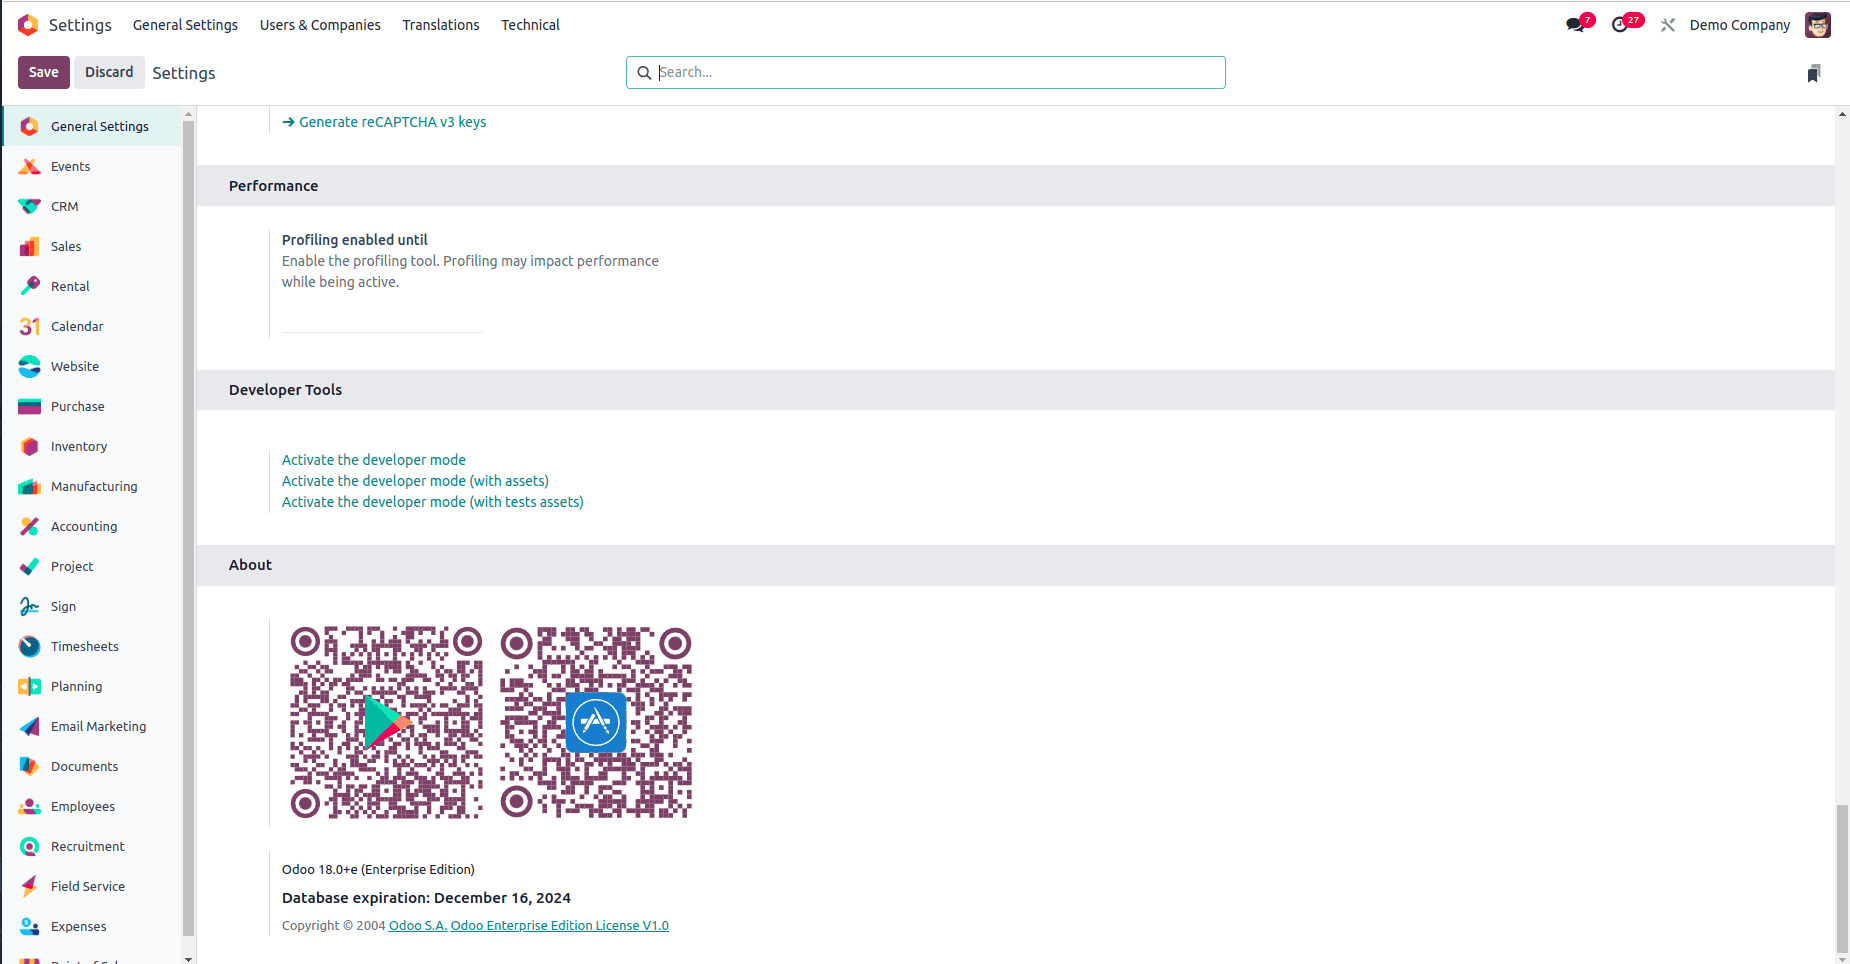
- Scroll down to the very bottom of the page in the "Settings" section, and locate the "Developer Tools" area. Click on "Activate the Developer Mode" to enable it.
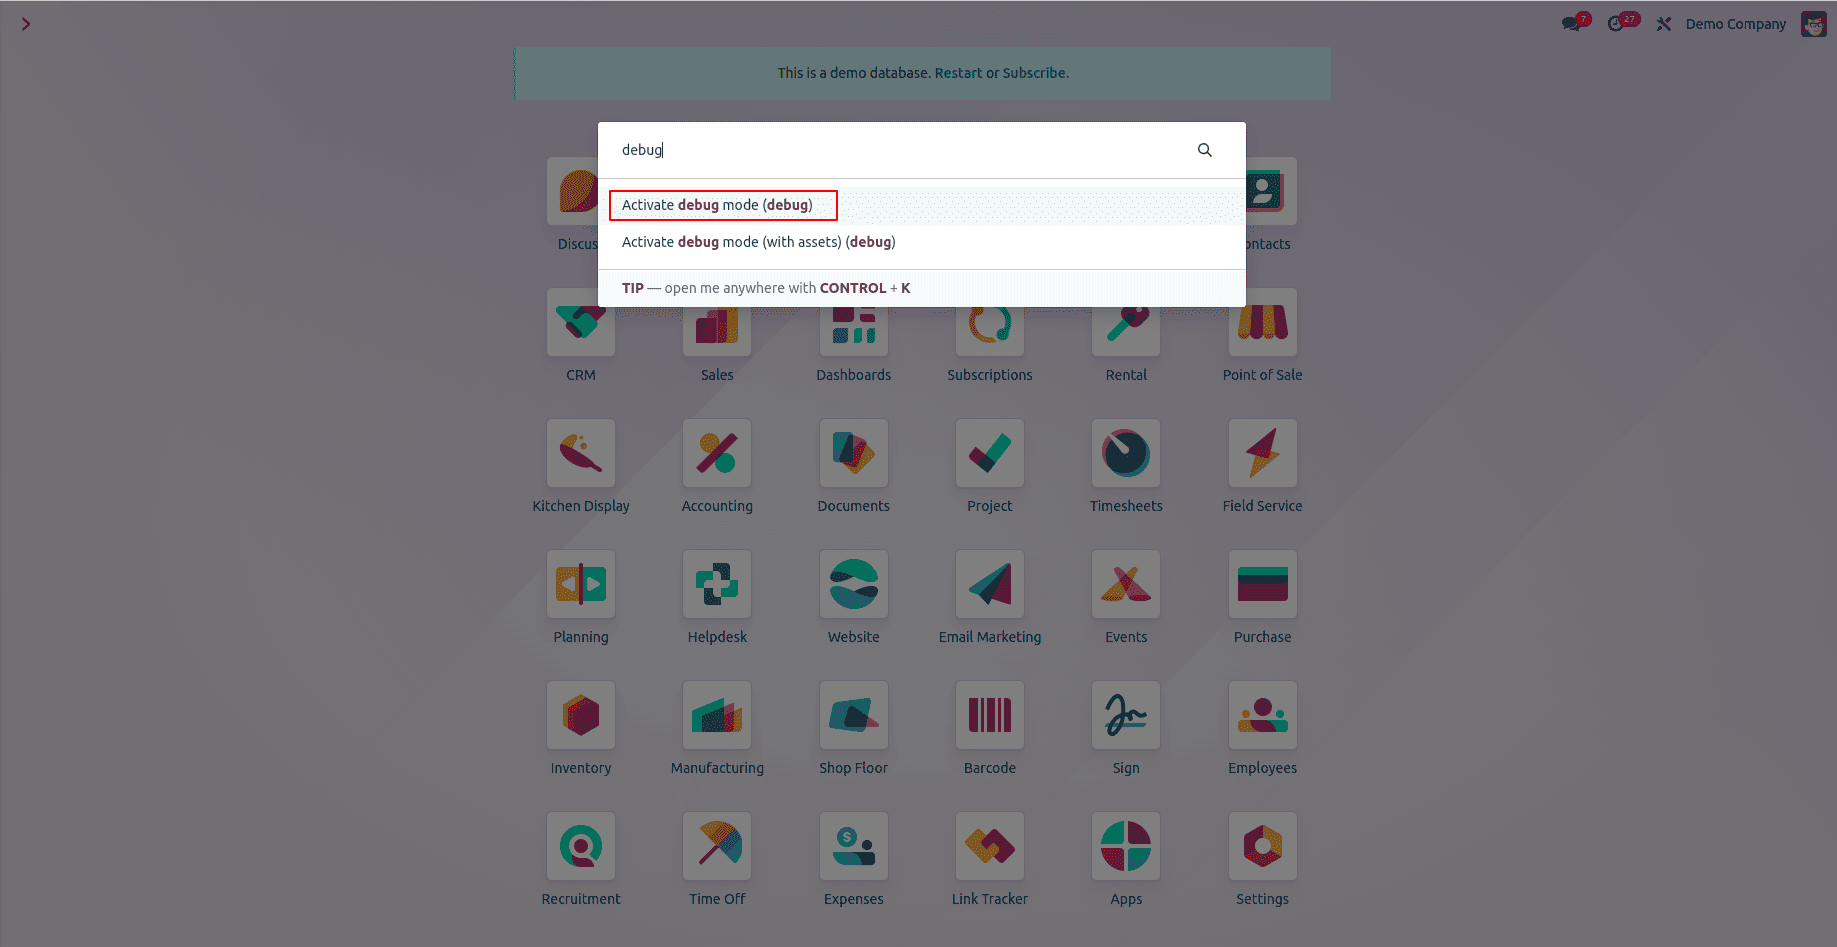
- Alternatively, for quicker access, you can search for "debug" directly from the Odoo homepage using the global search bar.
Once Developer Mode is successfully enabled, a new "Technical" menu will appear within your Odoo interface. This menu provides comprehensive access to advanced configuration options, which are essential for setting up and managing mail servers.
Step 2: Configuring Outgoing Mail Servers
Outgoing mail servers are fundamental for allowing Odoo to send various types of emails, including automated notifications, customer invoices, promotional campaigns, and general business correspondence, directly from within the platform. Proper and secure configuration is crucial for reliable email delivery and maintaining professional communication with external parties.
Access Outgoing Mail Server Settings
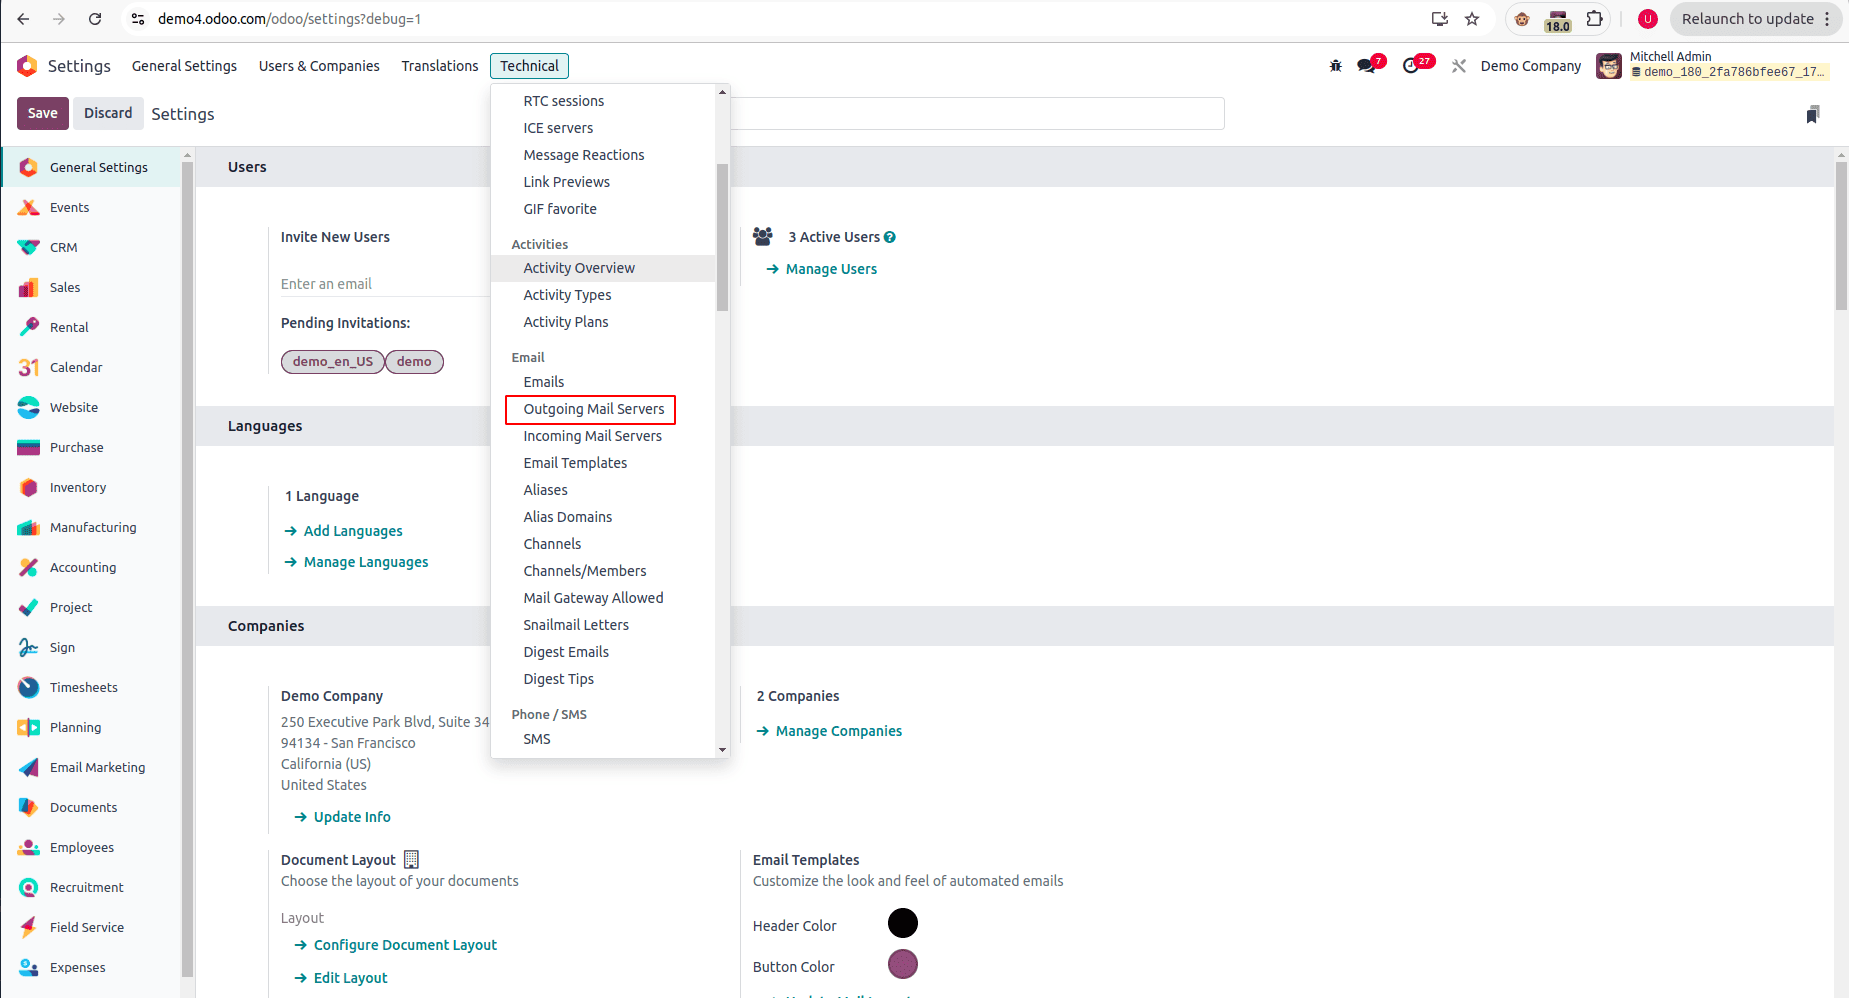
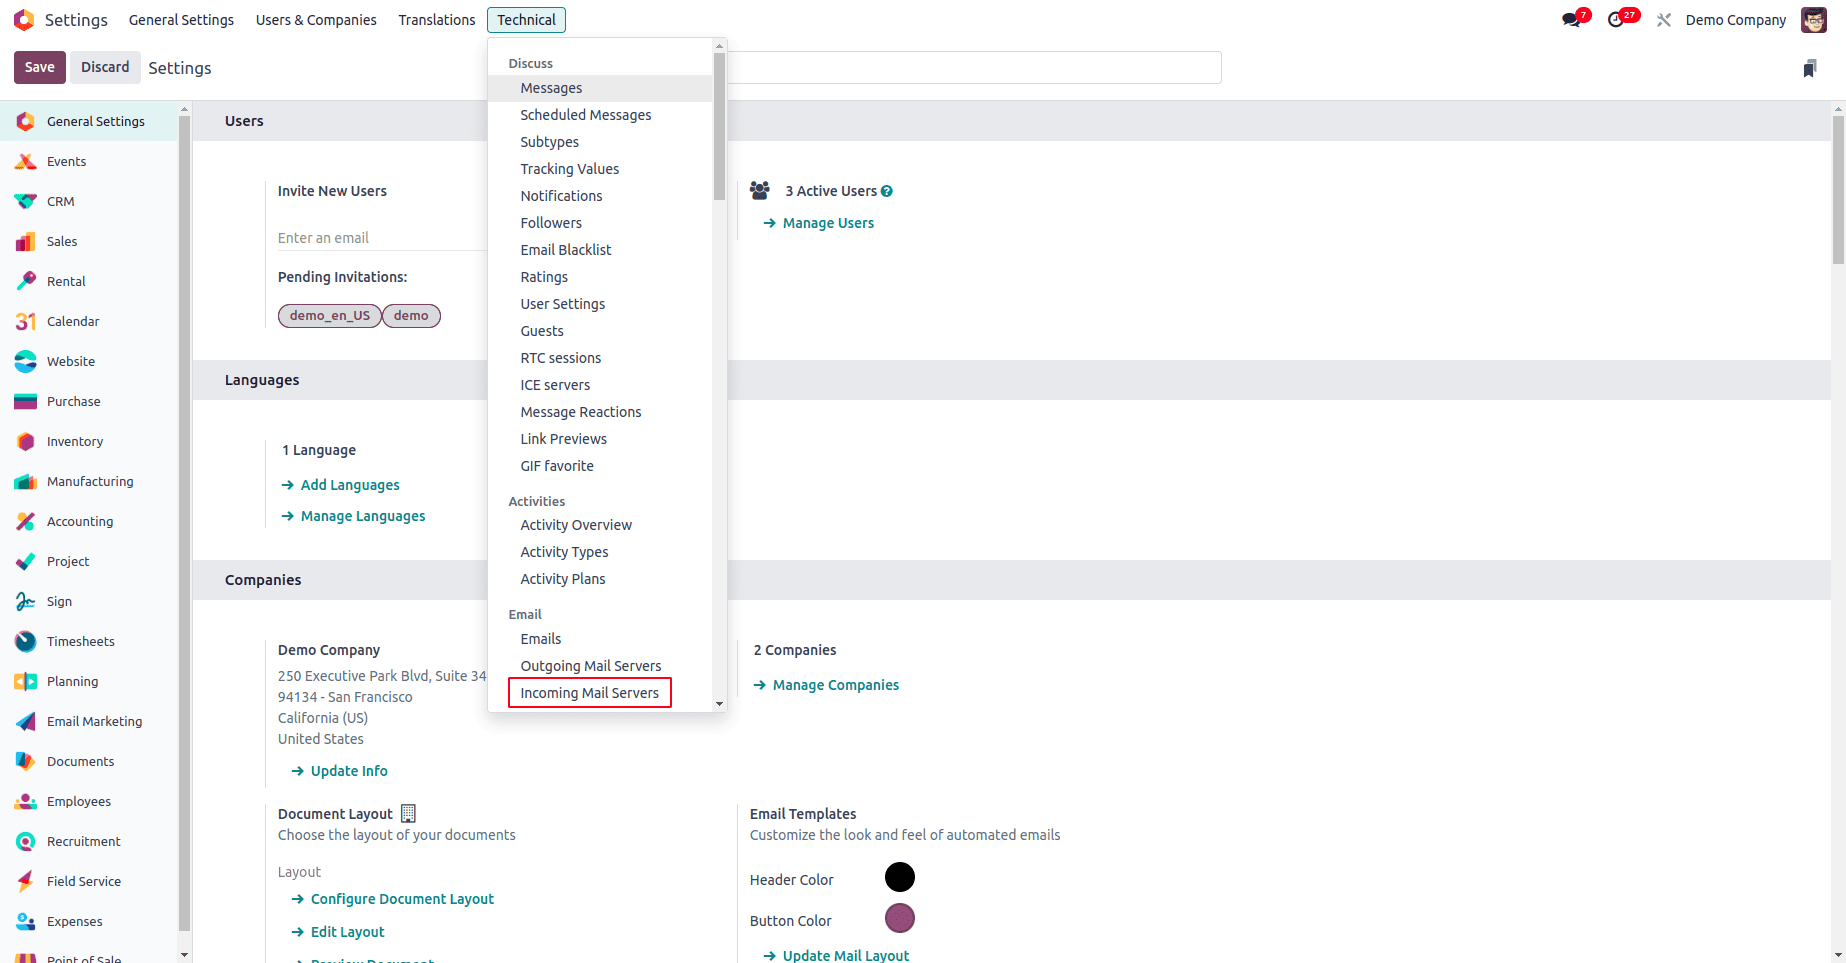
- Navigate to the "Settings" menu, then proceed to "Technical," and within the "Email" section, select "Outgoing Mail Servers."
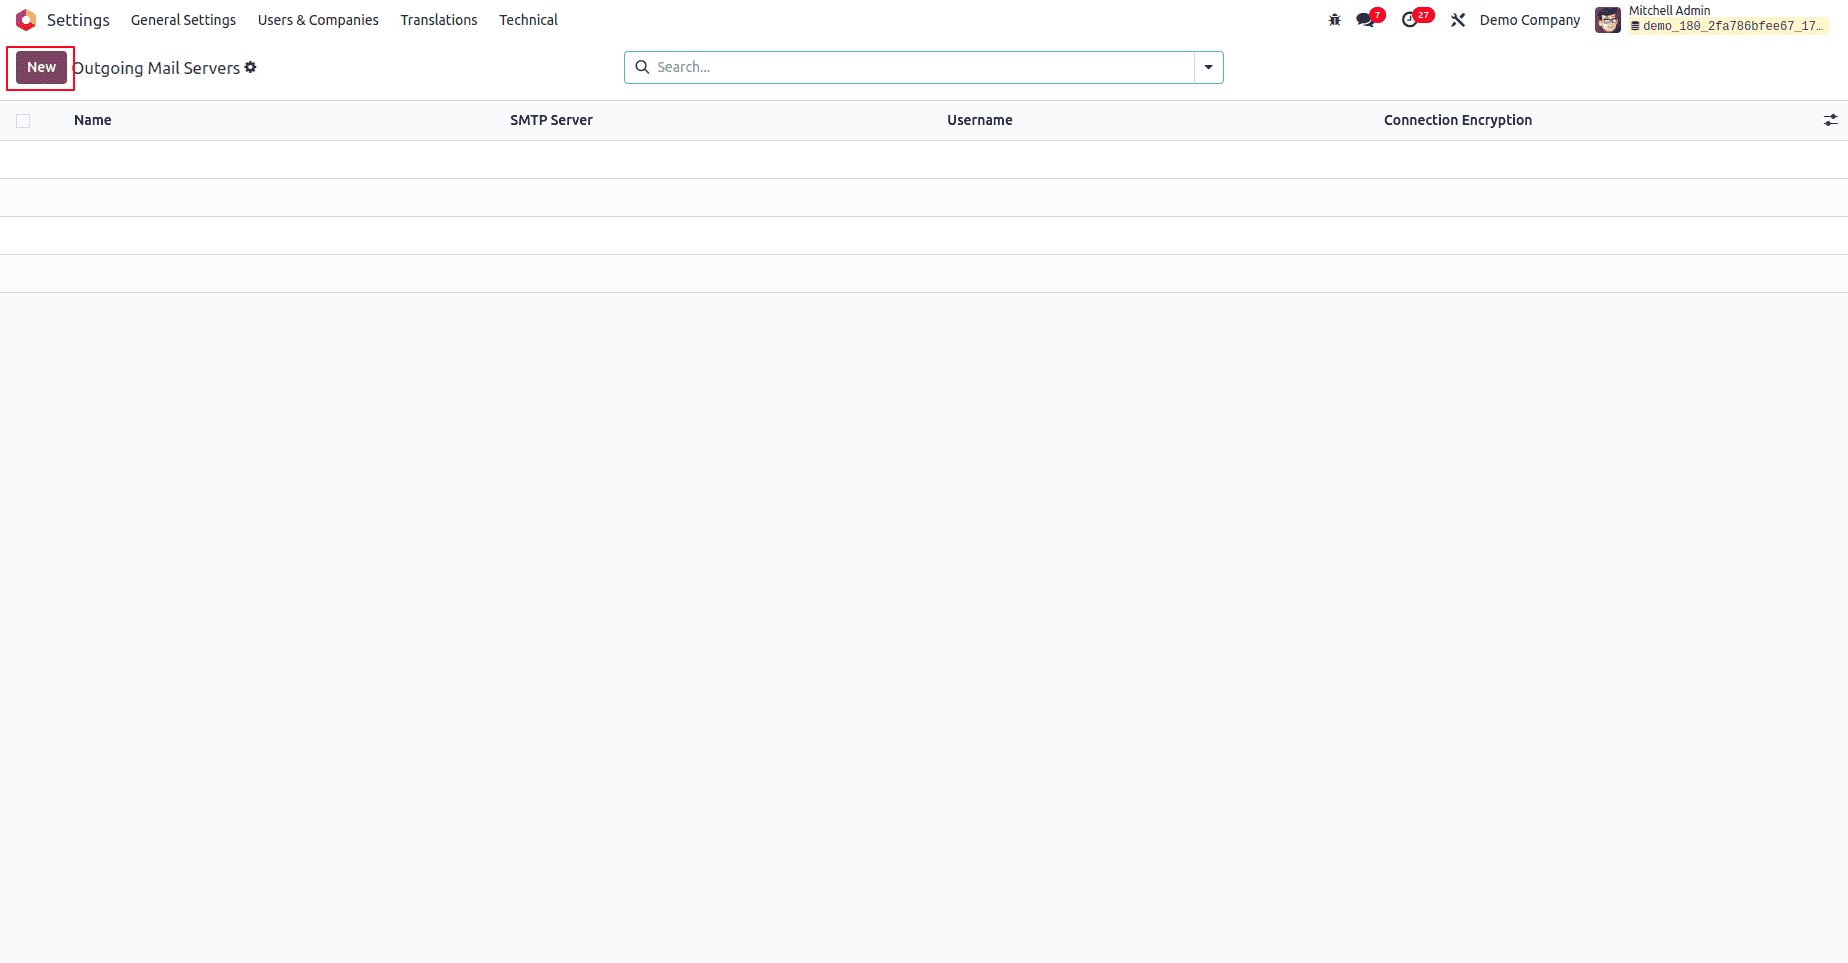
- Click the "New" button, typically located at the top of the screen, to initiate the process of adding a new outgoing mail server configuration.
Fill in Outgoing Mail Server Details
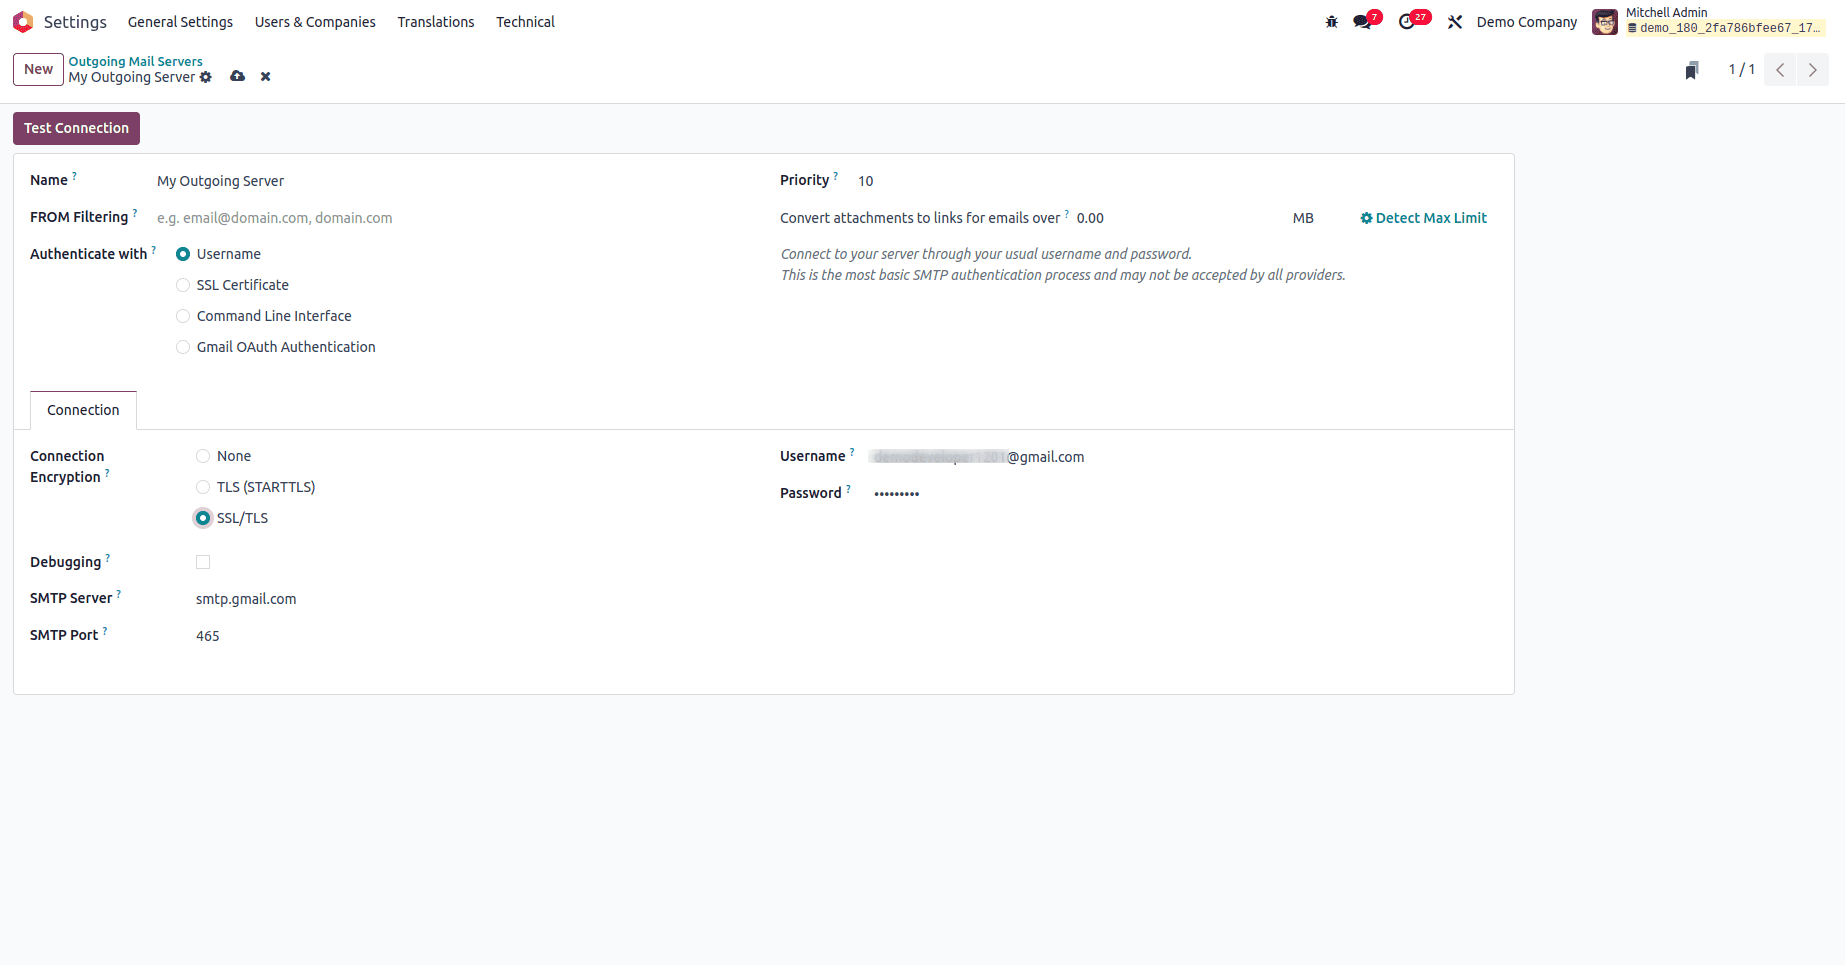
In the detailed form view that appears, you will need to provide the following essential information to configure your outgoing mail server:
- Name: Assign a clear and descriptive name for this specific mail server configuration (e.g., "Gmail SMTP Server," "Company Mail Server," or "Marketing Email Sender"). This helps in easy identification and management.
- SMTP Server: Enter the SMTP server address provided by your email service provider. This is the address Odoo will use to connect and send emails:
- For Gmail:
smtp.gmail.com - For Outlook:
smtp.office365.com - For Yahoo:
smtp.mail.yahoo.com - For other services, please consult your email provider's official documentation for the correct SMTP server address.
- For Gmail:
- SMTP Port: Specify the port number that corresponds to your chosen encryption settings:
- Use
465for SSL/TLS, which establishes a secure, encrypted connection from the start. - Use
587for STARTTLS, another widely adopted method that upgrades an insecure connection to a secure one.
- Use
- Connection Encryption: Choose the appropriate encryption type to ensure secure email communication. SSL/TLS is generally the recommended option for robust security in modern email configurations, protecting sensitive information during transmission.
- Authenticate With: Select User Name as the primary method for authentication, indicating that Odoo will use an email address and password to log in to the SMTP server.
- Username: Enter the full email address that will be used for authentication with the SMTP server (e.g.,
user@example.com). This account will be responsible for sending emails. - Password: Provide the corresponding password for the specified email account. If your email provider employs enhanced security measures such as two-factor authentication, it might be necessary to generate and use an app-specific password instead of your main account password.
- Priority: Assign a priority level to this server. Lower numerical values indicate a higher priority, meaning this server will be utilized first if multiple outgoing mail servers are configured in your Odoo instance.
Test the Connection
- After meticulously completing all the required fields in the form, click the Test Connection button, which is typically found at the top of the page. This action attempts to establish a connection with the configured mail server.
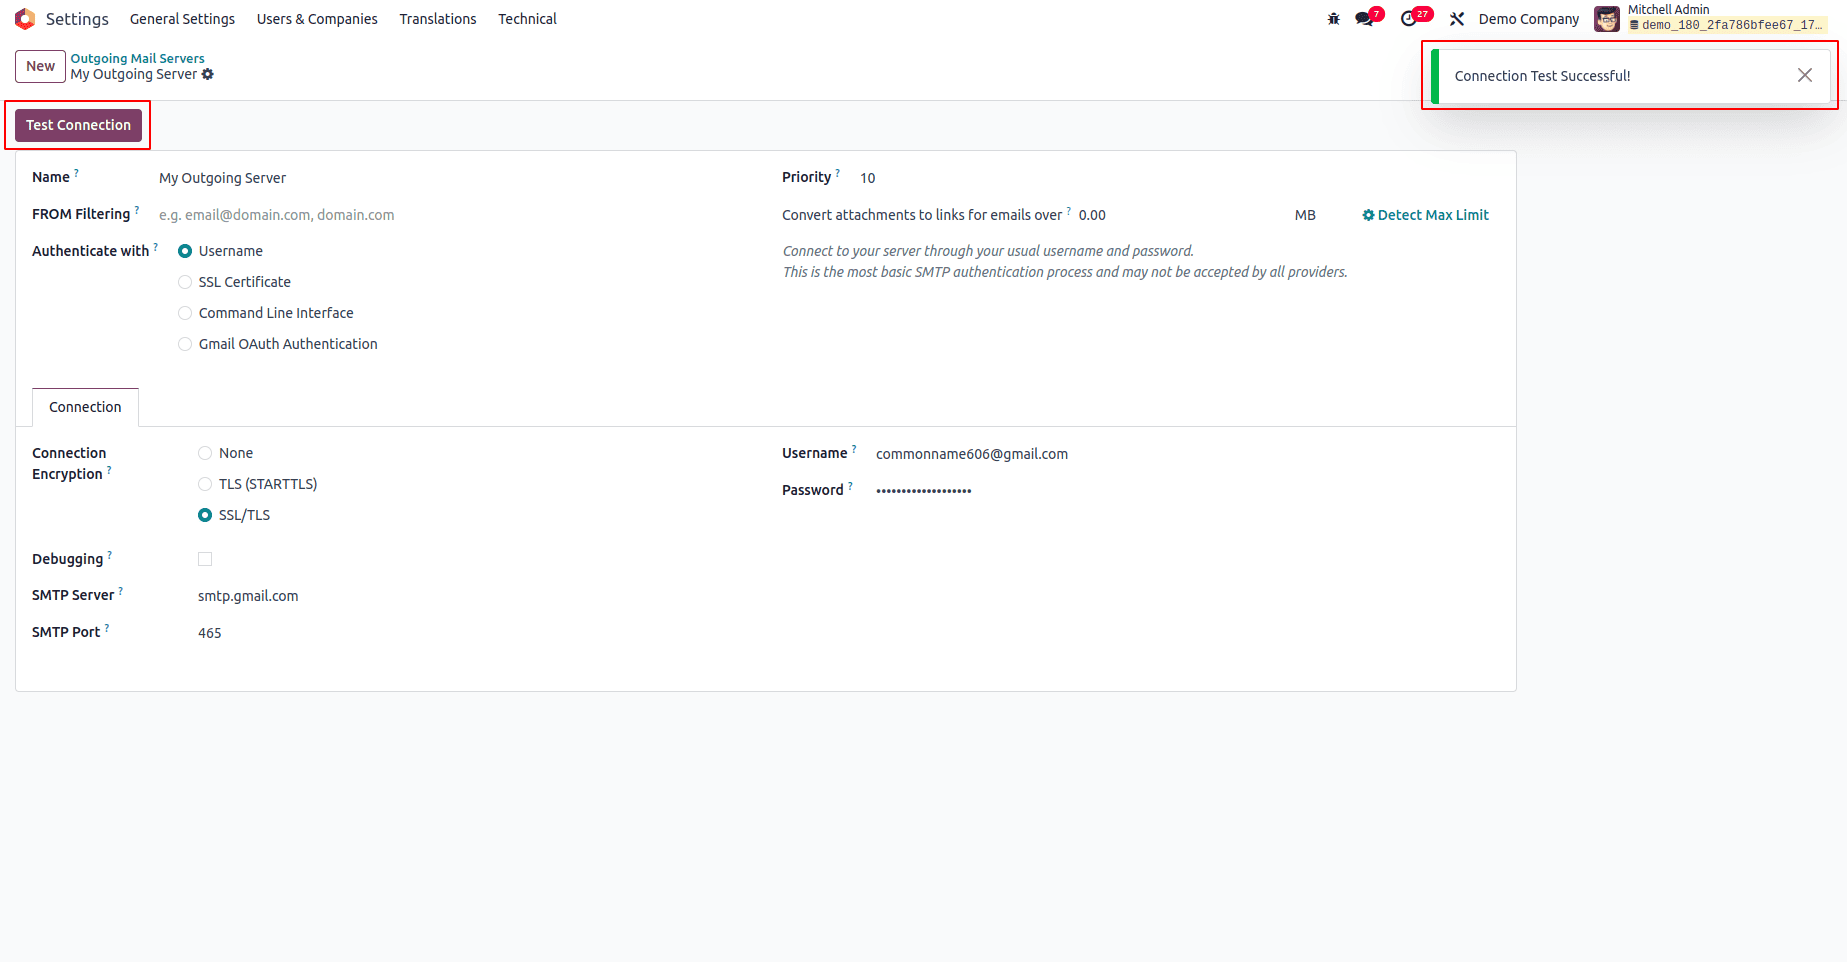
If all configuration parameters have been entered correctly and the connection is successful, Odoo will display a success message, unequivocally confirming that the connection to your outgoing mail server has been established without issues.
Should the test encounter a failure, it is critically important to thoroughly double-check all entered details: verify the SMTP server address, port number, username, and password for any typographical errors or inaccuracies. Furthermore, ensure that any necessary email account security settings, such as enabling "Allow less secure apps" (if applicable for older setups) or generating "App passwords" for accounts with two-factor authentication, are correctly configured within your email provider's account settings. Resolving these common issues typically leads to a successful connection.
Step 3: Configuring Incoming Mail Servers
Incoming mail servers are indispensable for enabling Odoo to automatically receive and process emails. This functionality is pivotal as it allows the platform to fetch incoming messages from designated mailboxes and, based on predefined rules, create corresponding records in various Odoo models. This capability significantly automates crucial business workflows, such as converting customer emails into new sales leads or support tickets.
Access Incoming Mail Server Settings
- Navigate to the "Settings" menu, then proceed to "Technical," and within the "Email" section, select "Incoming Mail Servers."
- Click the "New" button to begin the process of adding a new incoming mail server configuration to your Odoo instance.
Fill in Incoming Mail Server Details
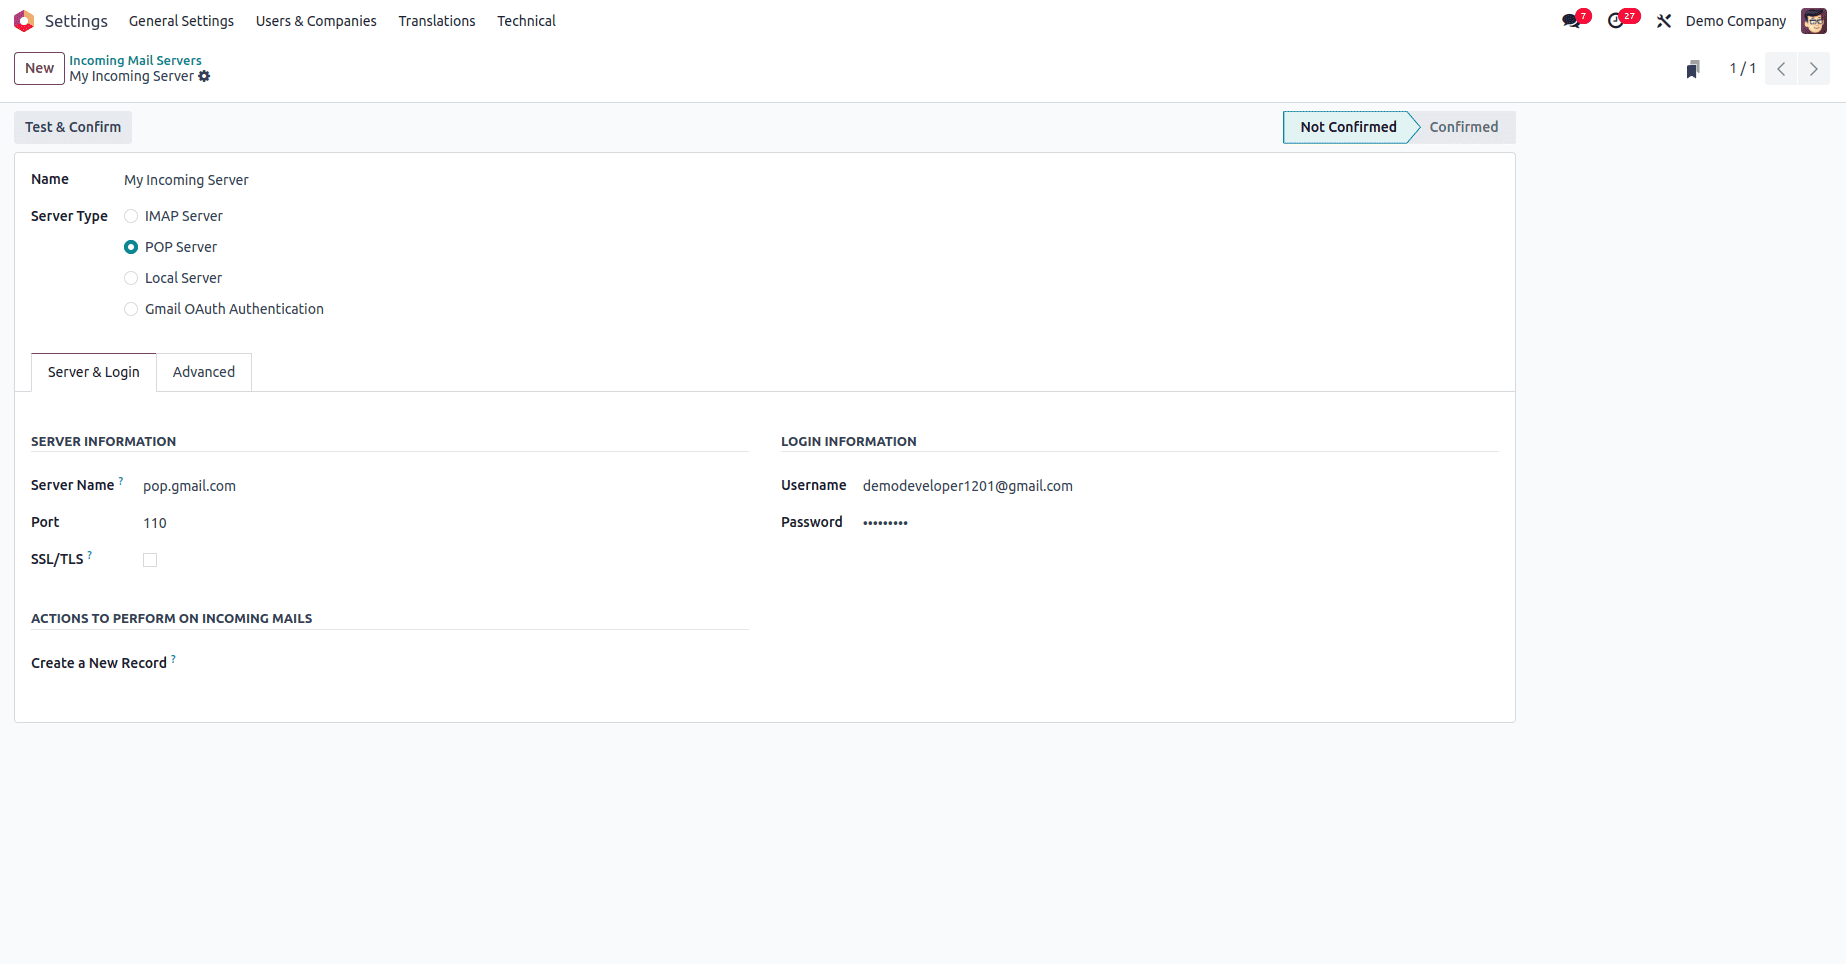
In the incoming mail server form view, complete the following fields with accurate and precise information to ensure proper functioning:
- Server Name: Enter the email server address. This will vary depending on whether you choose to use the POP3 or IMAP protocol:
- For Gmail POP3:
pop.gmail.com - For Gmail IMAP:
imap.gmail.com - For Outlook:
outlook.office365.com - It is always recommended to refer to your specific email provider's documentation for the most accurate and up-to-date server details.
- For Gmail POP3:
- Port: Specify the appropriate port number for the email protocol you are utilizing (e.g.,
995for POP3 with SSL, or993for IMAP with SSL). - SSL/TLS: Enable this option by checking the box to ensure secure and encrypted email communication between your Odoo instance and the designated mail server. This is a critical security measure.
- Username: Enter your full email address (e.g.,
user@example.com). This is the specific email account Odoo will use to fetch and process incoming emails. - Password: Provide the corresponding password for the email account specified in the username field. Similar to outgoing servers, an app-specific password may be required if two-factor authentication is enabled on your email account.
Actions to Perform on Incoming Mails
Odoo offers powerful automation capabilities by allowing you to define specific actions that should be performed whenever an email is received by the configured incoming mail server. In the Actions to Perform on Incoming Mails section:
- Create a Record in a Model: Select the specific Odoo model where incoming emails should be processed and converted into new records. This enables smart automation for various business processes. Common and highly beneficial examples include:
- Leads: Automatically create new CRM leads from incoming inquiries or contact form submissions, helping your sales team follow up promptly and efficiently.
- Helpdesk Tickets: Generate support tickets directly within your helpdesk module from customer emails, ensuring that customer issues are logged, tracked, and addressed systematically and without delay.
- Other relevant models can also be selected and configured depending on your unique business requirements and workflows.
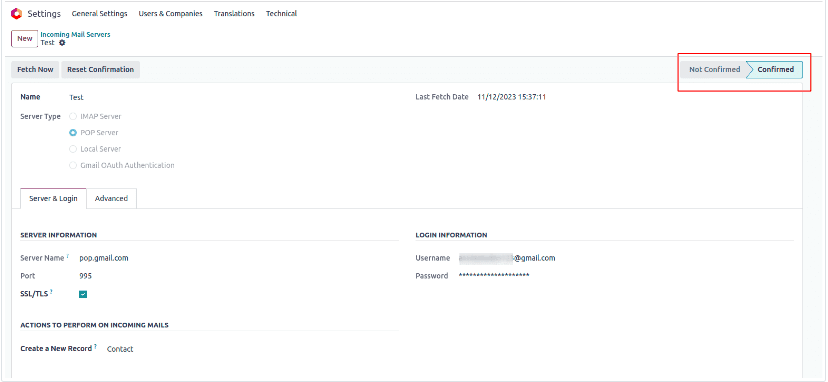
Test & Confirm the Configuration
- Click the Test & Confirm button, typically situated in the top-right corner of the form view, to rigorously verify your incoming mail server settings and ensure connectivity.

- If the connection is successful and all parameters are correctly entered, Odoo will update the server's status. The status will change from NOT CONFIRMED to CONFIRMED, providing a clear indication that your incoming mail server is fully operational and ready to fetch emails.
Step 4: Monitoring and Troubleshooting Email Communication
After successfully configuring both outgoing and incoming mail servers in Odoo 18, it is important to establish practices for regularly monitoring their performance and to be prepared to troubleshoot any issues that may arise. This proactive approach is vital for ensuring continuous and efficient email integration within your Odoo environment, which is crucial for business operations.
Effective monitoring involves periodically checking Odoo's mail queues and system logs to confirm that emails are being sent and received precisely as expected. Odoo often provides detailed technical logs that can be invaluable in diagnosing issues such as delivery failures, unreceived emails, or authentication problems. Common troubleshooting steps include verifying server credentials, checking network firewall restrictions that might block mail ports, and ensuring there are no service interruptions with your email provider.
By diligently following this comprehensive guide, you can confidently configure both outgoing and incoming mail servers in Odoo 18. This unlocks powerful email integration features that significantly boost communication efficiency, enhance overall organizational productivity, and support secure and streamlined business operations within your organization, making Odoo a central hub for your email-driven workflows.
