 (1).svg)
 (1).png)


 (1).svg)
.svg)
Understanding Website Staging in Plesk
Website staging within Plesk involves creating a precise duplicate of your active website. This duplicate serves as a dedicated environment for testing changes and updates before they are made publicly accessible. This isolated setup provides a secure space where you can safely experiment with new features, design alterations, or underlying code modifications without any risk of disrupting your live, production site.
Plesk is equipped with integrated tools designed to streamline this staging process. These tools facilitate the effortless copying of website files, databases, and configuration settings to a designated staging area. The result is a controlled testing ground where developers and site administrators can thoroughly identify and resolve potential issues or conflicts before they could impact the functionality or user experience of the live website and its visitors. Essentially, a staging environment acts as a crucial dress rehearsal, ensuring everything is perfect before the main performance.
Setting Up Your Website Staging Environment
To establish your staging environment, you can utilize your existing Plesk webspace by creating either a new domain or a subdomain. For example, if your primary domain is yourwebsite.com, you might create a subdomain such as staging.yourwebsite.com specifically for testing purposes. Detailed instructions for creating domains or subdomains in Plesk can typically be found within your hosting provider's documentation or knowledge base.
Copying Your Website Files and Configuration
Once your staging domain or subdomain is successfully set up, the next critical step is to populate it with the contents of your production environment. Follow these precise steps to ensure that all necessary website files, databases, and essential settings are accurately copied to your staging area.
- Log in to your Plesk panel using the administrative credentials provided by your web hosting provider.
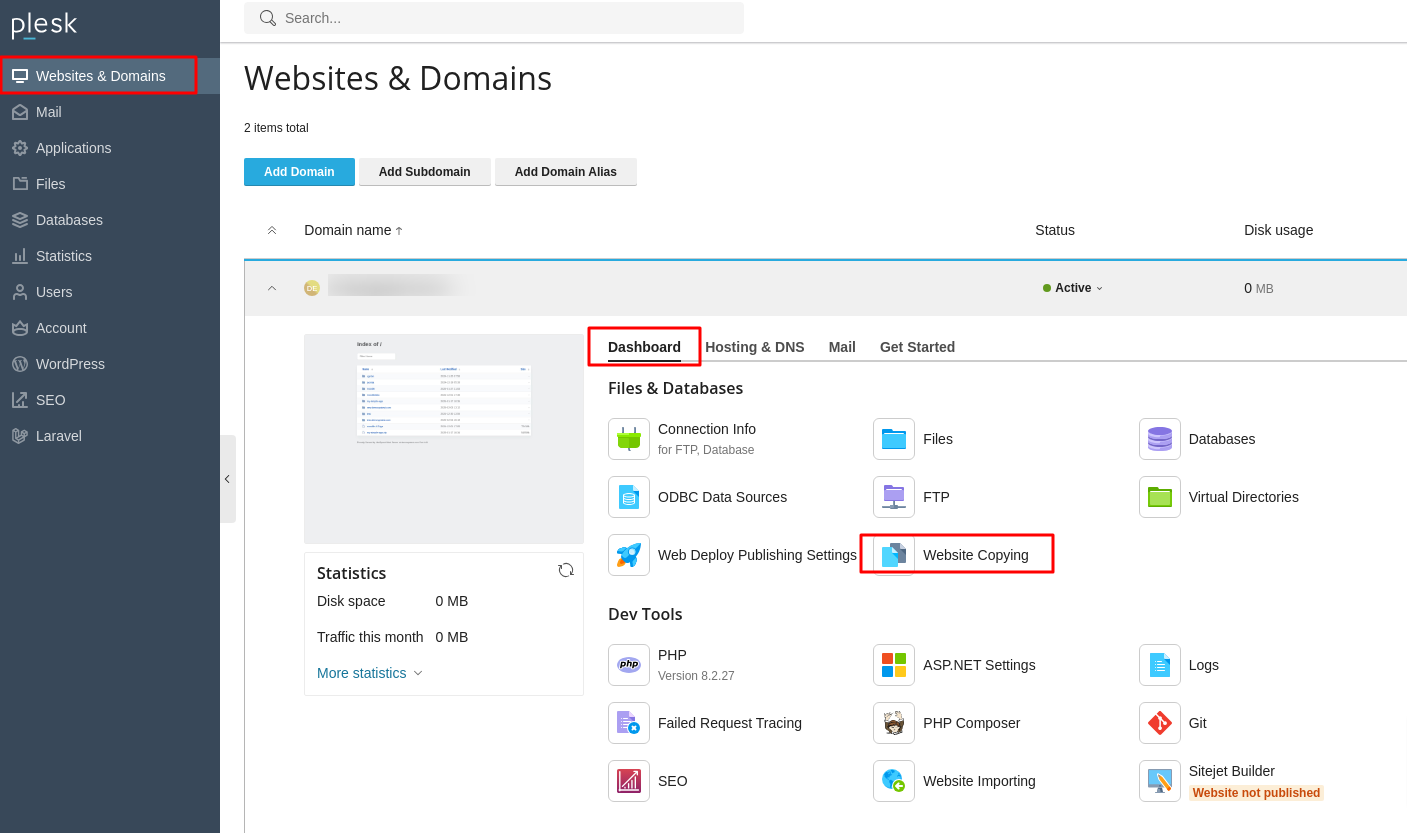
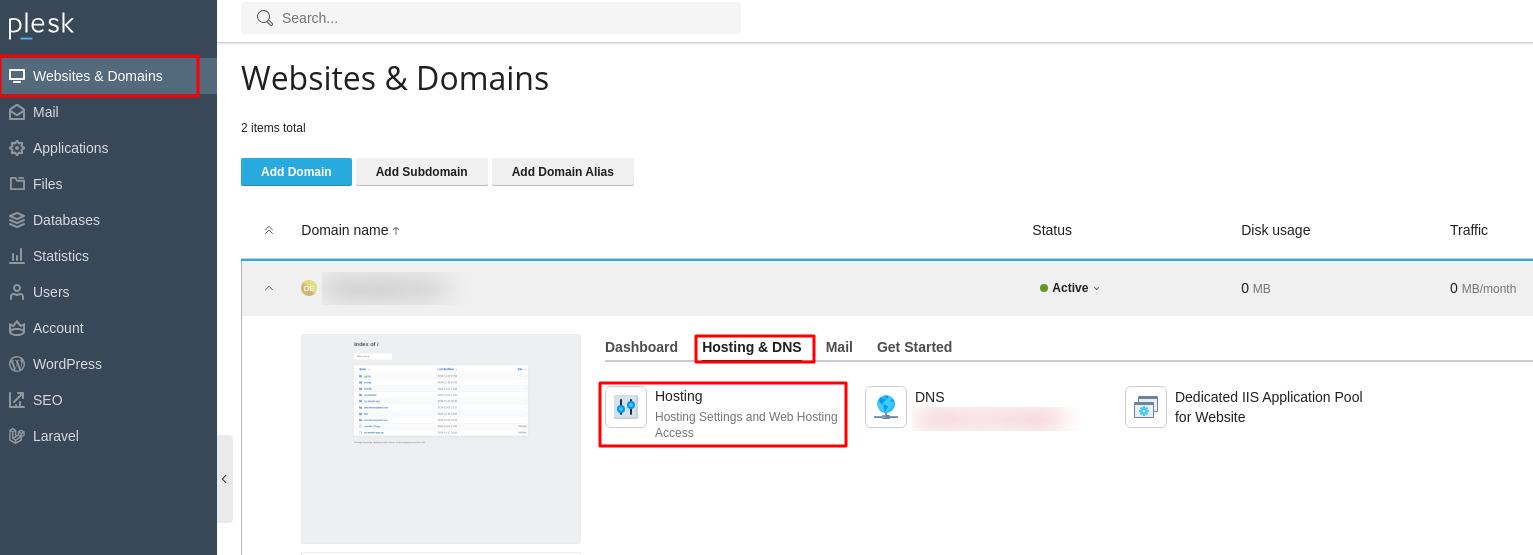
- Navigate to the Websites & Domains section, typically found in the left sidebar.
- On the subsequent interface, locate the specific website you intend to copy. Click on the Website Copying option associated with that website.
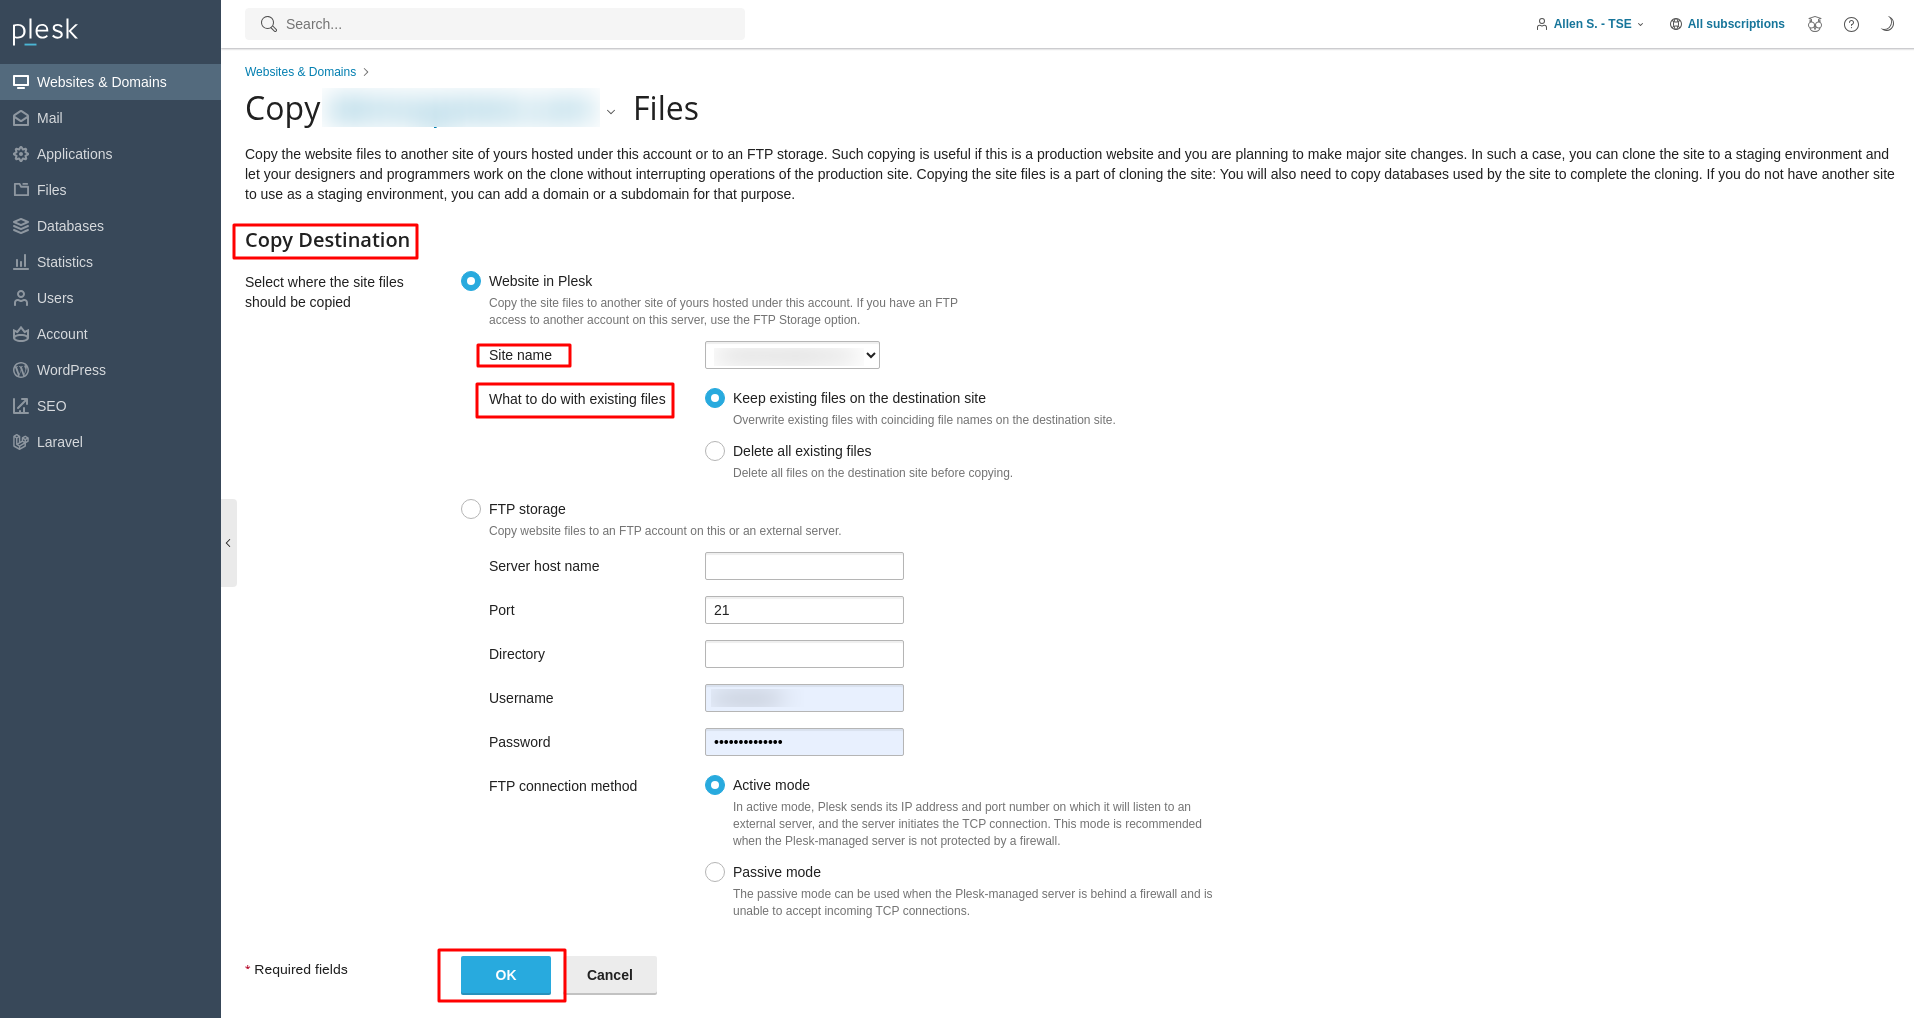
- The "Copy Files" page will then open, presenting various options for the copying process.
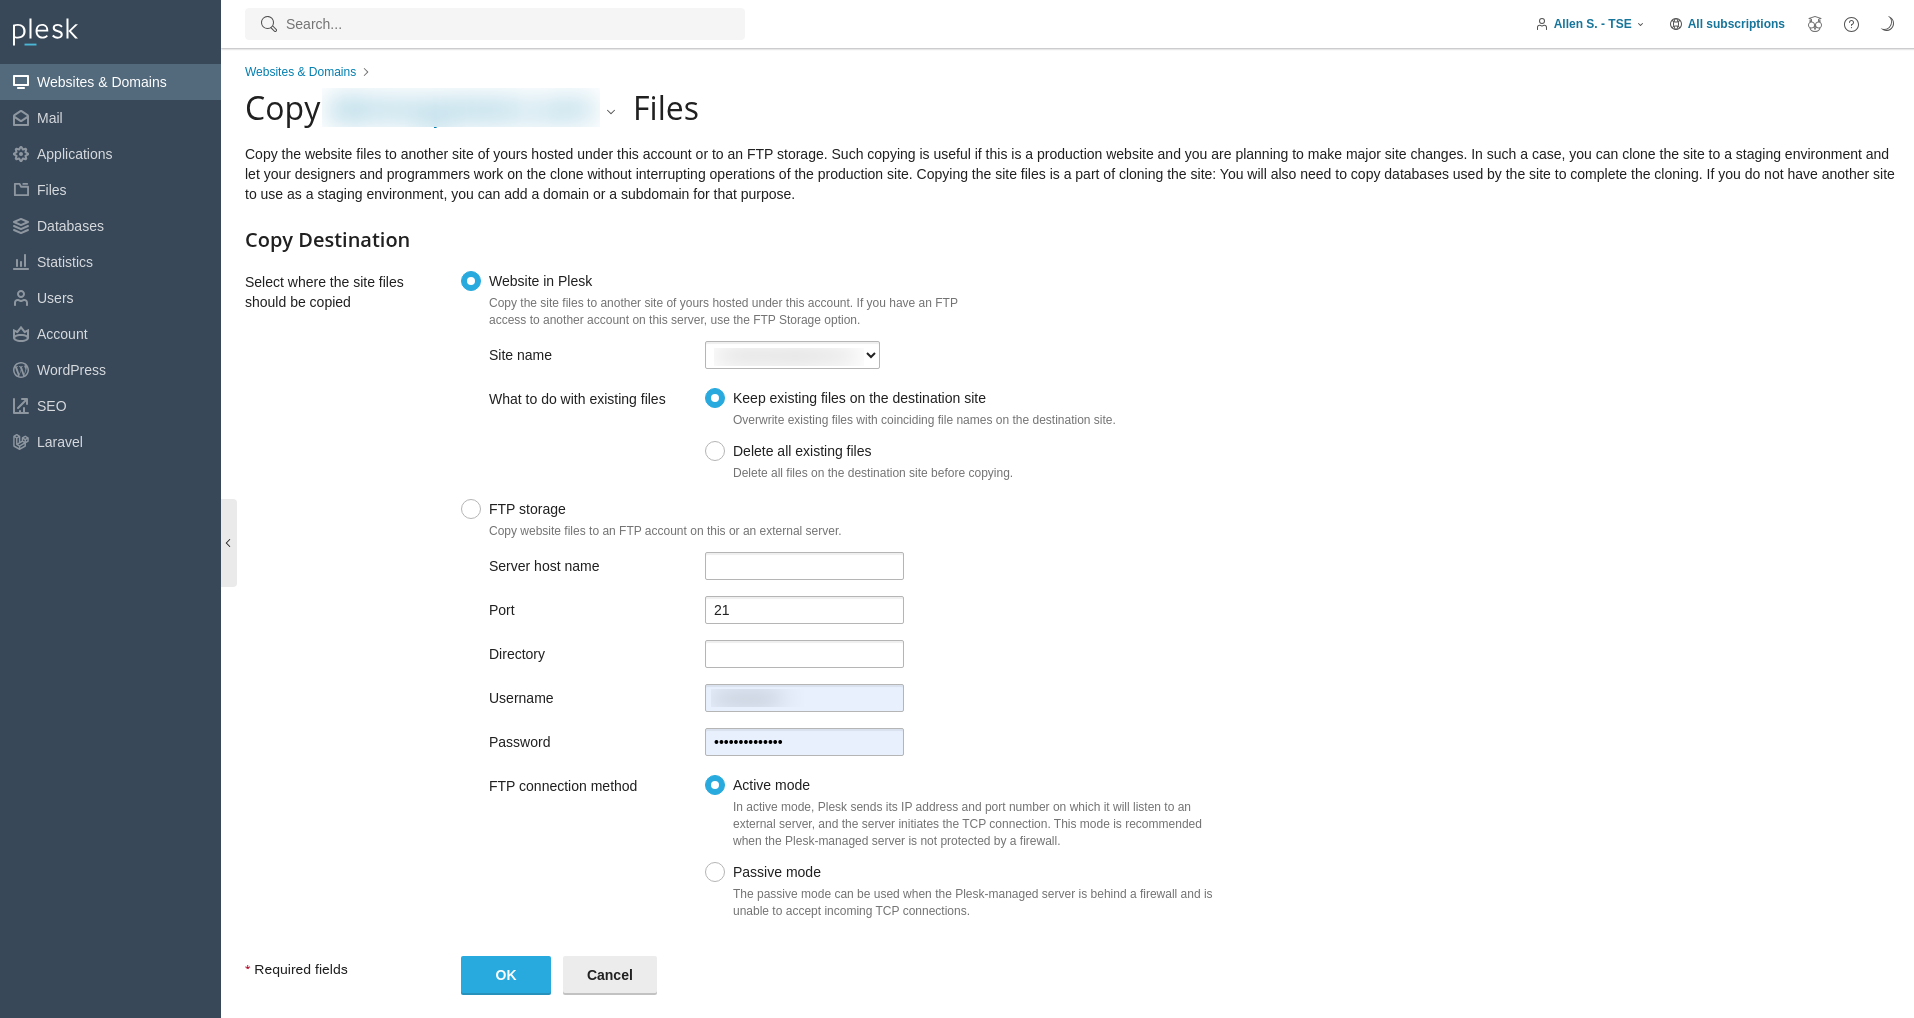
- Under the section labeled Copy Destination, select Website in Plesk.
- From the Site Name dropdown menu, carefully choose the previously created destination domain or subdomain for your staging environment.
- In the What to do with existing files section, specify your preferred action regarding any files that might already exist on the destination domain. It is often recommended to overwrite existing files to ensure a complete and accurate copy of your production site.
- Click OK to initiate the process of copying your site to the chosen destination domain.
Copying Your Website Databases
For websites that rely on one or more databases, it is equally important to copy these databases to your staging environment to ensure all functionalities are replicated accurately. Follow these steps to duplicate your databases:
- Access your Plesk panel once again, using your hosting provider's credentials.
- Click on the Databases option, usually located in the left sidebar.
- Identify the specific database you wish to copy. Click on the Copy icon or link associated with that database.
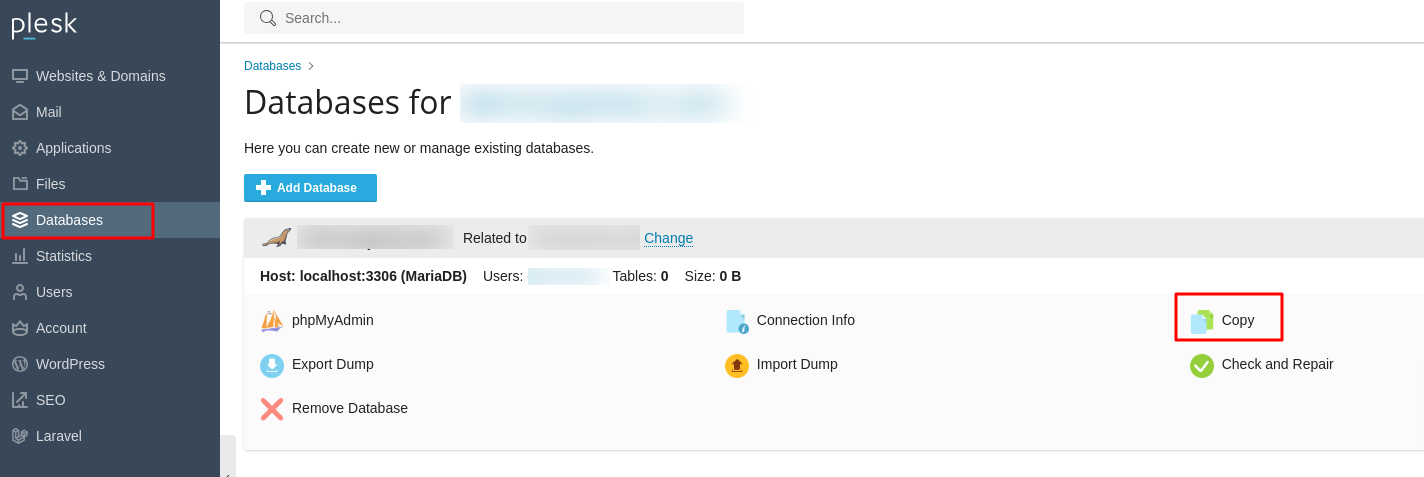
- The "Copy Files" page for databases will appear, displaying various database copying parameters.
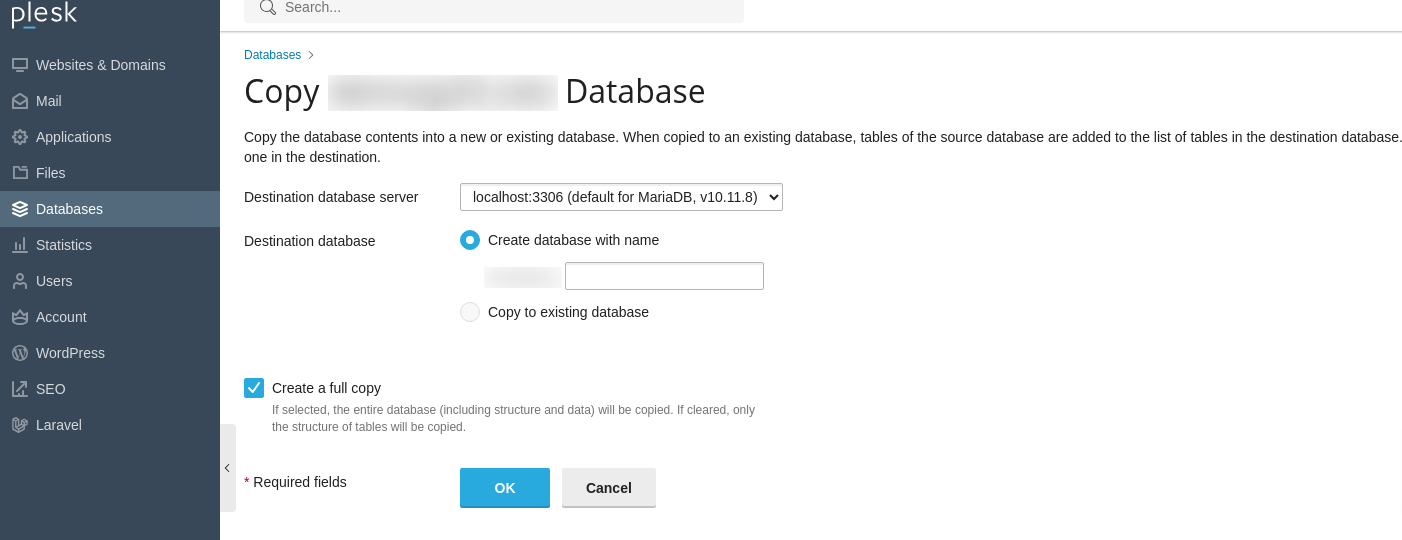
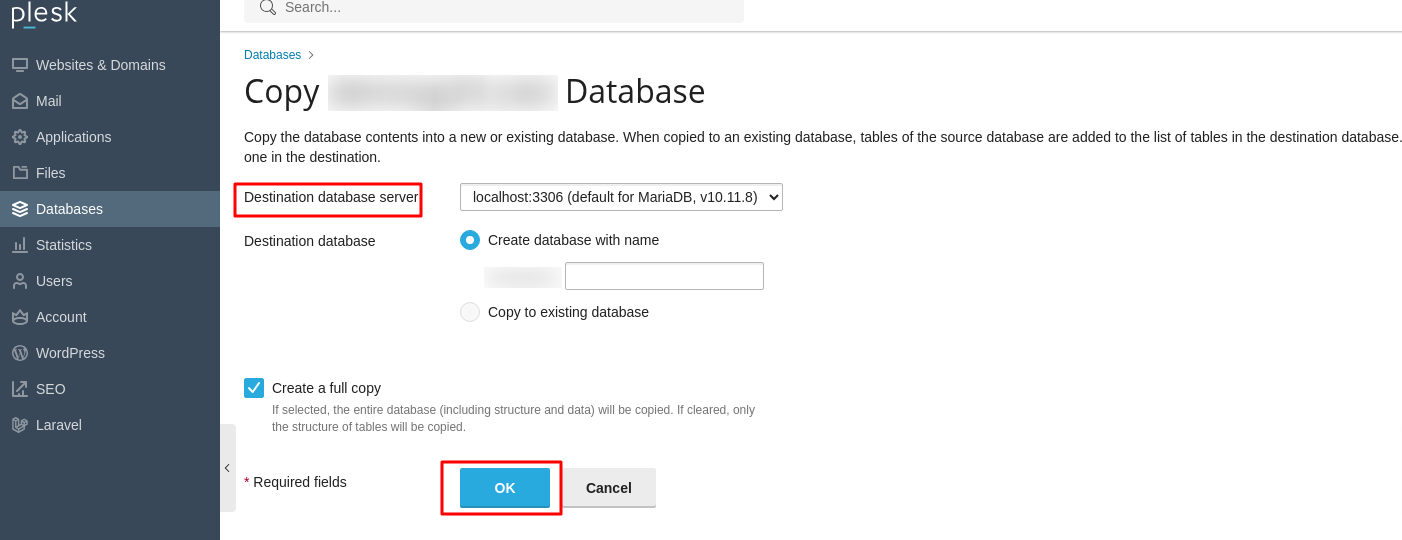
- In the Destination database server dropdown menu, select localhost:3306 or the appropriate database server for your staging environment.
- Under the Destination database section, choose the option Create database with name and then enter a unique and descriptive name for your new staging database.
- Ensure the Create a full copy checkbox is selected to guarantee all data is transferred.
- Click OK to proceed with copying the database using Plesk's integrated tools.
Important Note: After the database copying process is complete, it is crucial to update your website's scripts and configuration files within the staging environment. These updates must direct your staging site to connect to the newly copied staging database, rather than the original live database. This often involves adjusting connection strings to reflect the new database name, username, and password.
Thoroughly Testing Changes in the Staging Environment
With your website files and databases successfully replicated in the staging environment, you are now equipped to make and test any desired modifications without impacting your live production site. This phase is critical for ensuring the stability and functionality of your updates.
- Proceed to update code, develop and test new features, or modify content as required. This includes making significant design changes or implementing new plugins and extensions.
- Crucially, always verify that any database connection settings within your website's scripts and configuration files in the staging environment are correctly pointing to the staging database. Misconfigurations here could lead to unintended data changes on your live site.
- Perform comprehensive tests for various scenarios, including user registration, form submissions, e-commerce transactions, and general navigation to ensure everything functions as expected.
Publishing Your Staged Changes to the Live Site
Once you have meticulously tested all changes in the staging environment and are completely satisfied with the updates, the final step is to publish these changes to your live website. This process effectively swaps your staging environment with your production one, making the updated content and features accessible to your audience.
- Log back into your Plesk control panel.
- Navigate to the Websites & Domains section, located in the left sidebar.
- Click on Hosting DNS, and then select Hosting from the subsequent options.
- In the Document Root field, precisely enter the directory path for your staging site environment. This action effectively tells Plesk to now serve the content from your staging directory as the live site.

- Click OK to confirm and publish your thoroughly tested changes to go live.
Establishing and utilizing a staging environment in Plesk is a straightforward yet profoundly valuable practice for any website owner or administrator. By diligently following the steps outlined in this comprehensive guide, you can confidently create a secure, isolated space to experiment with and refine updates, integrate new features, and implement significant design changes without ever jeopardizing the stability, performance, or overall user experience of your active, live website. Ultimately, a well-managed staging environment within Plesk significantly minimizes the inherent risks associated with making website modifications, thereby helping you consistently maintain a robust, secure, and impeccably functioning online presence.
