 (1).svg)
 (1).png)


 (1).svg)
.svg)
Website staging is an essential practice for web developers and administrators who need to implement and test changes without affecting the live version of their site. This guide offers a detailed, step-by-step walkthrough of how to leverage Plesk to establish an effective staging environment. We will meticulously cover the entire process of duplicating your website – encompassing all files, databases, and critical configurations – thereby empowering you to thoroughly test updates, new features, and design modifications in a secure, isolated, and controlled setting.
Understanding Website Staging in Plesk
Website staging within Plesk involves the creation of a precise duplicate of your active website. This duplicate serves as a sandbox where you can rigorously test modifications, updates, and new functionalities before they are deployed to the public-facing version of your site. This isolated environment provides a secure space to experiment with new features, implement design changes, or integrate new code without any risk of disrupting your live website's performance or user experience.
Plesk provides integrated tools specifically designed to streamline the staging process. These tools facilitate the effortless copying of your website's files, databases, and various settings into a dedicated staging area. This dedicated space functions as a controlled testing ground, enabling you to proactively identify and resolve any potential issues or conflicts. By doing so, you can ensure that all updates are thoroughly vetted and flawless before they ever reach your live audience, safeguarding your site's stability and reliability. It's akin to conducting a full dress rehearsal before the grand opening, ensuring every detail is perfect.
Setting Up the Website Staging Environment
To begin, you will establish your staging environment within your existing Plesk webspace. This is typically achieved by either creating a new domain or, more commonly, a subdomain. For example, if your primary website resides at example.com, you might configure a subdomain such as staging.example.com or dev.example.com specifically for testing. This approach keeps your staging site logically separated yet easily accessible.
If you require detailed guidance on how to create a new domain or subdomain within your Plesk control panel, comprehensive documentation is available to assist you through that initial setup phase.
Copying Your Website
With your staging environment prepared, the next crucial step is to replicate your live production website onto it. This ensures that your staging site is an exact mirror of your current live site, allowing for accurate testing. Follow these instructions carefully to ensure all website files, configurations, and associated settings are copied correctly.
- Begin by logging into your Plesk panel using the administrative credentials provided by your web hosting provider.
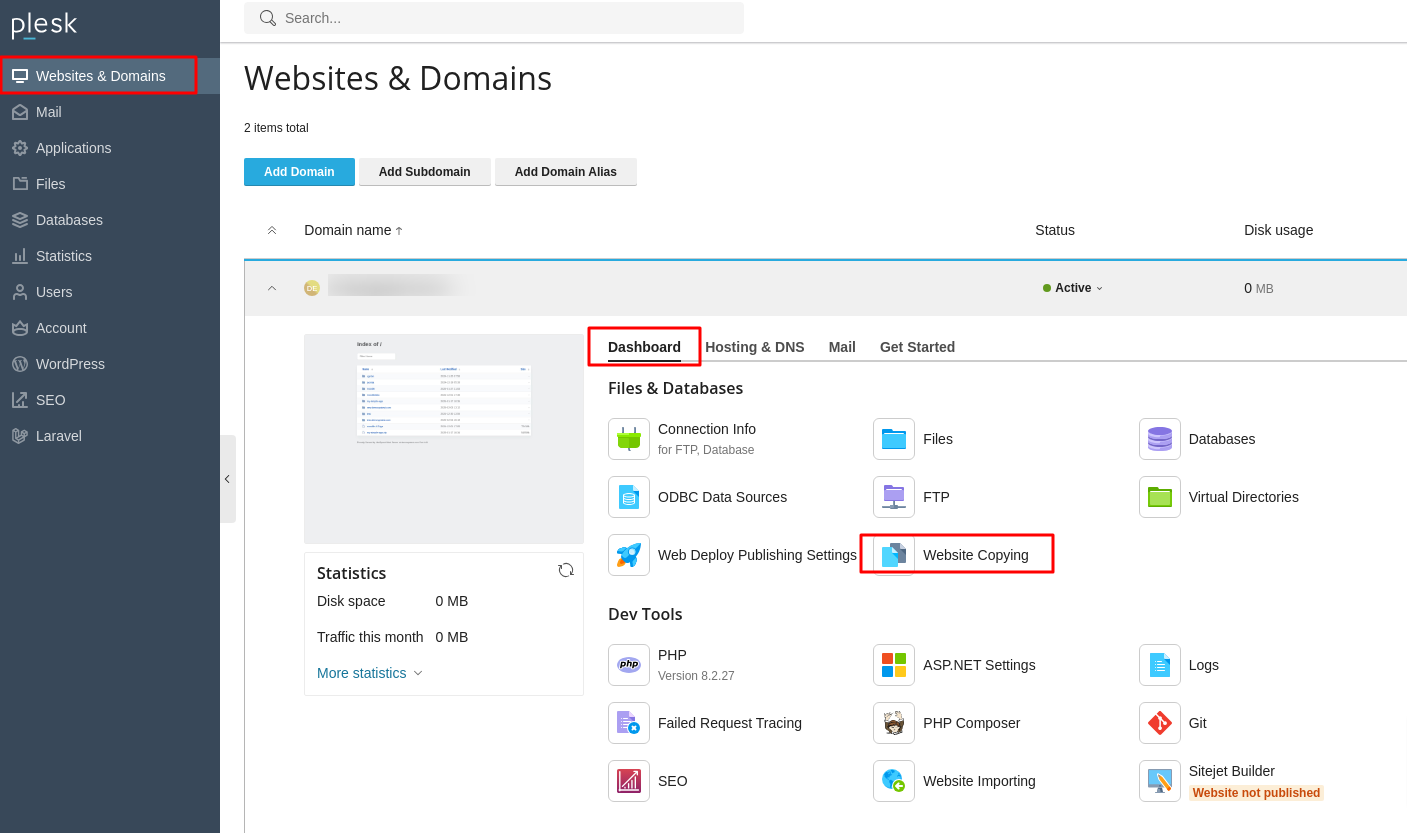
- Navigate to the Websites & Domains section, located in the left sidebar of the Plesk interface.
- On the subsequent page, you will observe an interface displaying your hosted websites. Identify the specific website you wish to duplicate and proceed by clicking on the Website Copying option.
- The system will then present the "Copy Files" page.
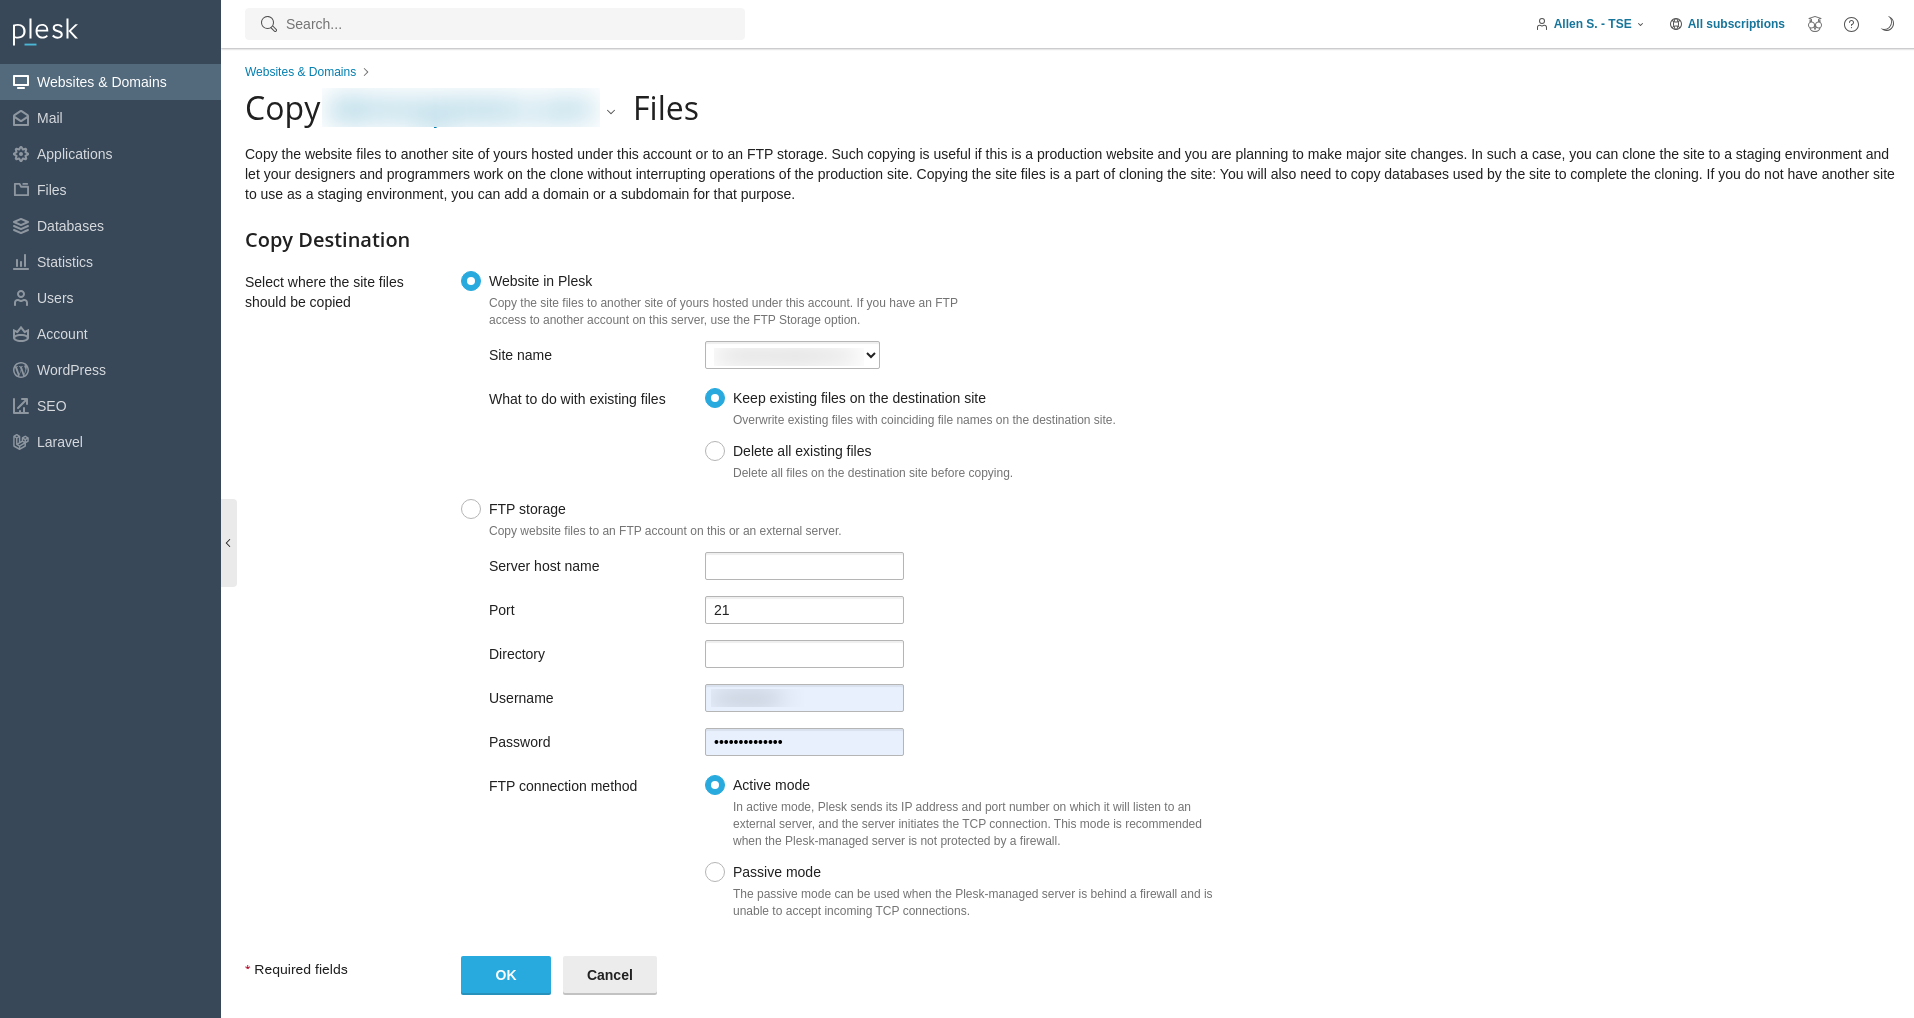
- Within the Copy Destination area, ensure you select the option Website in Plesk.
- From the Site Name dropdown menu, carefully choose the previously created destination domain or subdomain for your staging environment.
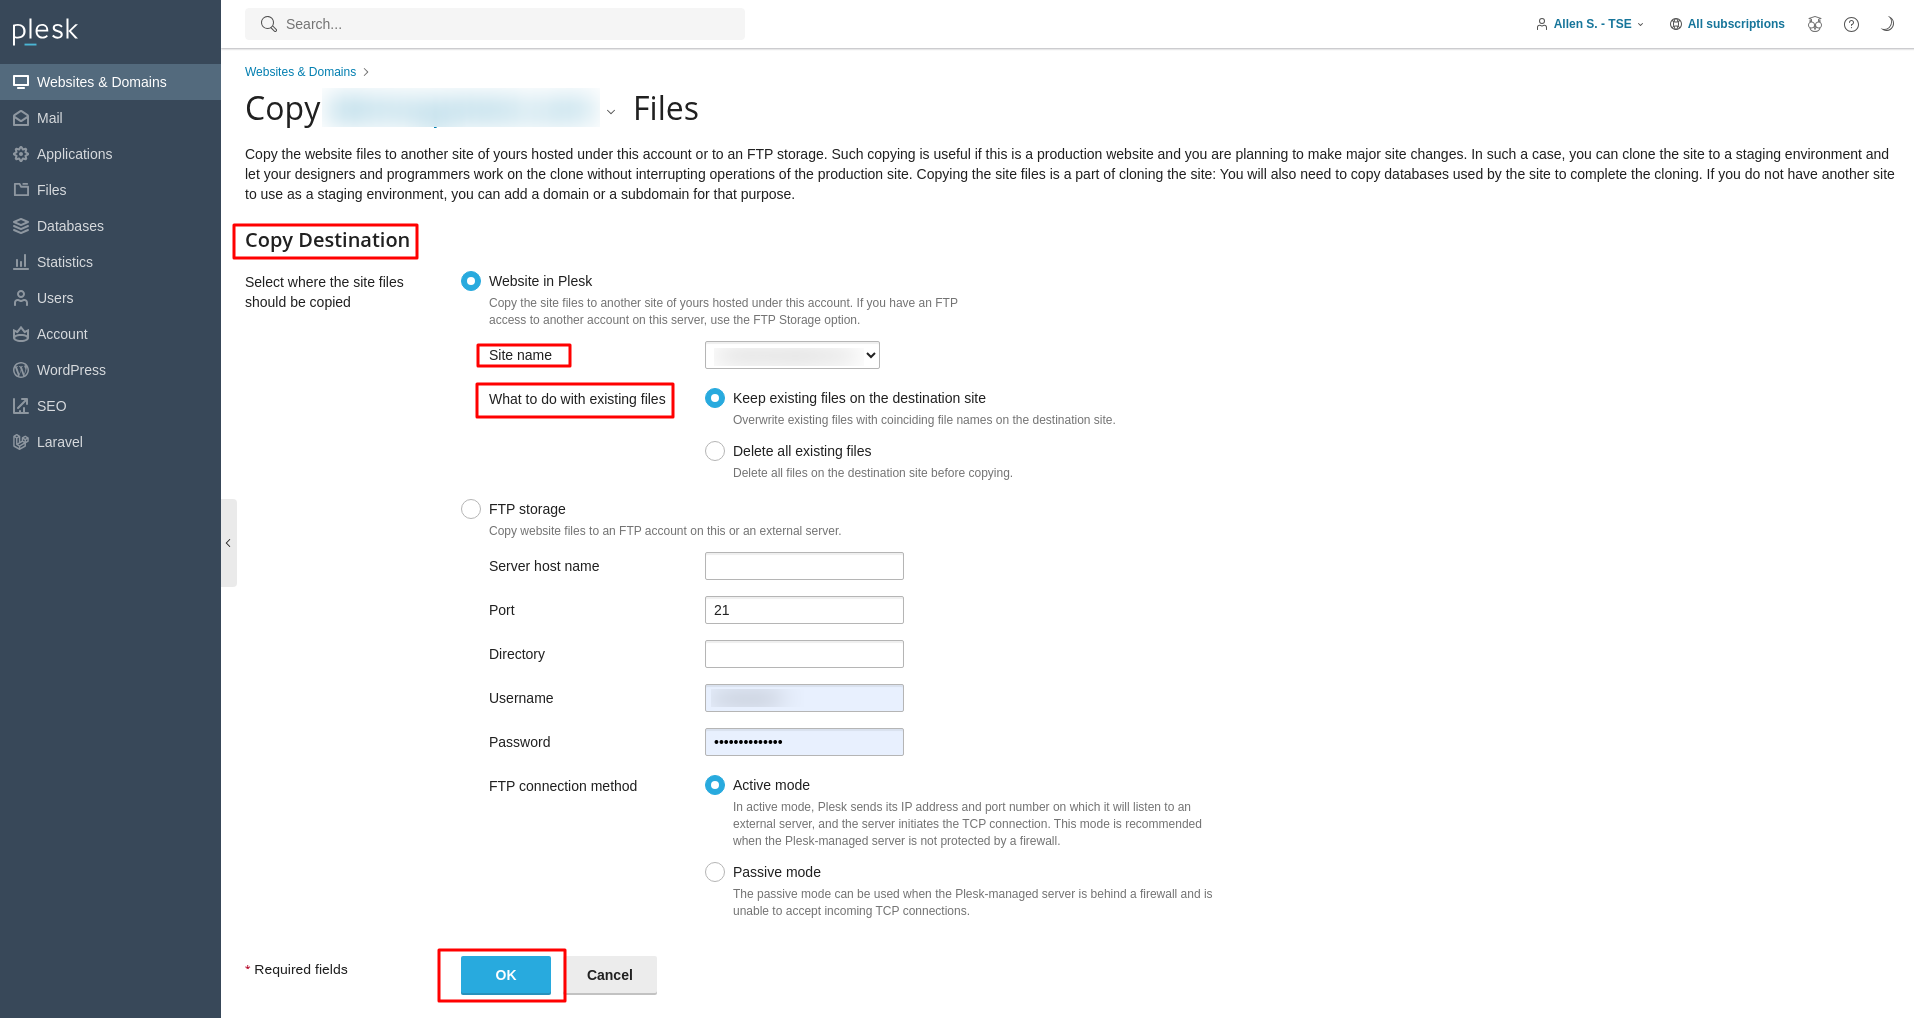
- In the section labeled What to do with existing files, specify your preferred action regarding any files that might already exist in the destination domain's directory. Options typically include overwriting or skipping files.
- Finally, click OK to initiate the website copying process to your designated staging domain.
Copying Databases
For most dynamic websites, copying the database (or databases) is as critical as copying the files. This step ensures that your staging environment has access to the same data as your live site, which is essential for accurate testing. Follow these steps to duplicate your database:
- Log into your Plesk panel once again using your hosting provider's credentials.
- From the left sidebar menu, click on Databases. This will display a list of all databases associated with your hosting account.
- Locate the specific database you intend to copy for your staging site. Once found, click on the Copy icon or link adjacent to it.
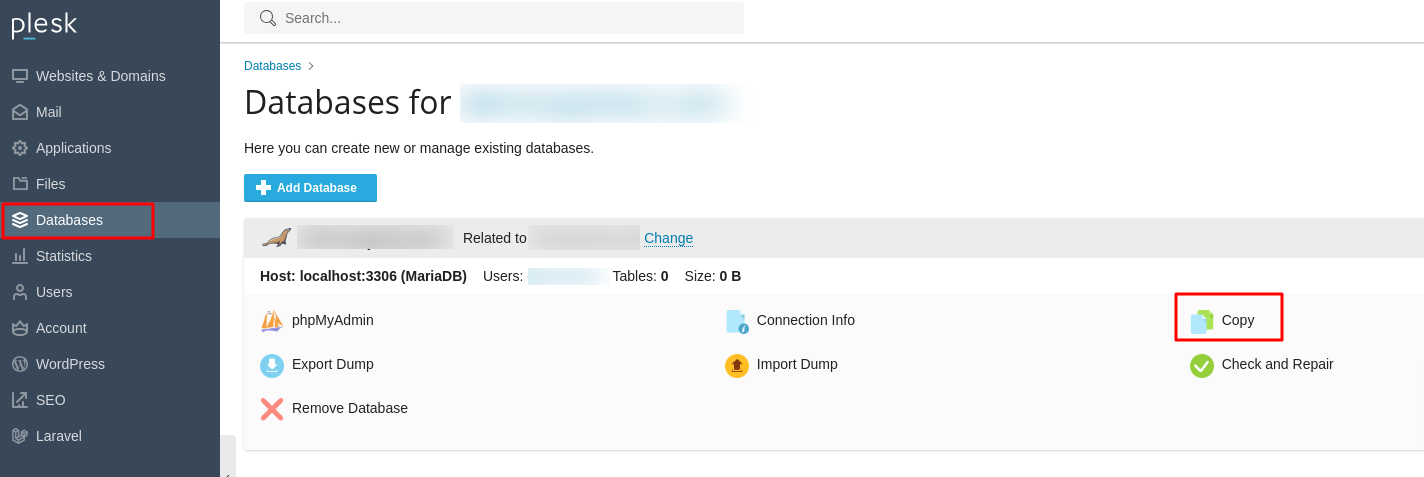
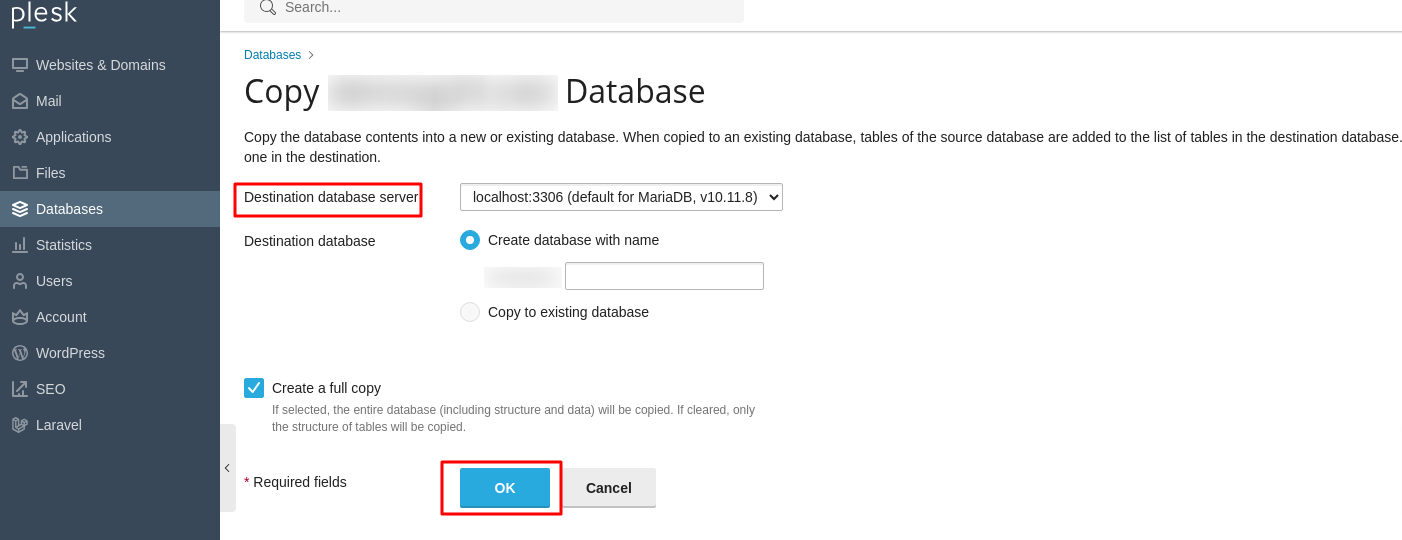
- The "Copy Files" page, specifically tailored for database operations, will then appear.
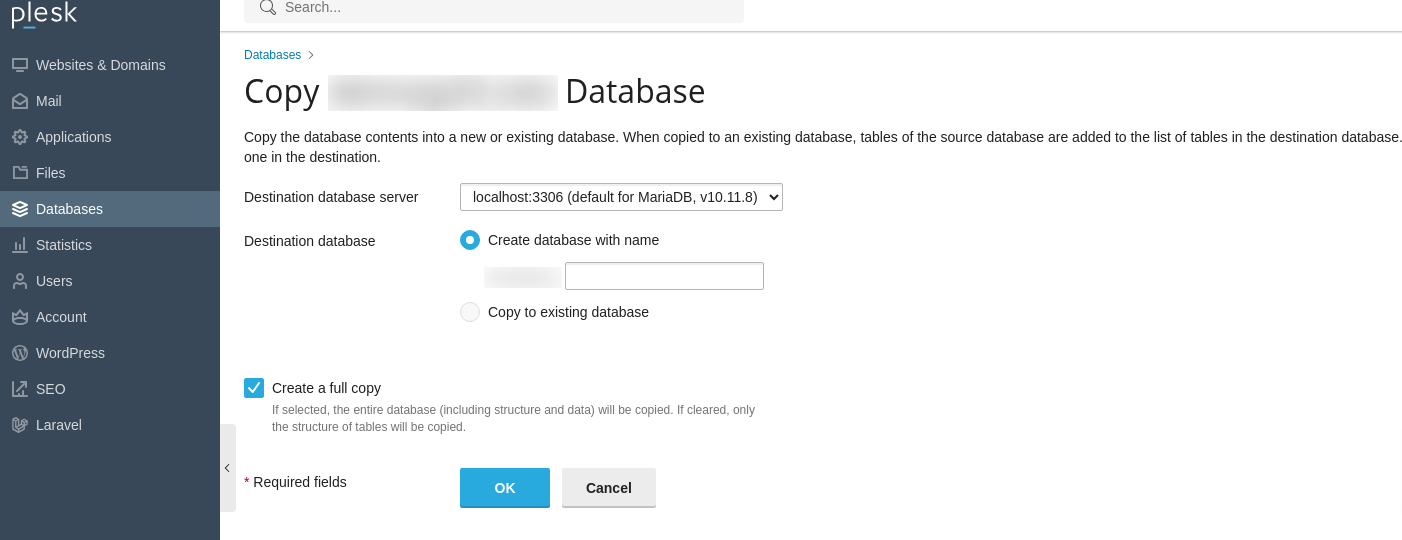
- In the Destination database server dropdown menu, select localhost:3306. This typically refers to the local MySQL server within your hosting environment.
- Within the Destination database section, opt for Create database with name and then provide a unique, descriptive name for your new staging database.
- Crucially, ensure that the Create a full copy checkbox is marked to replicate all data and structure.
- Click OK to initiate the database copying process through Plesk.
Important Note: After the database duplication is successfully completed, it is imperative to update your website's configuration files or scripts within the staging environment. These scripts must be modified to connect to the newly copied database rather than the live production database. This often involves adjusting parameters such as the database name, username, and password in your site's connection string or configuration files (e.g., wp-config.php for WordPress).
Testing Changes in Staging
With both your website files and databases successfully copied to the staging environment, you now possess a fully functional replica of your live site. This is where you can confidently implement and test all desired changes without any risk to your production website. This phase is critical for identifying and rectifying issues before they reach your users.
- Proceed to update your website's code, test the integration of new features, refine existing functionalities, or modify content as required.
- Double-check and confirm that all database connection settings within your staging site's scripts are correctly configured to point exclusively to the staging database, and not the live production database. This separation is fundamental to preventing unintended modifications on your live site.
- Thoroughly test all aspects of your site, including navigation, forms, e-commerce functionalities, and any interactive elements.
Publishing the Site
Once you have thoroughly tested all changes in your staging environment and are completely satisfied with the updates and their performance, you can proceed to publish these changes to your live website. This process effectively swaps your staging site into the live production slot.
- Log back into your Plesk control panel.
- Navigate to the Websites & Domains section from the left sidebar.
- Within your domain's management interface, locate and click on Hosting DNS, followed by clicking on Hosting. This will take you to the hosting settings for your domain.
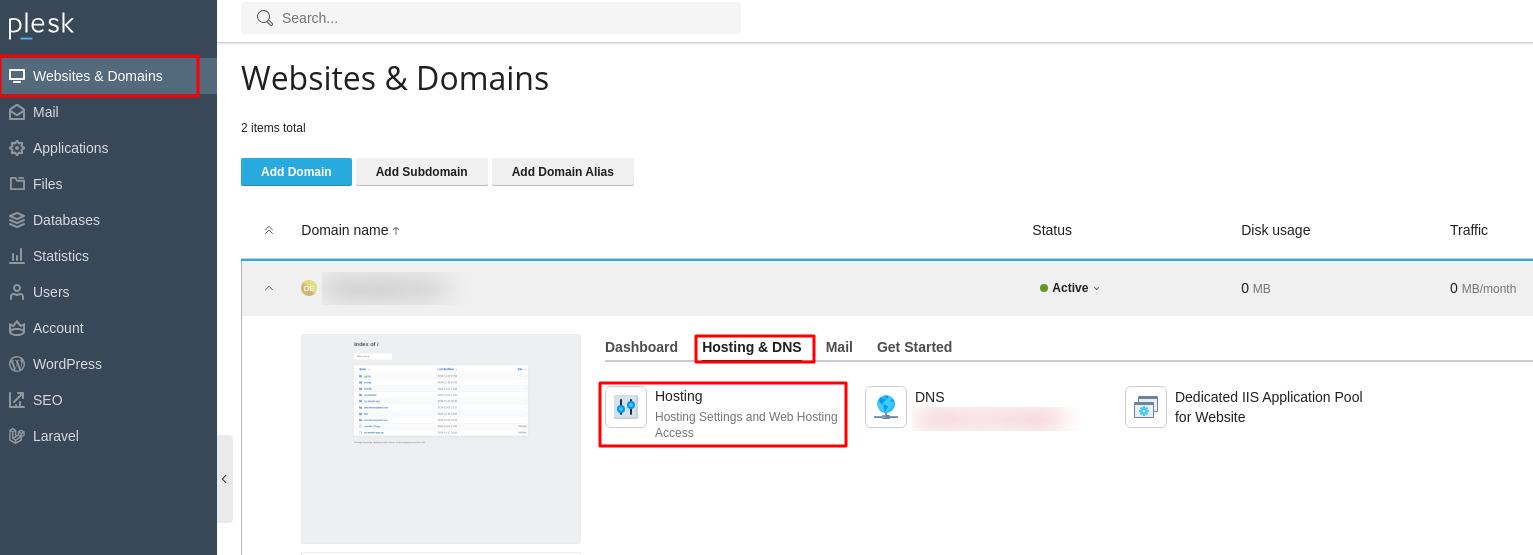
- In the Document Root field, carefully enter the directory path corresponding to your staging site environment. This action effectively points your main domain to the content of your staging site.

- Finally, click OK to apply these changes and publish your updated website content live.
Establishing a staging environment in Plesk, while a fundamental practice, is an incredibly valuable asset for any website owner, developer, or administrator. By meticulously following the step-by-step instructions detailed in this comprehensive guide, you can successfully create an entirely safe and isolated workspace. This environment empowers you to confidently experiment with significant updates, deploy innovative new features, and implement crucial design alterations without ever jeopardizing the stability, functionality, or the overall user experience of your live production website.
Ultimately, the strategic utilization of a Plesk staging environment dramatically mitigates the inherent risks associated with making changes to a live website. It provides an indispensable layer of protection, allowing for thorough vetting and refinement, thereby ensuring you can consistently maintain a robust, high-performing, and secure online presence for your audience.
