 (1).svg)
 (1).png)


 (1).svg)
.svg)
For any WordPress website, a staging environment is an invaluable tool, allowing you to thoroughly test new functionalities, updates, or design changes without posing any risk to your live site. This article provides a comprehensive guide on how to effortlessly create, manage, and seamlessly deploy a professional staging site with just a few clicks, ensuring your website remains stable and professional.
Key Benefits of a WordPress Staging Environment
- Error-free testing: Create an exact replica of your live site for secure development and testing.
- Simplified setup: Utilize the intuitive WordPress Toolkit within Plesk for quick and easy configuration.
- Seamless deployment: Safely transition validated changes from your staging site to your live website with the "Push to Live" feature.
- Secure collaboration: Provide a protected environment for team members to work without impacting the active site.
- Efficient resource management: Optimize server resources through targeted management of subdomains for testing purposes.
Understanding WordPress Staging Environments
A staging environment serves as a precise duplicate of your operational WordPress site. It offers a secure sandbox where you can implement modifications and test new features without disturbing your site's visitors or potentially affecting your search engine optimization (SEO) ranking. This capability is especially crucial when undertaking significant updates, integrating new plugins, or revamping themes.
By using a staging site, you can identify and resolve errors and conflicts proactively, long before they could manifest on your live website. This foresight helps prevent costly issues and frustration, particularly for e-commerce platforms like WooCommerce sites or dynamic editorial platforms with high traffic volumes. Ultimately, this approach guarantees uninterrupted operations and upholds professional quality assurance standards.
Dedicated staging systems also empower developers, designers, and content editors to collaborate productively without requiring direct access to the live production site. This ensures that ongoing operations remain stable and secure. Furthermore, extensive redesign projects or comprehensive plugin tests can be meticulously reviewed and perfected in peace before they are made visible to the public. Even for solo professionals, the benefits of enhanced security and a streamlined workflow are significant: always 'test first, then implement.'
Implementing a staging system can significantly professionalize your entire development and deployment workflow. It enables you to develop comprehensive test plans, anticipate and resolve potential conflicts using a structured checklist, and launch final changes with confidence at the push of a button. This not only increases your responsiveness to technical updates but also provides dedicated time to analyze common sources of error, leading to a more robust and reliable website.
Advantages of Utilizing the Plesk Staging Environment
Plesk includes a powerful WordPress Toolkit that greatly simplifies the entire process of setting up and managing a staging environment. This integrated solution eliminates the need for additional plugins or external server tools, allowing you to safely test various WordPress versions, themes, and plugins. All changes can be easily compared, managed within a single, unified interface, and seamlessly transferred to your live site when ready.
Compared to manual methods, which often involve numerous steps for cloning databases and files, Plesk offers significant time savings. This makes it an especially attractive and efficient alternative for frequent testers, web developers, and agencies. Even those new to website management can establish a fully functional staging site in a remarkably short amount of time.
The WordPress Toolkit also stands out with its clear and highly intuitive user interface. It provides a comprehensive overview of all your WordPress installations, enabling you to update themes and plugins, swap themes, and conduct security scans with just a few clicks. These integrated features empower you to work efficiently and close to the system without having to invest valuable time in exploring external tools or extensive tutorials. Additionally, Plesk supports advanced features such as the import of SSL certificates and the configuration of automatic security checks, further enhancing your website's integrity.

Essential Requirements for Your WordPress Staging Setup
Before embarking on your staging setup, a few fundamental prerequisites must be met. Primarily, you will need web hosting that includes Plesk. It is crucial to verify that your chosen hosting package provides ample storage space to accommodate a second, complete WordPress installation. Your primary WordPress website should also be fully operational and configured within your hosting environment.
Furthermore, you must have access to your Plesk interface. While optional, establishing a dedicated subdomain, such as staging.your-domain.com, is highly recommended. This practice ensures that your test site remains hidden from public visitors and is distinctly separated from your live production system. Remember, Plesk must be correctly installed for the WordPress Toolkit to be fully functional.
If your workflow involves managing multiple projects, confirm that your hosting package allocates sufficient resources for each additional staging environment you intend to create. For larger projects, which may involve extensive file libraries or numerous high-resolution images, consider upgrading to a hosting product that offers increased storage capacity and CPU performance. This proactive step guarantees the smooth and efficient operation of both your test and live systems. Moreover, a well-structured subdomain strategy can significantly enhance your ability to maintain a clear overview of all your projects.
In professional environments such as companies or agencies, it can also be highly beneficial to establish dedicated developer accounts with precisely defined access rights. This practice ensures that only authorized personnel can access the staging environment and participate in the development and testing processes, thereby maintaining security and accountability.
Step-by-Step Staging Setup with the WordPress Toolkit
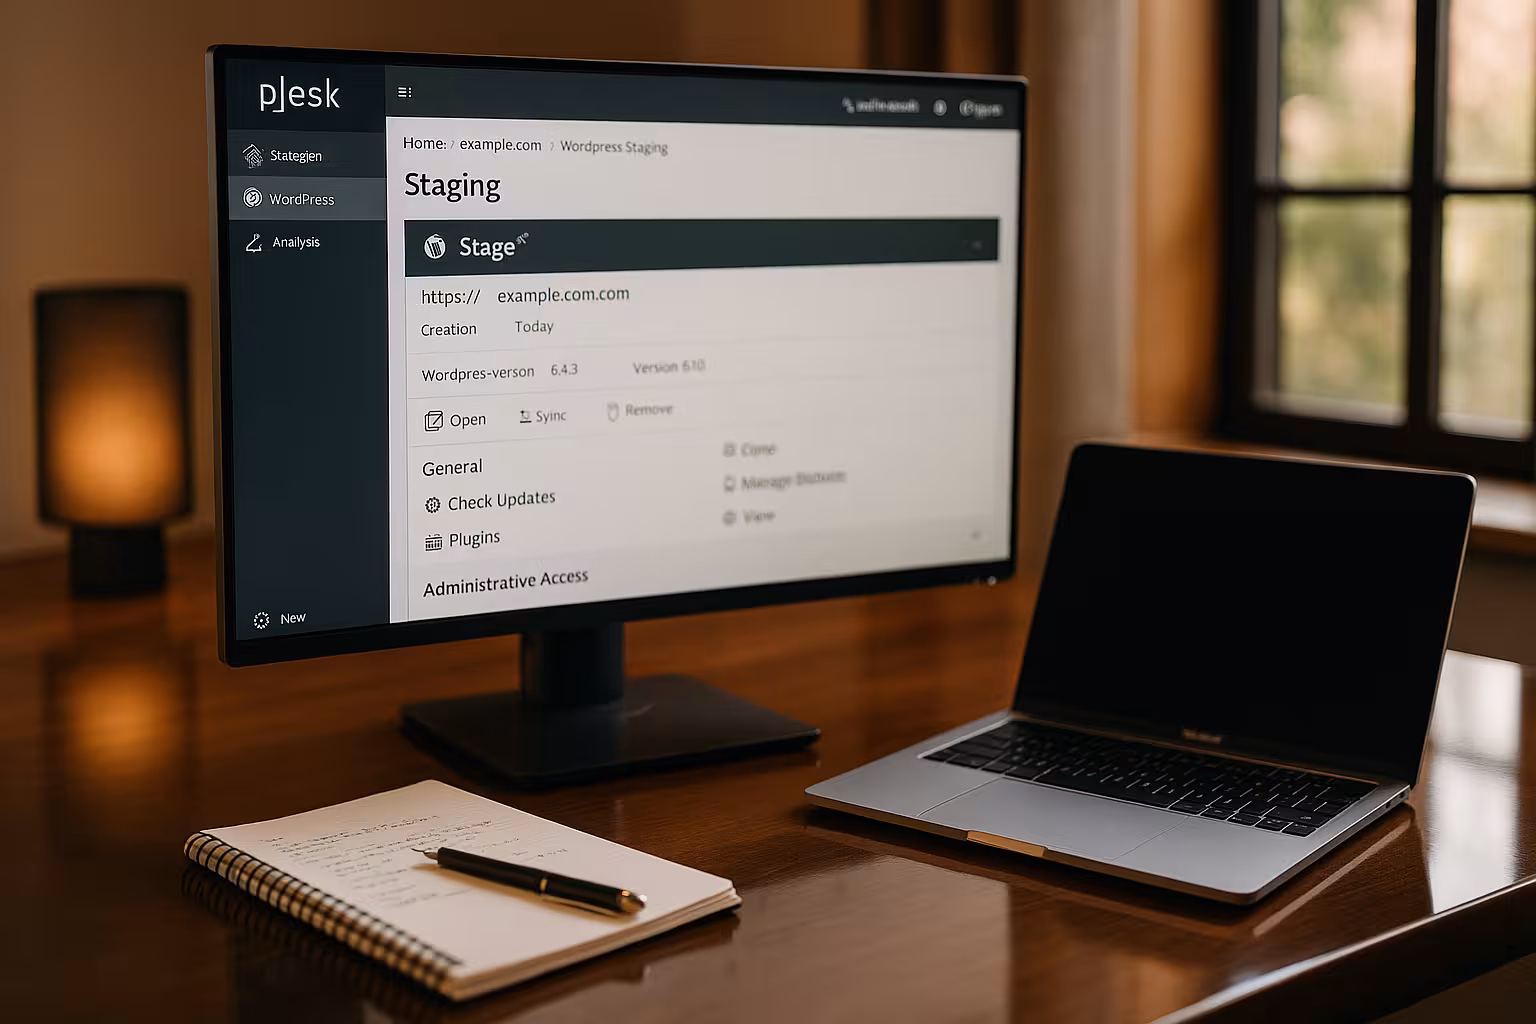
Plesk streamlines the process of creating a new environment for testing purposes. Leveraging the integrated WordPress Toolkit, you can effortlessly clone your existing WordPress site with just a few clicks:
- Access your Plesk dashboard and navigate to either "Websites & Domains" or directly to the "WordPress Toolkit."
- Select the specific live WordPress installation you wish to clone and click on the "Clone" or "Staging" option.
- Proceed to automatically or manually create an appropriate subdomain for your staging site, such as
staging.yourdomain.com. - Initiate the cloning process. Plesk will then automatically copy all necessary files, the database, themes, and media content.
- Crucially, block search engine indexing for your staging site. This can be done via the WordPress Toolkit settings or within the WordPress settings under the "Reading" section.
Depending on the overall size and complexity of your website, the cloning process might take several minutes to complete. Upon successful completion, you will have a fully functional replica of your site, primed and ready for thorough testing. For multilingual websites or installations that utilize a large number of plugins, the process may indeed require a little more time. After the cloning is finalized, meticulously check to ensure that all content, menus, and functionalities are correctly accessible. Should you observe that certain plugins have not been copied, or if error messages appear, it is advisable to repeat the process or carefully review your file permissions.
It is equally vital to either exclude your staging site from search engine indexing or password-protect it immediately after cloning. This precaution prevents the appearance of duplicate content in search results, which could negatively impact your SEO ranking. If desired, you can also activate a distinct design or specific functionalities exclusively within the staging environment, allowing you to concentrate on particular development areas without affecting your live site's appearance or performance.
Seamlessly Publishing Changes: The "Push to Live" Feature
Once your testing phase is successfully completed, you can confidently transfer the newly tested functions and updates directly to your live website. The WordPress Toolkit offers a robust "Push to Live" feature, which allows you to selectively update only files, only the database, or both, depending on the nature of your changes.
A key security aspect of Plesk's "Push to Live" functionality is the ability to set a restore point. This critical feature acts as a safety net: if any unforeseen issues arise during the deployment process, you can easily revert your website to its previous stable state. Following the live deployment, it is always recommended to perform a thorough check to ensure that image paths, internal links, and plugins have been transferred and are functioning correctly.
It is generally advisable to establish systematic testing scenarios. For instance, utilize the staging system as a secure foundation for theme updates, plugin updates, or transitioning to a newer PHP version. PHP updates, in particular, demand meticulous attention, as older themes or plugins can sometimes lead to compatibility conflicts.
Interestingly, the live deployment process can be executed in multiple stages. For example, you might choose to first update only the new code (files) and then meticulously verify that your theme is displayed visually without errors. The database can then be transferred in a subsequent step. This staged approach allows for quicker identification of the precise origin of any potential problems.
If you are accustomed to making frequent changes to your website, maintaining detailed documentation is a highly beneficial practice. This ensures that you always have a clear record of the steps you have tested and the sequence in which they were applied. In the event of unexpected errors, this documentation will prove invaluable for efficient troubleshooting and resolution.

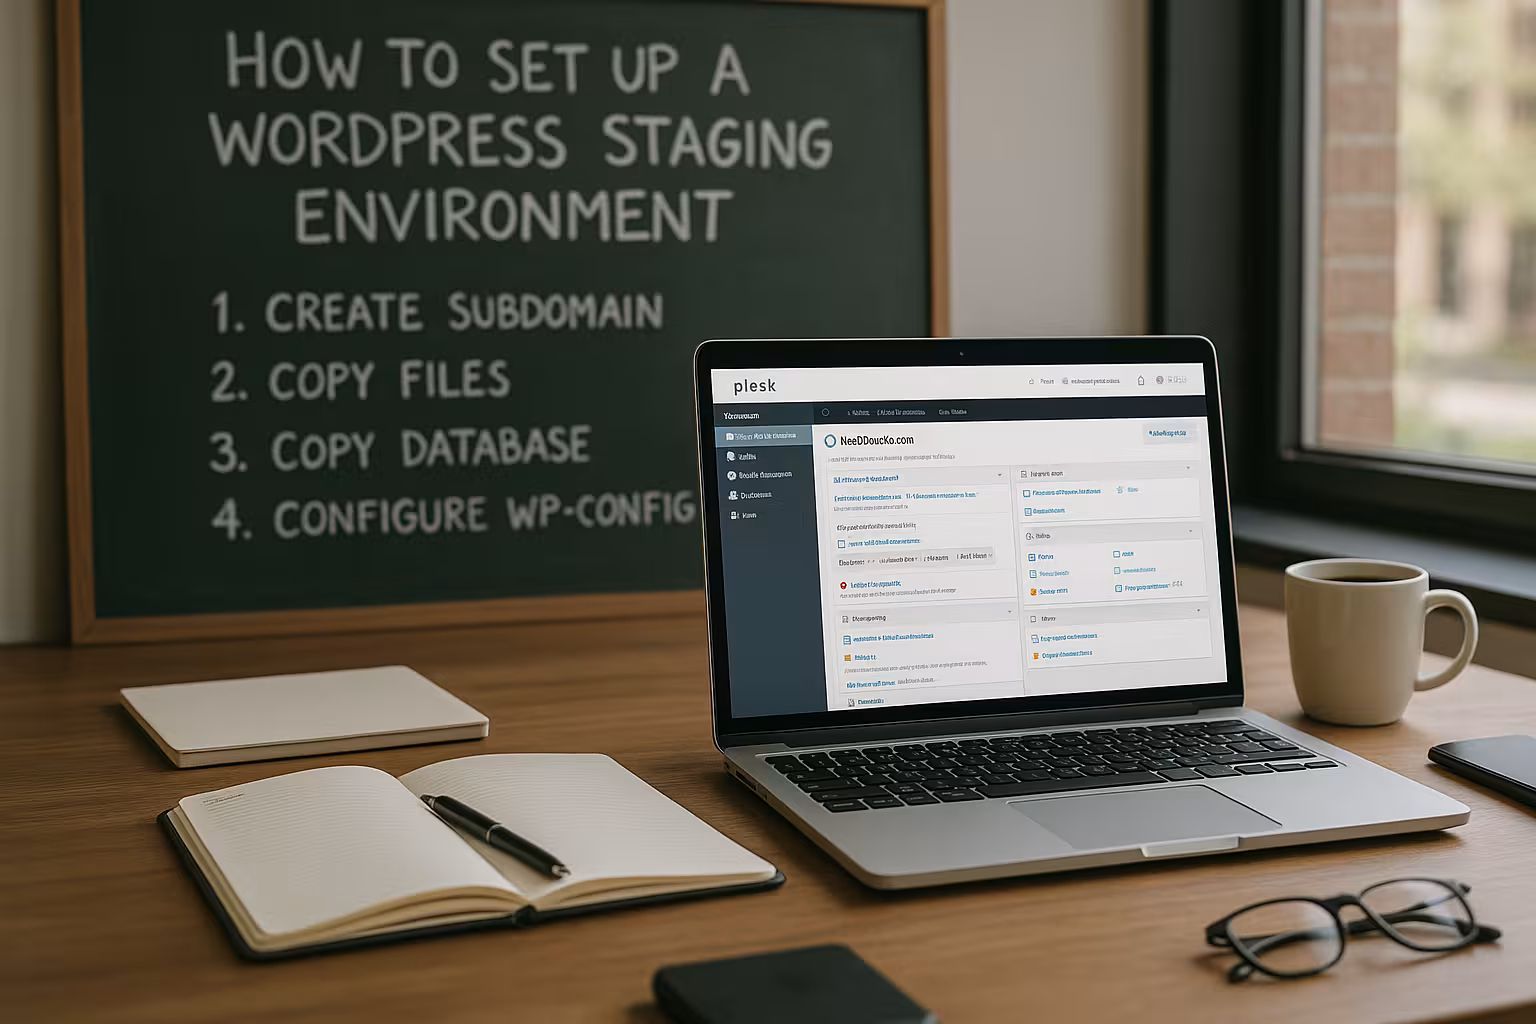
Implementing Manual WordPress Staging within Plesk
Should the WordPress Toolkit not be available or if you require a more granular level of control, you can still establish a staging environment manually. While this method demands a slightly greater effort, it offers reliable results and full customization:
Begin by using your Plesk dashboard to create a new, dedicated subdomain, such as staging.yourdomain.com. Next, copy the entire content from your "httpdocs" directory to this newly created directory using the file manager. Then, clone your WordPress database and meticulously update the wp-config.php file with the new database access credentials corresponding to your cloned database.
After completing these steps, open your staging page in a web browser and thoroughly verify that all elements load correctly. Crucially, ensure that all paths and URLs now point exclusively to the subdomain and that there is no active connection or redirection to your live system. If applicable, consider temporarily deactivating caching plugins on your staging site to minimize any potential interference with your testing.
Manual staging is particularly well-suited for users who desire comprehensive control over every step of the process or whose hosting package does not natively support the toolkit. However, it's important to note that with this method, you bear the full responsibility for accurately copying database tables and correctly updating all relevant paths. A helpful tip: utilize a search and replace tool to automatically adapt the URLs within your database to reflect your staging environment. This significantly reduces the likelihood of typographical errors or overlooked URLs.
It is highly recommended to create a complete backup of your live system before embarking on a manual staging process. This precaution is vital: if you inadvertently make changes to your live database, you can swiftly restore the original, stable state. Additionally, you can leverage different versions of the wp-config.php file to activate distinct debug modes for your staging and live environments, allowing for more targeted error identification during development.
Best Practices for an Effective Staging Workflow
To maintain a truly professional and efficient staging environment, adhering to some fundamental best practices is essential. These guidelines will help you conserve resources, mitigate potential sources of error, and streamline your development process:
| Recommended Measure | Rationale for Implementation |
|---|---|
| Activate maintenance mode only when required | Ensures live content remains consistently available while staging can be safely synchronized. |
| Deactivate cache plugins on staging | Prevents incorrect displays or inaccurate test results due to cached content. |
| Create a comprehensive backup before each "Push to Live" | Enables rapid recovery and restoration in the unlikely event of deployment issues. |
| Configure staging to prevent outgoing emails | Avoids sending test or customer data inadvertently from the development environment. |
| Regularly delete or clean up old staging projects | Removes outdated or "contaminated" test sites and optimizes memory usage. |
Beyond these crucial measures, establishing a clear and organized project structure is highly beneficial. New plugins, themes, or custom scripts are frequently tested within staging environments. To maintain optimal oversight, it is advisable to label these components clearly or organize them into dedicated folders. Regular reviews of your staging setup allow you to identify and remove unused components, which in turn contributes to the overall performance and efficiency of your system.
Effective communication within your team also plays a pivotal role in a successful staging workflow. If you are collaborating with developers, designers, or content editors, a clear allocation of roles and responsibilities is incredibly helpful. Defined workflows and coordinated test plans facilitate quicker release cycles for changes. Depending on your project's specific needs, you can also restrict access for certain individuals or grant specific permissions, thereby reducing the risk of unintended modifications to the staging environment.
Common Problems and Effective Solutions in Staging
A frequently encountered issue during staging setup is that the newly created subdomain is not found or accessible. In such instances, the first step should be to meticulously check your DNS settings. If you are utilizing external services like Cloudflare, it is imperative to ensure that the subdomain has also been correctly configured and propagated within their system. Allow a few minutes for DNS changes to take effect, or locally clear your DNS cache if necessary.
Lengthy cloning processes are particularly common with large-scale websites, such as extensive WooCommerce stores. In these situations, allow Plesk to work in the background without refreshing the view unnecessarily. Once complete, thoroughly confirm that all content is present and accounted for. It is critical to verify that all links and image paths have been transferred correctly; dedicate specific attention to this check.
Another common challenge involves error messages related to outdated plugins. Occasionally, specific plugins may not be compatible with a newer PHP version, or legacy data within the database can cause conflicts during the cloning process. In such cases, it is advisable to update the plugins individually or temporarily deactivate them before initiating the cloning procedure. This approach helps minimize potential sources of error. You can then test in the staging environment whether the plugin can be successfully installed and activated.
If you opt for the manual staging method, it is possible that crucial tables within the database might not be copied accurately. This can manifest as missing images or non-functional features. A precise examination of the wp-options table and other relevant database tables can help pinpoint such errors. For in-depth logging and analysis, it is sometimes beneficial to activate WordPress debug mode. This allows error messages to be displayed directly during testing, providing valuable insights for troubleshooting.
Choosing the Right Hosting Provider for WordPress Staging
The reliability and performance of your hosting provider significantly influence the functionality and speed of your staging environment. Systems built on Plesk often offer a distinct advantage in this regard due to their integrated tools and optimized configurations. When selecting a provider, it is crucial to consider factors that support seamless staging.
Beyond the fundamental technical specifications, it is highly beneficial to closely examine aspects such as database performance, server location, and additional value-added services like daily automated backups or complimentary SSL certificates. Many reputable hosting providers now offer a range of optional plans that allow for booking increased RAM or higher CPU performance. For rapidly expanding websites or e-commerce stores, it is often a wise investment to allocate slightly more performance from the outset, ensuring that both your live and staging sites operate without lag or interruption.
While performance undoubtedly plays a pivotal role, the quality of customer support should never be underestimated. Competent, responsive assistance can make a significant difference, especially when navigating the complexities of setting up and troubleshooting a staging system. Investigate how quickly and thoroughly a potential host responds to inquiries. Direct support channels, such as live chat or telephone assistance, and personalized guidance can be invaluable when dealing with intricate staging-related challenges.
Conclusion: The Value of a WordPress Staging Environment
A meticulously configured WordPress staging environment empowers you with enhanced security, greater flexibility, and superior control over all website modifications. With Plesk and its powerful WordPress Toolkit, implementing such an environment takes mere minutes, even for users without extensive prior technical knowledge. This robust setup ensures that any errors can be identified and rectified in a controlled manner well before they ever reach your live audience.
The staging functionality remains an indispensable asset for any professional web project aiming for stability and continuous improvement. When coupled with a thoughtfully chosen hosting package, it can significantly save you time, optimize memory usage, and reduce overall effort. Begin today to elevate your WordPress development and deployment processes to an advanced level. Especially in an era of continuous updates, evolving security standards, and rapid design trends, a dependable staging system provides a significant competitive advantage. You not only gain full control over your website but also acquire the confidence to handle any changes with complete assurance.
Thanks to its clear and efficient workflow—comprising cloning, testing, and pushing to live—you will conserve valuable resources in the long term and substantially minimize the risk of unnecessary downtime. Your development team will also appreciate the ability to experiment with new ideas and features without jeopardizing the integrity or performance of your live website. All in all, a professional, seamless, and secure website performance is well within reach.
