
 (1).svg)
 (1).png)


 (1).svg)
.svg)
Email spam is a pervasive issue, leading to cluttered inboxes, reduced productivity, and potential security vulnerabilities. Unwanted messages not only consume valuable time but can also harbor malicious content. Thankfully, Plesk offers a comprehensive suite of tools designed to effectively manage and filter these unsolicited communications. This guide is crafted to provide you with a clear, step-by-step walkthrough on how to activate and meticulously configure spam protection for your email accounts directly within the Plesk control panel, thereby ensuring a significantly cleaner, more organized, and ultimately more secure email environment.
Enabling Spam Protection in Plesk: A Step-by-Step Guide
To activate robust spam prevention for your email accounts within Plesk, carefully follow these detailed instructions, which cover each stage of the setup process:
Log in to your Plesk account. Begin by securely logging into your Plesk control panel using your administrative credentials. This will grant you access to all server management features necessary for configuring email settings.
Navigate to the "Mail" section. Once logged in, locate the left-hand sidebar menu and click on the "Mail" option. This section is specifically dedicated to managing all email-related configurations for your domains and associated accounts.

Select the specific email address. From the comprehensive list of email accounts displayed, choose the particular email address for which you intend to enable or configure spam protection. Remember that each individual email address can have its own distinct spam filter settings.
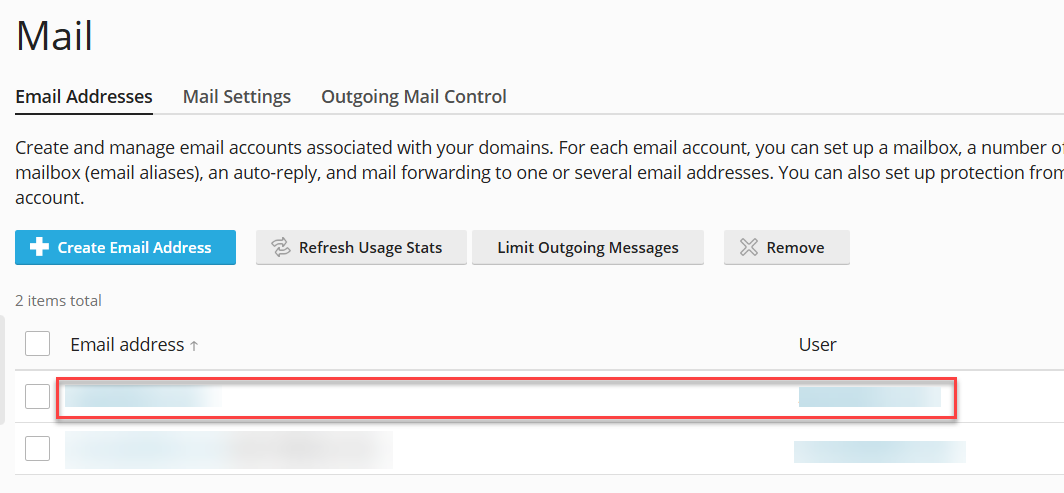
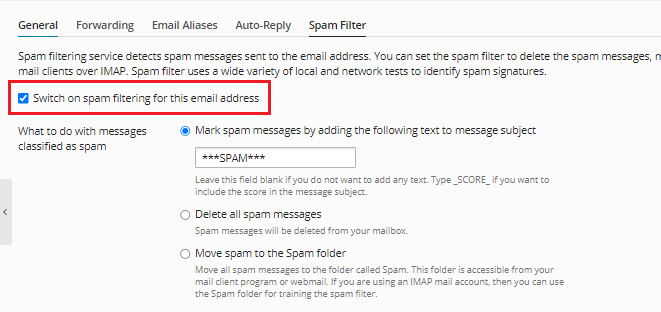
Access the "Spam Filter" settings. After selecting the desired email address, proceed to click on the "Spam Filter" tab or the corresponding option prominently displayed within the interface. This action will open the dedicated configuration interface for spam management and filtering.
Activate spam filtering. To enable the core spam protection functionality, locate and check the box explicitly labeled "Switch on spam filtering for this email address." This crucial action initiates the spam detection and processing mechanisms for all incoming emails to that specific account.
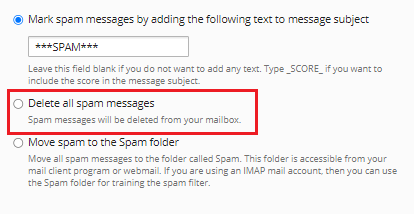
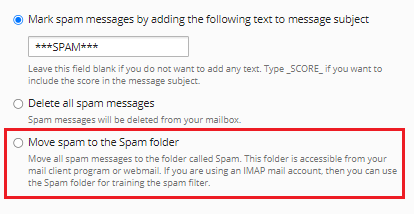
Choose your preferred spam handling option. In this crucial section, you can define precisely how Plesk should react and manage messages that it identifies as spam. Several distinct options are available, allowing you to tailor the system to your personal preferences for inbox management and security.
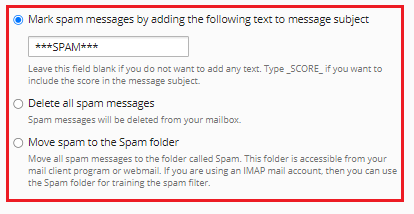
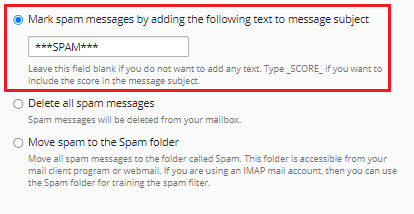
Mark spam messages by subject line. Selecting this option instructs Plesk to append a predefined phrase or tag, such as "[SPAM]" or "***SPAM***", to the subject line of any email detected as spam. This method makes it incredibly easy to visually identify and sort unwanted messages directly within your email client, allowing for quick action.
Automatically delete all spam communications. For users who prefer a completely clutter-free inbox and wish to minimize interaction with unwanted emails, choosing this option will instruct Plesk to automatically and permanently delete all identified spam messages upon detection, preventing them from ever reaching your mailbox.
Move spam emails to a dedicated folder. A widely used and highly recommended option, this setting directs all detected spam to a specially designated "Junk" or "Spam" folder within your email account. This allows you the opportunity to periodically review the contents before making a decision on permanent deletion, thereby minimizing the risk of losing legitimate emails mistakenly flagged as spam.
Configuring Advanced Spam Filter Settings
For those seeking even greater precision and control over their spam protection mechanisms, expanding the "Advanced Settings" menu offers a robust set of options. Within this section, administrators can meticulously fine-tune various parameters to significantly optimize the performance and accuracy of their spam filter, adapting it to specific requirements and refining its effectiveness against evolving spam tactics.
Adjust spam filter sensitivity. The "Spam filter sensitivity" field is crucial for balancing detection aggressiveness with the need to avoid false positives. You can input a numerical value, with the typical default being seven. It is vital to understand that a lower numerical value will heighten the filter's sensitivity, resulting in a more aggressive identification of potential spam. Conversely, a higher numerical value will reduce sensitivity, potentially allowing more marginal messages through.
Manage the whitelist. The whitelist serves as an "always allow" list, acting as an exception to the general spam filtering rules. Here, you can specify individual email addresses or entire email domains that you explicitly trust and from which you always wish to receive mail. Emails originating from any entry on this whitelist will bypass all spam filtering processes, guaranteeing their direct delivery to your inbox.
Utilize the blacklist. In contrast to the whitelist, the blacklist acts as an "always block" list, designed to prevent unwanted communications. This powerful feature empowers you to designate specific email addresses or even entire domain names that are known sources of unsolicited or malicious content. Any mail detected as originating from these blacklisted sources will be automatically rejected or prominently marked as spam, effectively preventing their intrusion into your secure environment.
Define trusted languages and locales. This advanced option allows you to specify particular languages and geographical locations that you consider trustworthy for your communications. Emails predominantly written in these designated languages or those originating from the specified locales will be automatically allowed to pass through the filter, significantly reducing the likelihood of legitimate, geographically relevant communications being incorrectly flagged as spam.
Allow specific IP addresses. In scenarios where you need to guarantee the delivery of emails from particular trusted sources, such as critical business partners, internal servers, or essential online services, you can enter their specific IP addresses into the designated textbox. This is an invaluable feature for ensuring that critical communications from these reliable sources are never mistakenly blocked by the spam filter, maintaining uninterrupted flow.
After carefully configuring all your preferred settings for spam protection, remember to click the "OK" button to apply and save your changes. Upon successful application, a confirmation message will typically be displayed, reassuring you that spam protection has been effectively enabled and meticulously configured for your chosen email address.
The implementation of these robust spam protection measures within Plesk is a pivotal step towards significantly enhancing your overall email security posture. It not only safeguards your inbox from the constant influx of unsolicited messages but also contributes to maintaining a clean, highly organized, and efficient communication environment. By proactively managing spam, you reclaim control over your digital correspondence and minimize exposure to potential online threats, fostering a more secure and productive email experience.
